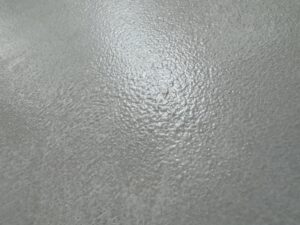
It was a moment of pure panic. I stood in my kitchen, staring at the bumpy, rough painted granite countertops, and a single thought screamed through my mind: “What have I done?” My husband was furious, and I was convinced I had just made a five thousand-dollar mistake. This wasn’t how my budget-friendly kitchen makeover was supposed to go.
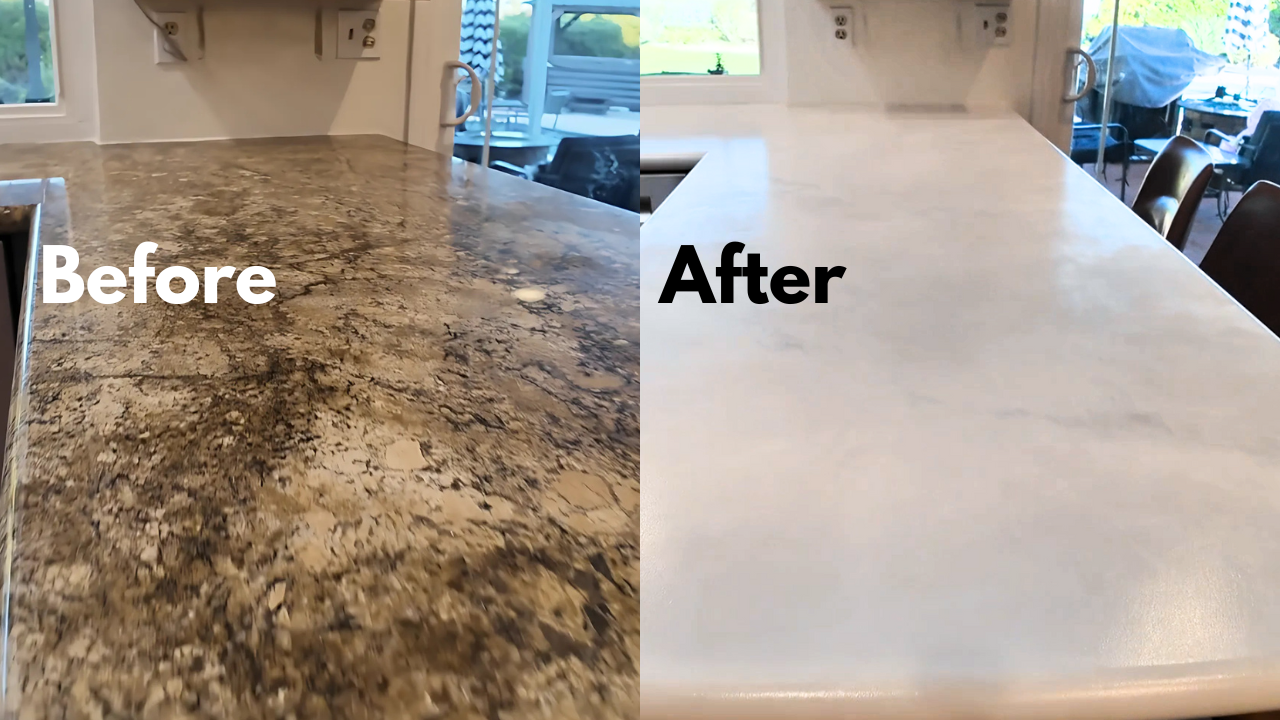
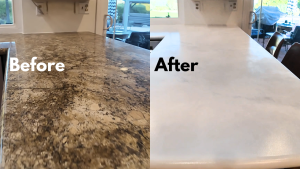
This is the story of how I transformed my dated, brown granite countertops into a beautiful faux marble finish for under $300. But it’s also a story of a DIY project gone wrong, a masterclass in what not to do, and a testament to the power of perseverance. If you’ve ever dreamed of updating your kitchen on a budget, but are terrified of the potential disasters, then this is the post for you.
In this tutorial, I’ll walk you through the entire process of Painting Your Kitchen Cabinets, from the initial prep work to the final, stunning reveal. And, most importantly, I’ll share the critical mistakes I made so you can avoid them. Ready to learn how to paint your kitchen countertops like a pro (and what to do when it all goes wrong)? Let’s dive in.
The Dream: A Faux Marble Makeover on a Budget
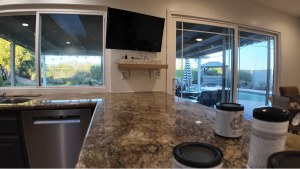
Like many of you, I was tired of my dated, ugly granite kitchen countertops. The busy, brown granite clashed with the gray cabinets I had recently painted, and it just wasn’t the modern, luxurious look I was dreaming of. Replacing them would have cost thousands, so I decided to take a leap of faith and paint them. I had seen amazing results with Heirloom Traditions All-In-One Paint on my cabinets, so I decided to use their countertop painting kit for this project.
For a visual guide, check out my full-length YouTube video series (Part1 and Part 2), where I walk you through every step:
Watch: How to Paint Kitchen Countertops – Part 1
How to Paint Kitchen Countertops – Part 2
What You’ll Need: The Tools for Transformation
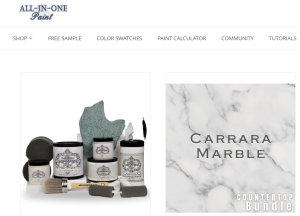
To achieve this faux marble look, I used the following products from Heirloom Traditions:
•Deglosser Wipes: To clean and prep the surface.
•Coliseum White Paint: For the base coats.
•Cobblestone and Antiquing Gel: To create the marble veins.
•White Wash Antiquing Gel: To add depth and realism.
•Water-Resistant Sealer: To protect the final finish.
•Brushes and Rollers: Specifically designed for a smooth finish.
All of these items came in a convenient countertop painting kit, which I highly recommend. You’ll also need painter’s tape, drop cloths, and a bit of patience!
The Step-by-Step Guide to Painting Your Countertops
Here’s the process I followed to paint my countertops.
Step 1: Surface Preparation – The Key to a Lasting Finish
The most crucial step in this entire process is the prep work. You need to start with a perfectly clean and smooth surface. I used the Heirloom Traditions deglosser wipes to remove years of grease, grime, and oil. These wipes also help to dull the glossy finish of the granite, allowing the paint to adhere better. After wiping everything down, I dried the countertops with a clean towel.
Step 2: Taping – Protecting Your Kitchen
Next, I taped off everything I didn’t want to get paint on – the backsplash, the sink, and the cabinets. A key tip here is to remove the tape immediately after each coat of paint to prevent the paint from seeping underneath.
Step 3: The First Coat – Trust the Process
Now for the scary part: the first coat of paint. I used the “brush and roll” technique recommended by Heirloom Traditions. You brush the paint on and then immediately roll it out with a special roller to eliminate brush marks. The first coat will look splotchy and uneven, especially on a dark countertop like mine. Don’t panic! This is your “dirty coat,” and it’s supposed to look a little rough.
Step 4: The Second Coat – Achieving Full Coverage
After the first coat was dry to the touch (about an hour), I applied the second coat. This is where the magic starts to happen. The second coat provides much better coverage and creates a smooth, even finish. I was amazed at how little paint I used – a third of a can was enough for my entire kitchen.
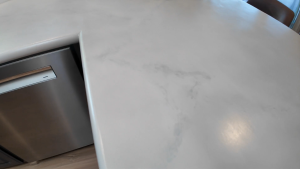
Step 5: Creating the Faux Marble Veining
With the white base coats complete, it was time to create the faux marble veins. I mixed two parts of the Cobblestone paint with one part of the antiquing gel. Then, using the “Faux Paw” stamper from Heirloom Traditions, I stamped the veining onto the countertops. I looked at pictures of real marble to get inspiration for the pattern, creating a mix of diagonal lines, Y-formations, and random patterns for a more realistic look.
Step 6: The Whitewash – Adding Depth and Realism
To make the veins look like they are part of the stone, I applied a whitewash over the entire surface. This is a very forgiving step. You simply brush on the whitewash antiquing gel and then wipe it off with a cloth or use a sponge to create a soft, layered effect. This “sandwiches” the veining between the white base coats and the whitewash, giving it a beautiful, natural depth.
Step 7: Sealing for Durability – The Final Touch
After all the painting was done and I was happy with the look, I waited 48 hours before applying the water-resistant sealer. I applied three thin coats, waiting three hours between each coat. This is the final step to protect your new countertops and make them durable enough for everyday use.
My Countertop Catastrophe: What Went Wrong and How to Avoid It
Now for the drama. My project was far from perfect, and I made some major mistakes along the way.
My biggest mistake was not rolling out the paint immediately after applying it. This created a terrible texture on the surface that I had to spend hours sanding down. I also experienced “lap lines,” which are visible lines where one section of paint overlaps another. This happened because I wasn’t working quickly enough and keeping a wet edge.
To avoid these mistakes, make sure you:
•Work in small sections.
•Roll out the paint immediately after brushing it on.
•Keep a wet edge to prevent lap lines.
•Don’t be afraid to sand down imperfections and start over.
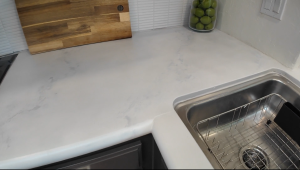
The Grand Reveal: Was It Worth It?
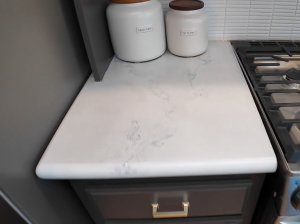
After a grueling two-week process of painting, sanding, and repainting, I finally have the countertops of my dreams. Are they perfect? No. But they are a massive improvement over the dated granite, and I’m incredibly proud of the result. The faux marble veining looks surprisingly realistic, and the overall effect is a much brighter, more modern kitchen.
FAQ: Your Countertop Painting Questions Answered
How long does it take to paint countertops? This is not a weekend project. With the drying times between coats and the final curing time, expect it to take at least a week, and possibly longer if you make mistakes like I did.
How durable are painted countertops? With the proper sealer, painted countertops can be quite durable. However, you should avoid using abrasive cleaners and always use a cutting board.
Is this a beginner-friendly DIY project? I would say this is a more advanced DIY project. It requires a lot of patience and attention to detail. If you’re new to DIY, I would recommend practicing on a smaller surface, like a bathroom vanity, before tackling your entire kitchen.
Conclusion

Painting my kitchen countertops was one of the most challenging and rewarding DIY projects I’ve ever attempted. It was a rollercoaster of emotions, from the initial excitement to the depths of despair when I thought I had ruined my kitchen. But in the end, I’m thrilled with the results. If you’re looking for a budget-friendly way to transform your kitchen, I highly recommend giving it a try – just make sure you learn from my mistakes!
Have you ever attempted a DIY project that went horribly wrong? Share your story in the comments below! And don’t forget to subscribe to my YouTube channel for more DIY tips and home renovation projects.
Don’t forget to check out the full video tutorial here: