When you go up your staircase every day, does it annoy the heck out of you how old and dated they look? Not sure if you are ready to tackle a staircase makeover yourself?
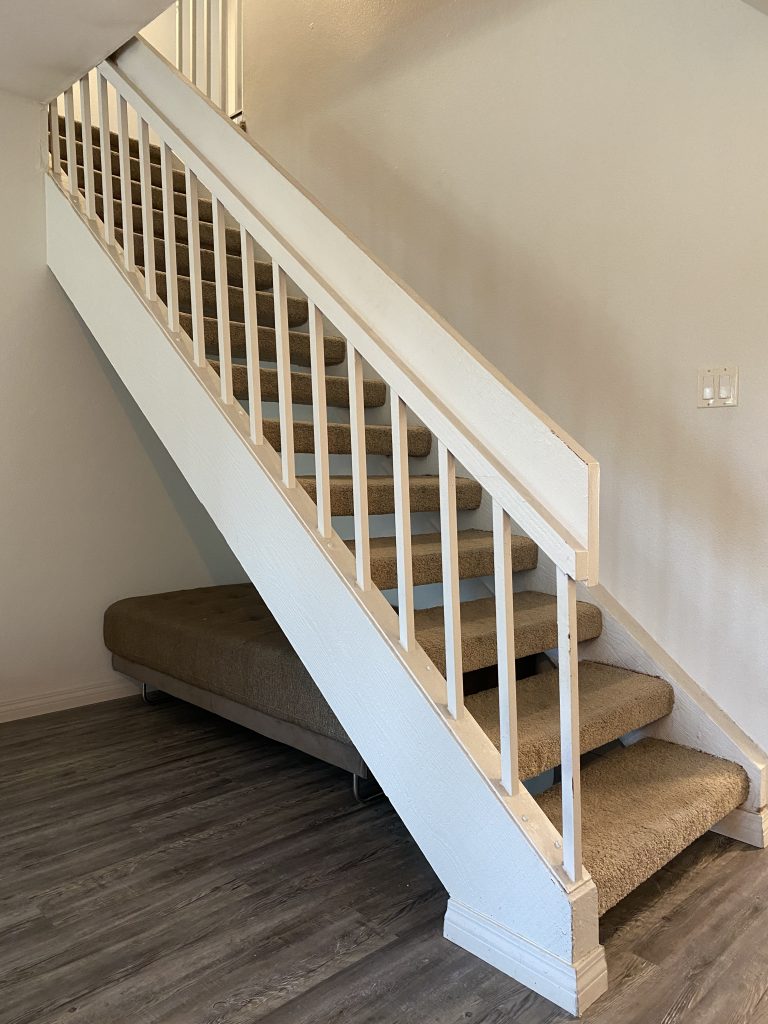
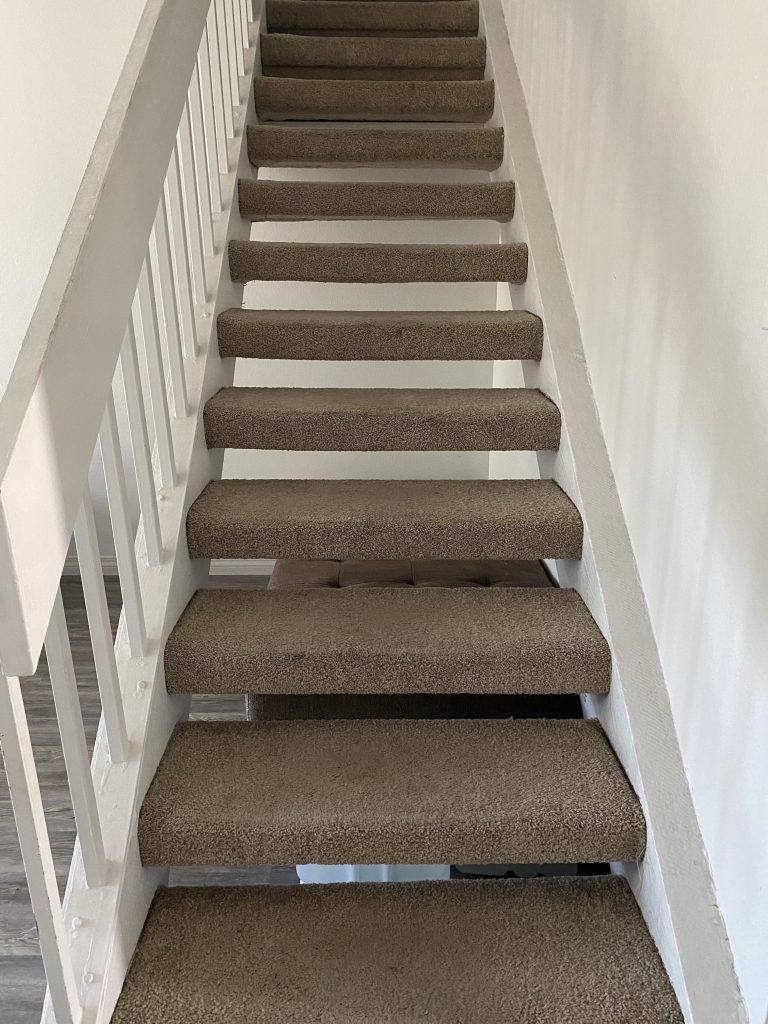
Do you have ugly carpeted stairs, and want something more modern and sleek?
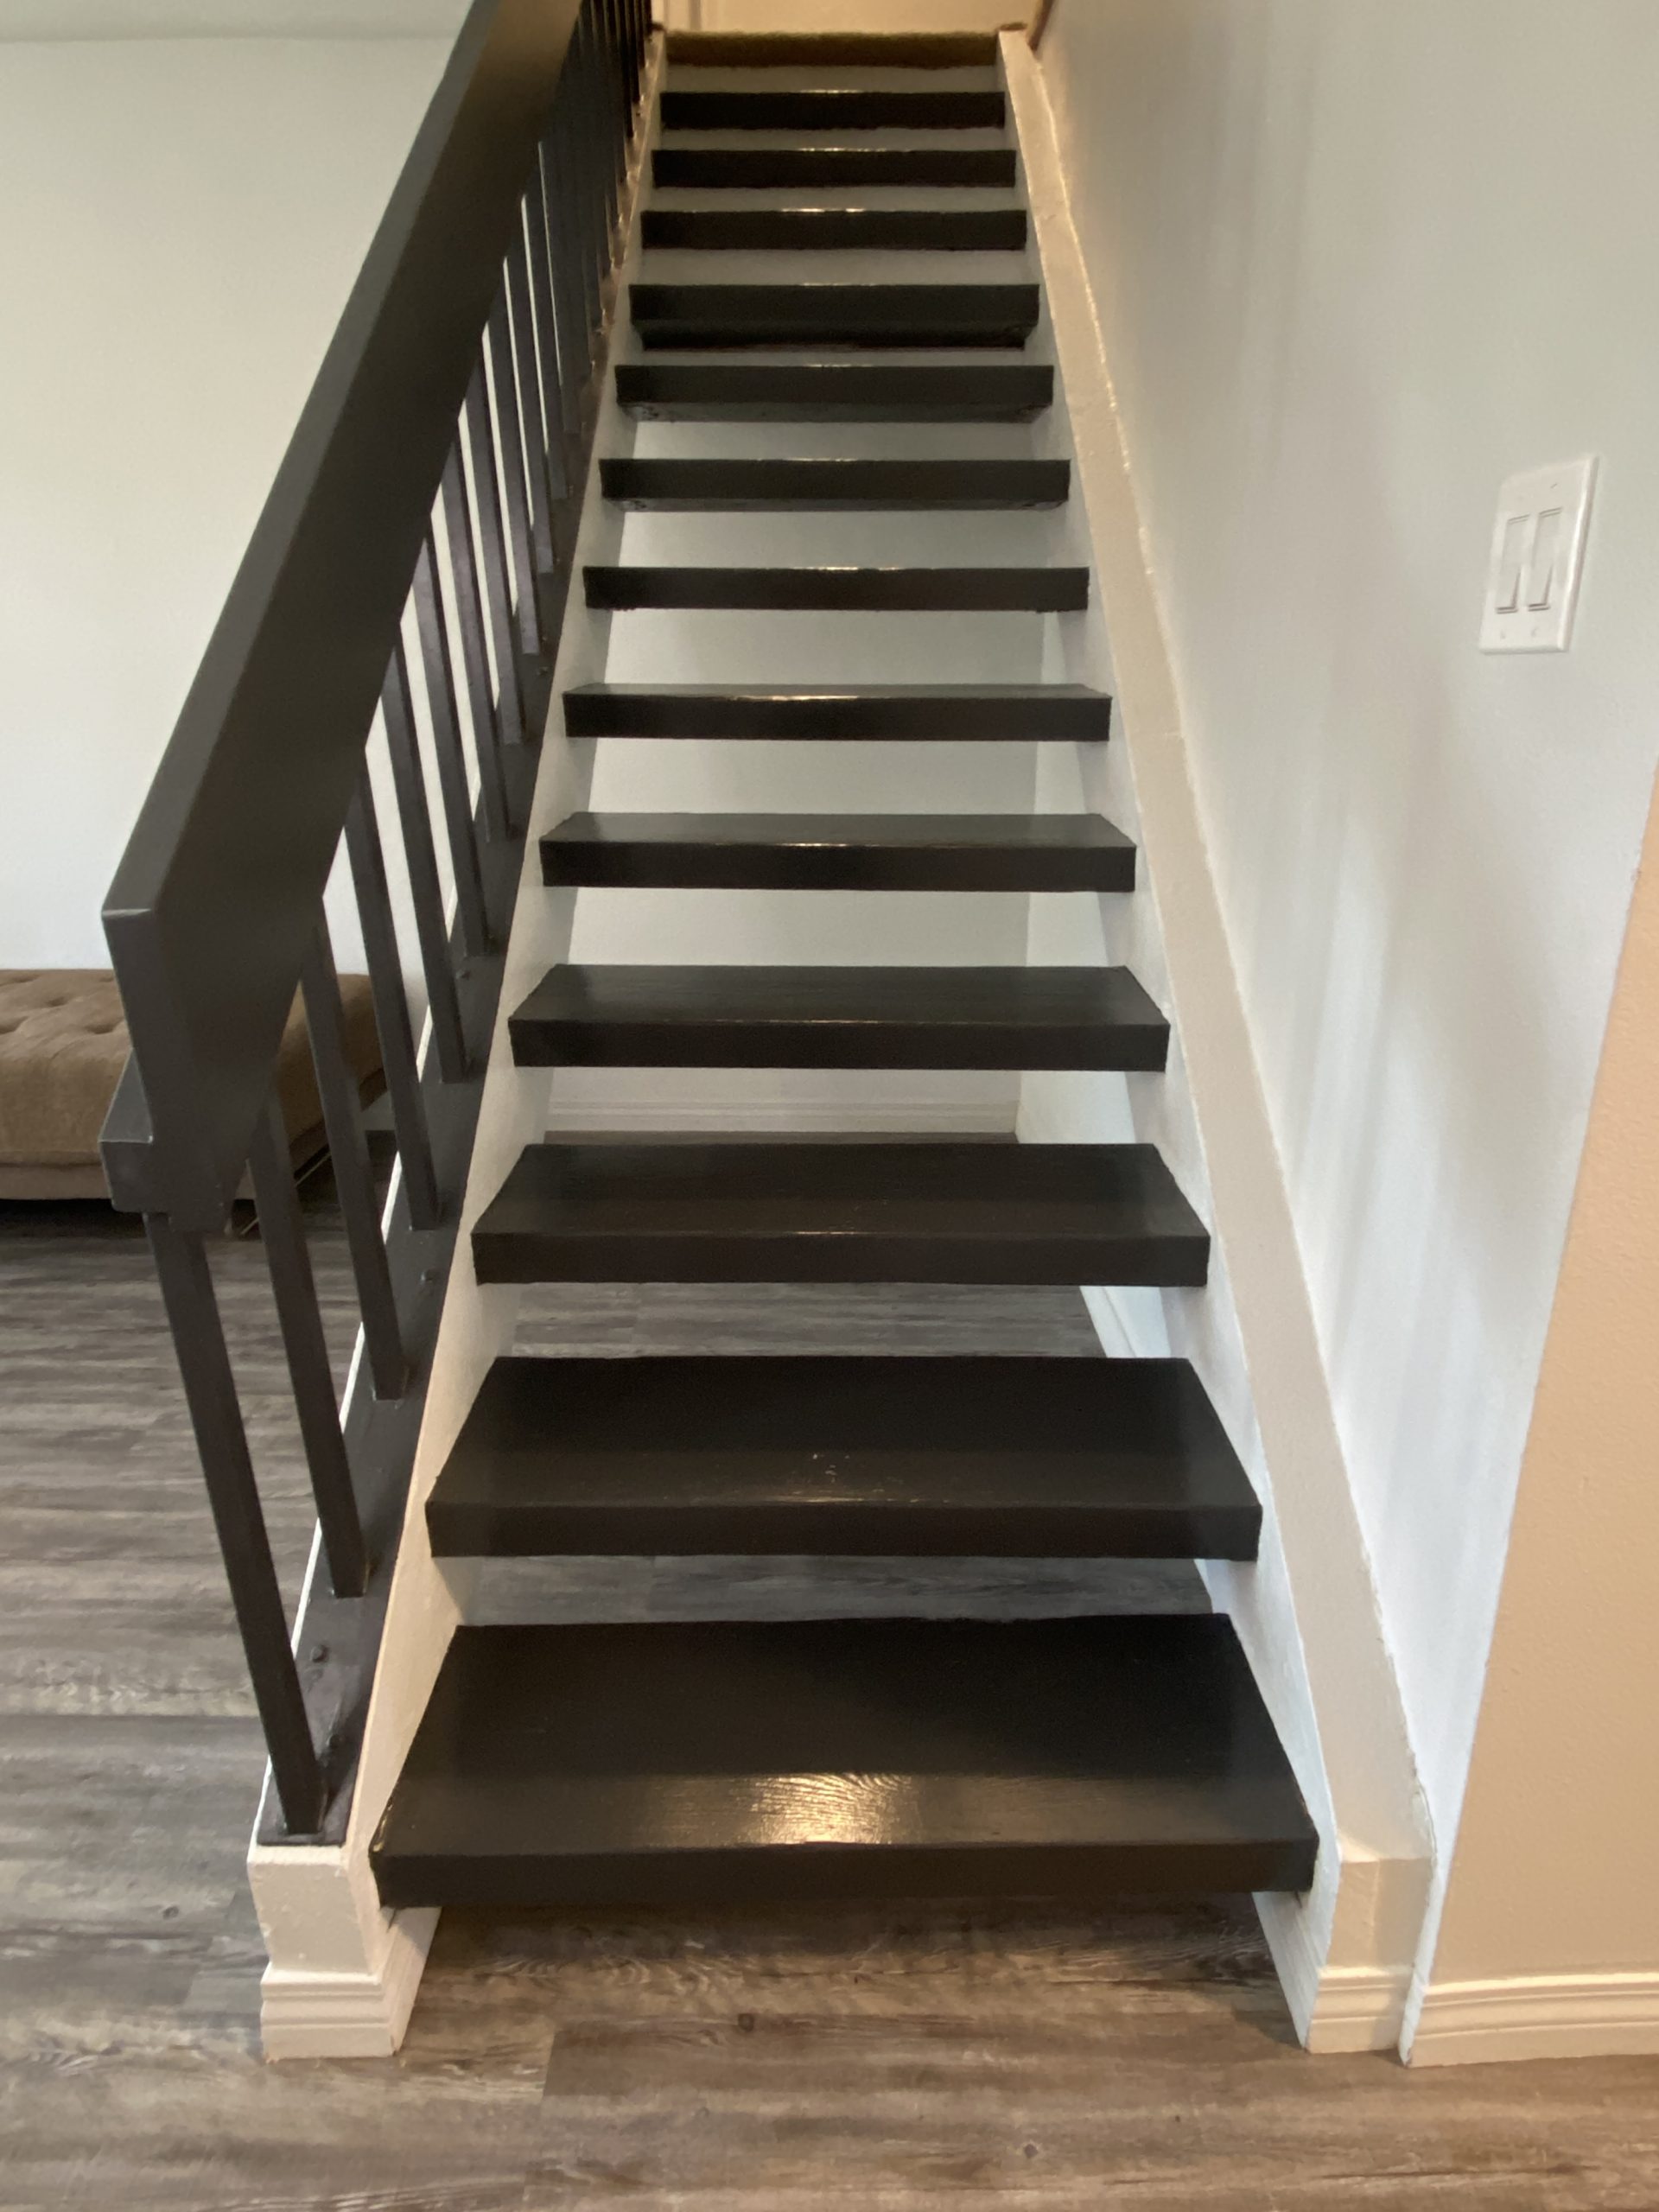
This is the post for you. I’ll show you step-by-step how we did our recent DIY staircase makeover. We transformed our 1970’s floating stairs from dated icky beige carpet to sleek and modern black wood steps – mainly using the magic of paint.

Just about anyone can do a DIY staircase makeover. All you need is a little willpower and be willing to put in some elbow grease.
This is a pretty big project if your stairs are like ours, and you use them 20 times a day. However, using this method to go from carpet to wood is far cheaper than the many thousands a new stair railing or professionally refaced stairs will cost. So, let’s get started on this DIY staircase makeover adventure.
Disclosure: This post contains affiliate links. As an Amazon Associate I earn from qualifying purchases, at NO extra cost to you.
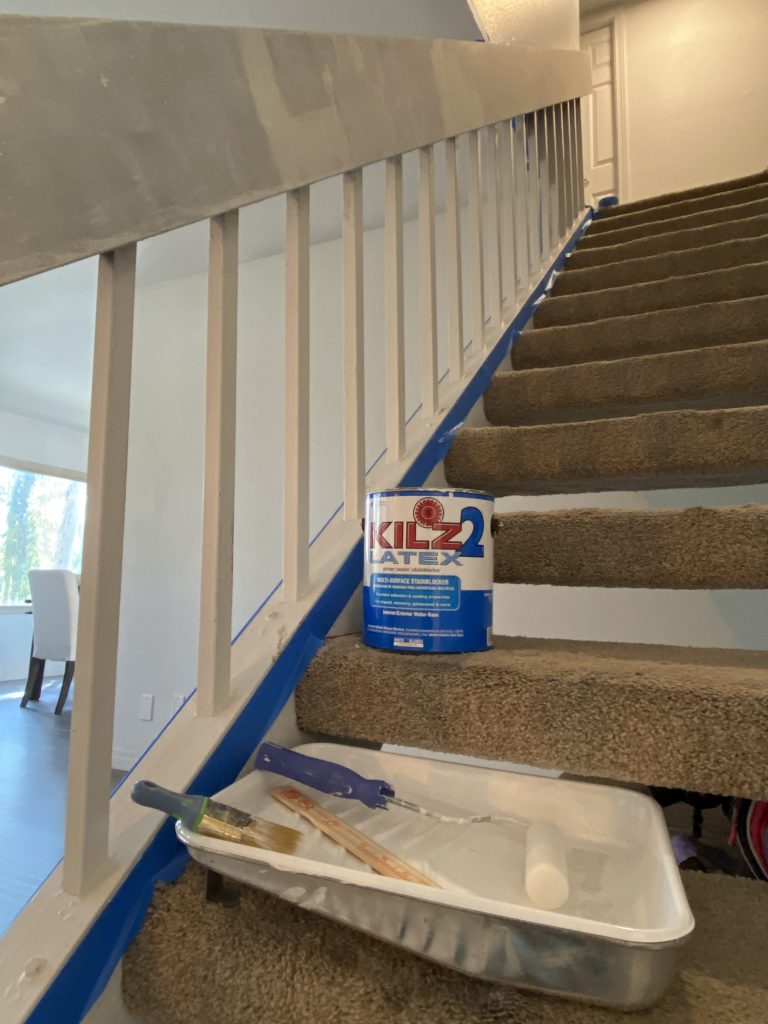
Step 1: Inspect your stairs
The first step in your staircase makeover, is you need to see what you are working with. We did this by peeling back the carpet from one of the stairs in a hidden spot. You want to see if you have cheap plywood or actual real wood under any carpet.
We were lucky and our floating stairs were one piece of solid wood. We decided to paint both the wood stairs and the railing the same color. For paint color, we chose Behr Cracked Pepper – a very dark grey/black color, to go with our grey luxury vinyl flooring.
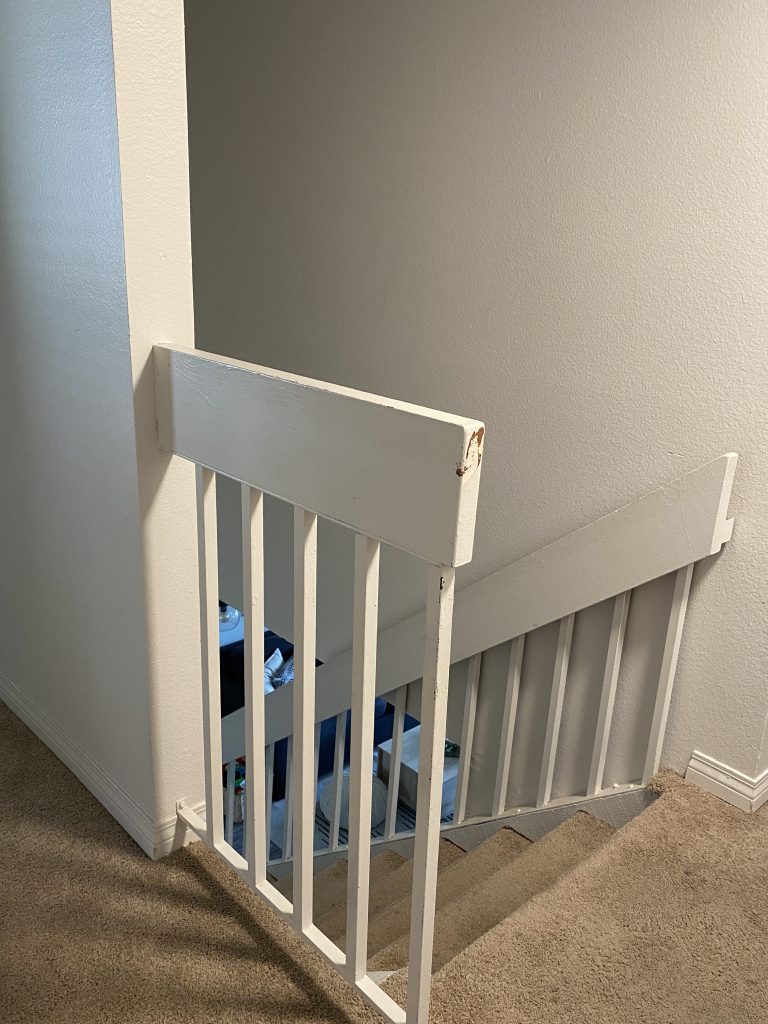
Step 2: Paint the railing first
Stair Railing Before 
Stair Railing After
We did our railings first. The thought was that if paint dripped onto the stairs I wouldn’t be upset since I had not worked on them yet.
Prep the railings
Remove old paint
Painting the railings would have been 500% faster had I not decided to strip the old paint from the wood banister (the part you put your hand on). I used Citristrip to peel off all the old paint.
There were around 5 or 7 layers of paint, so I had to apply it (letting it sit overnight with Saran Wrap around it) THREE times. I had to scrape the paint off with a putty knife each time. After all that, I used mineral spirits to get off all the residue.
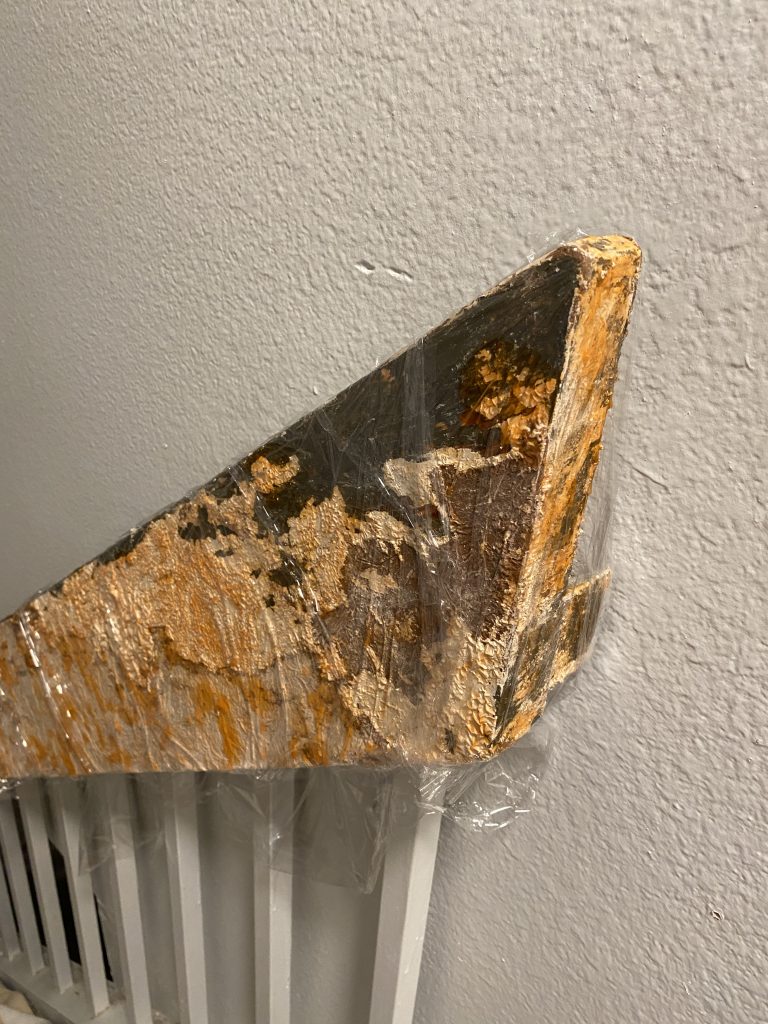
Since I was painting and not staining the railing, there really was not much need to remove the old paint for my DIY staircase makeover. It did make the final product much smoother and will be more durable though.
Fill in damage and sand
After removing the old paint, I lightly sanded (by hand) and filled in some gouges in the wood with wood putty.
Apply Primer to Railing
After sanding and removing all dust with a microfiber cloth, I applied Killz 2 Latex All Purpose Primer so the paint would stick and be durable.
Paint the Railing
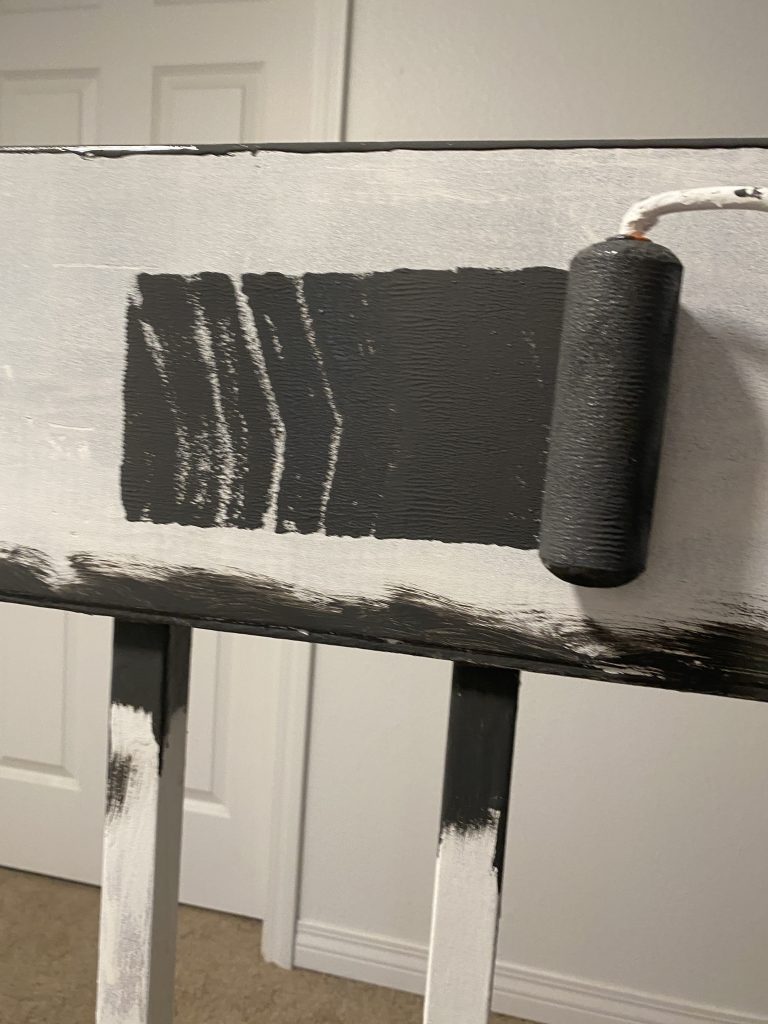
For painting the railing I used a quart of basic Behr latex paint in satin finish, and had it tinted Behr Cracked Pepper.
For my technique, I would paint the top and bottom with a brush, then use a small foam roller to paint the sides and “smooth out” the paintbrush lines on the top and bottom.
I did the same for the spindles – used a brush to apply the paint, but then smoothed it out with a once over from the foam roller.
Step 3: Remove carpet and prep stairs
Remove carpet and staples
OK – I’m going to be honest – removing carpeting, and in particular carpet staples STINKS. I removed hundreds, if not over 1000 tiny staples from our stairs. It was tedious. BUT so worth it for the final product.
My hubby ripped off the carpeting, but removing the staples was left to me. The best tools for the job are a staple puller and a pliers, plus safety goggles (for your eyes).
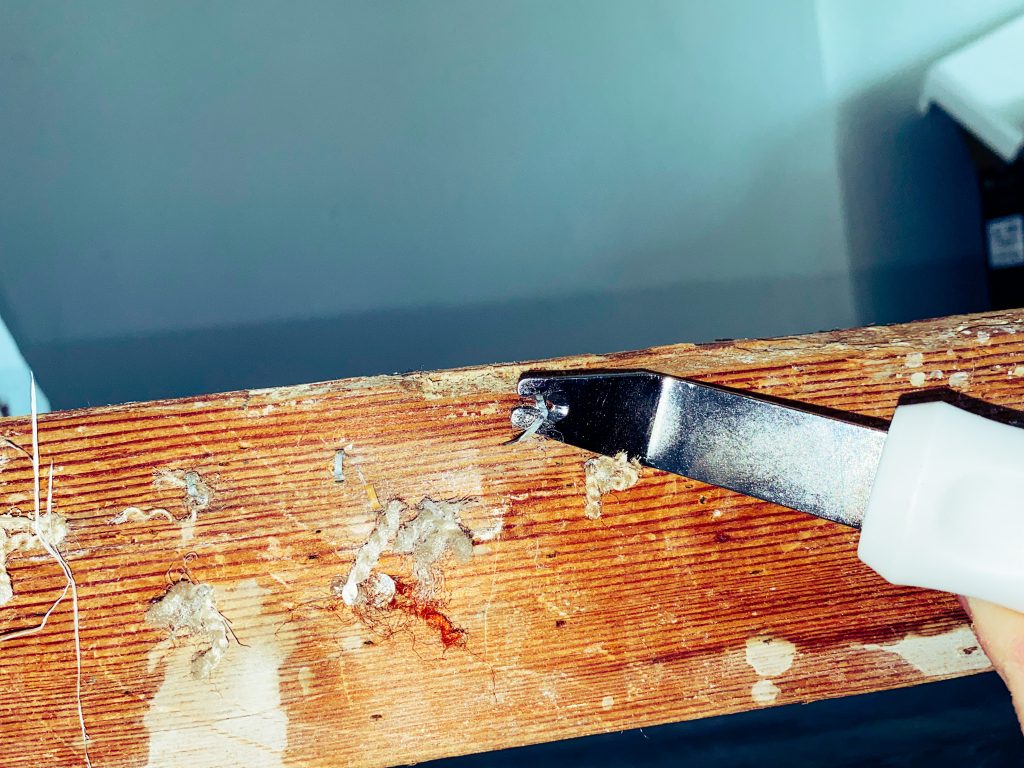
The BEST tool for removing carpet staples is the Arrow Staple Puller from Home Depot. Trust me, I literally tried every tool you could think of.
Here is a full photo and clickable link for this amazing tool:
![]()
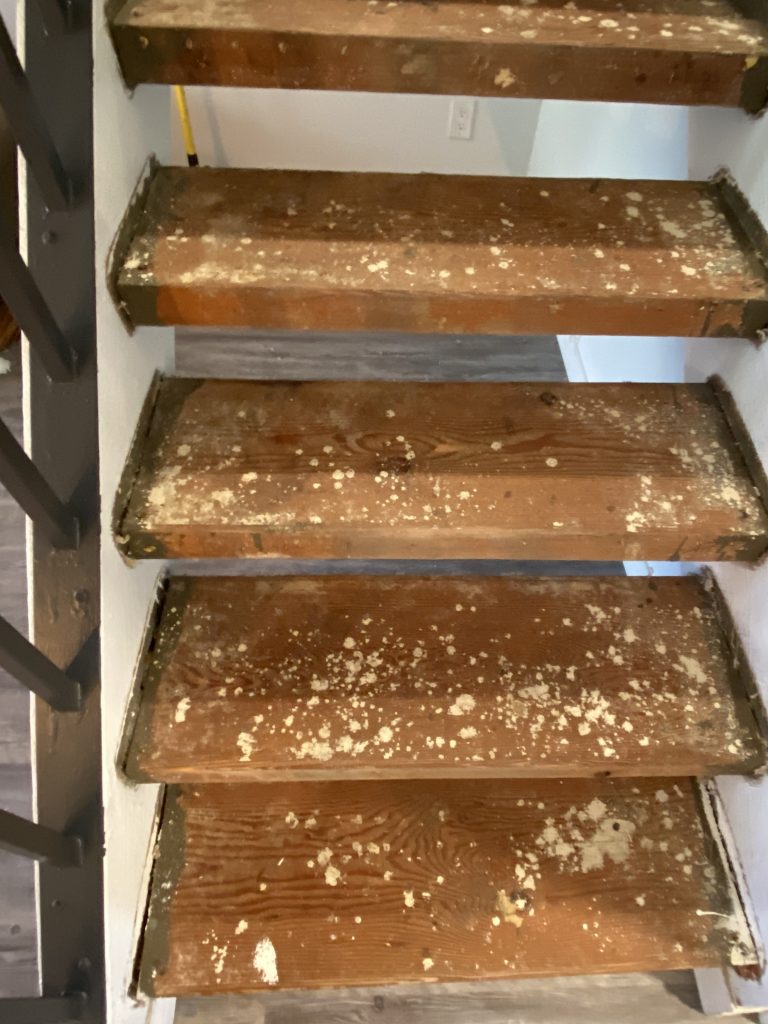
Repair any damage
It took over a week for me to pull all those dang staples. After that, it was time to make repairs. We fixed loose stairs, then filled in staple holes and gouges with putty.
To fix the loose stairs with gaps my hubby put in shims and countersink screws to secure our creaky stairs. Now they are silent when you walk on them, which is awesome.
I used wood putty to fill in some of the hundreds of staple holes and gouges.
Sand the stairs
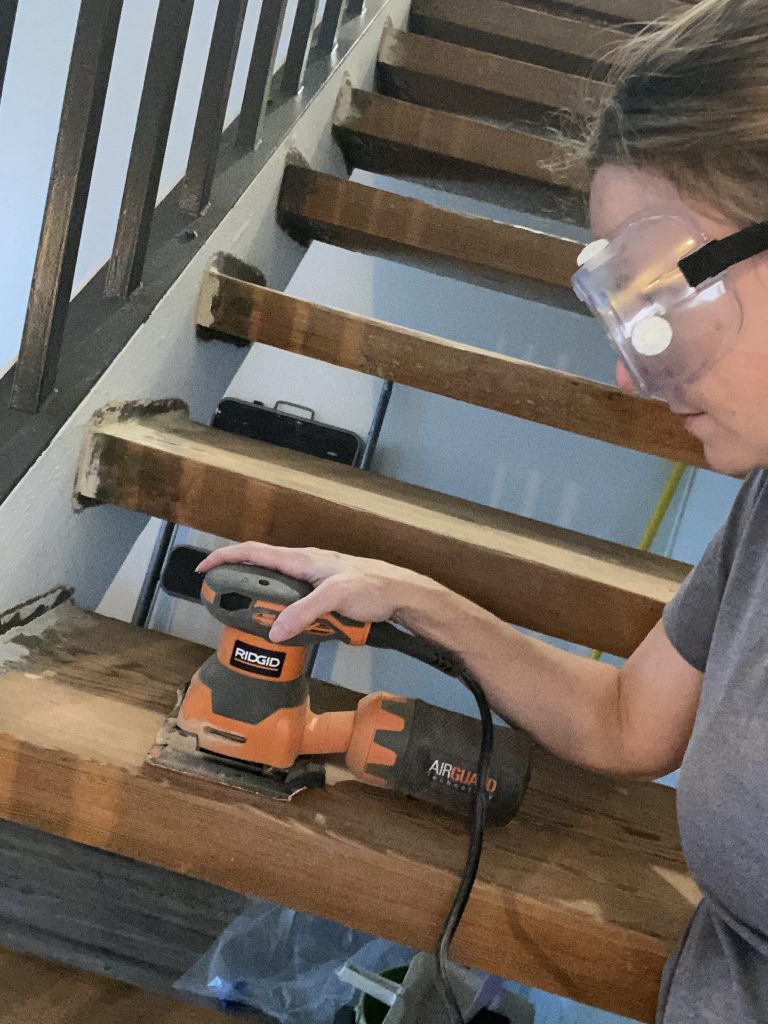
The stairs were raw wood from 1975 that had never been sanded – so it was extremely rough.
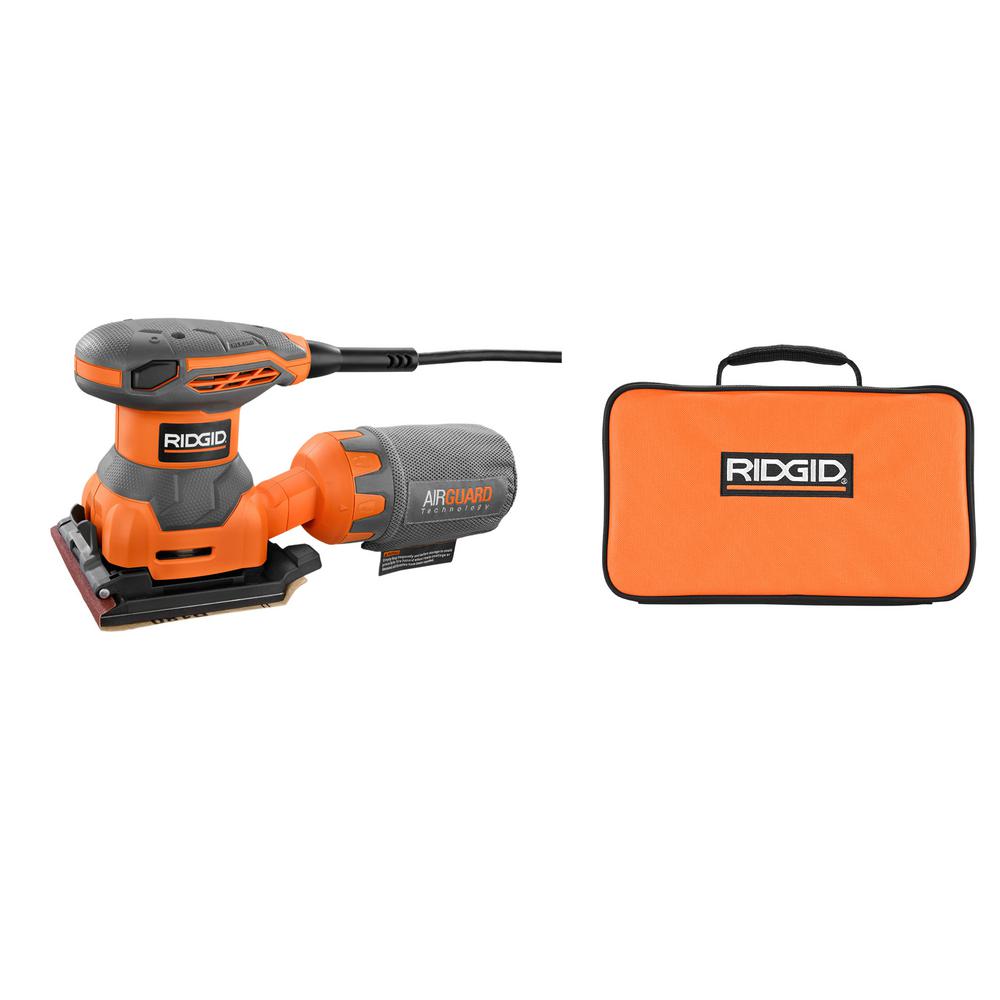
We used a 1/4 sheet sander from Ridgid for this job, which I got from Home Depot. I chose this because it has a nifty dust collection system that helps capture dust. You still need some dust mitigation like plastic sheeting, but I felt this sander really helped:
The stairs were sanded with three different grades of sandpaper to get a smooth finish. Start sanding with the roughest sandpaper (like 80), then gradually go to finer grit like a 120, then finish off with 220 grit.
Remove all dust
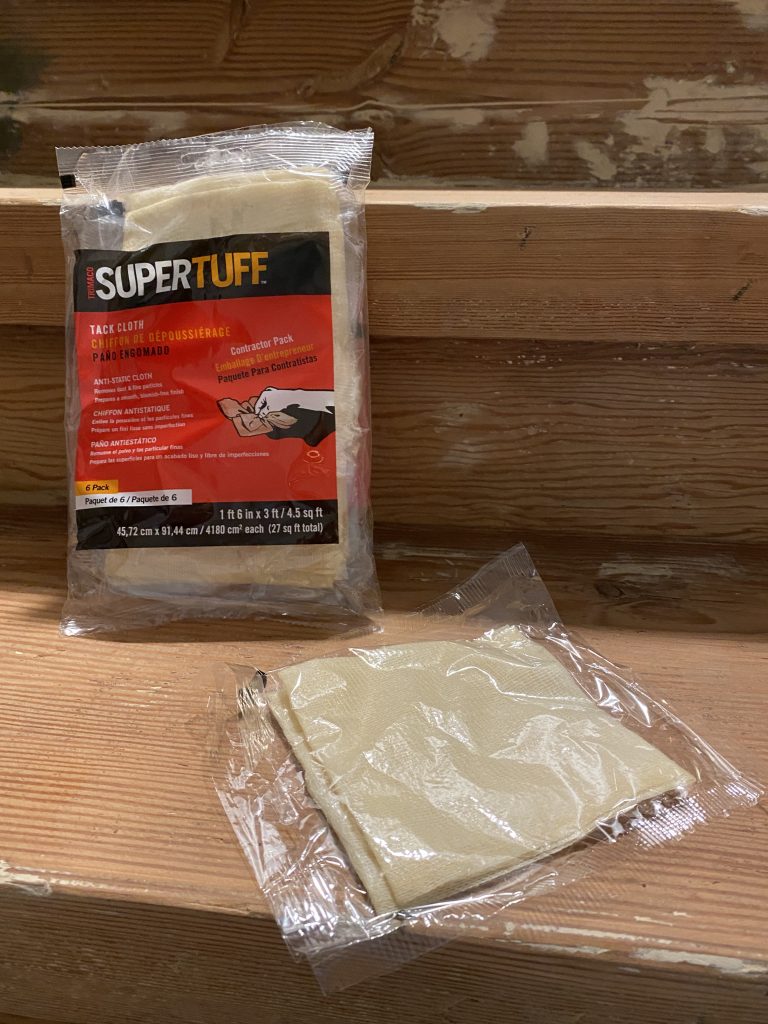
After sanding, you need to remove ALL the dust to ensure paint looks perfect. I used a small broom, then microfiber cloth, then Supertuff tack cloth (from Amazon).
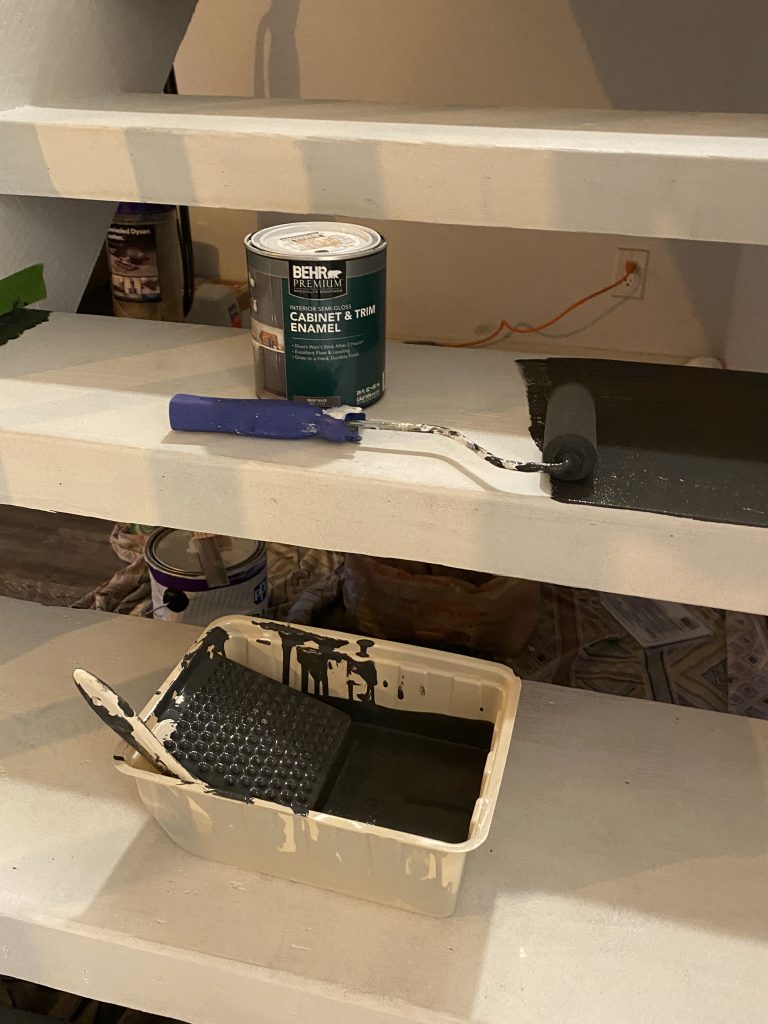
Step 4: Paint the stairs
First Apply Primer
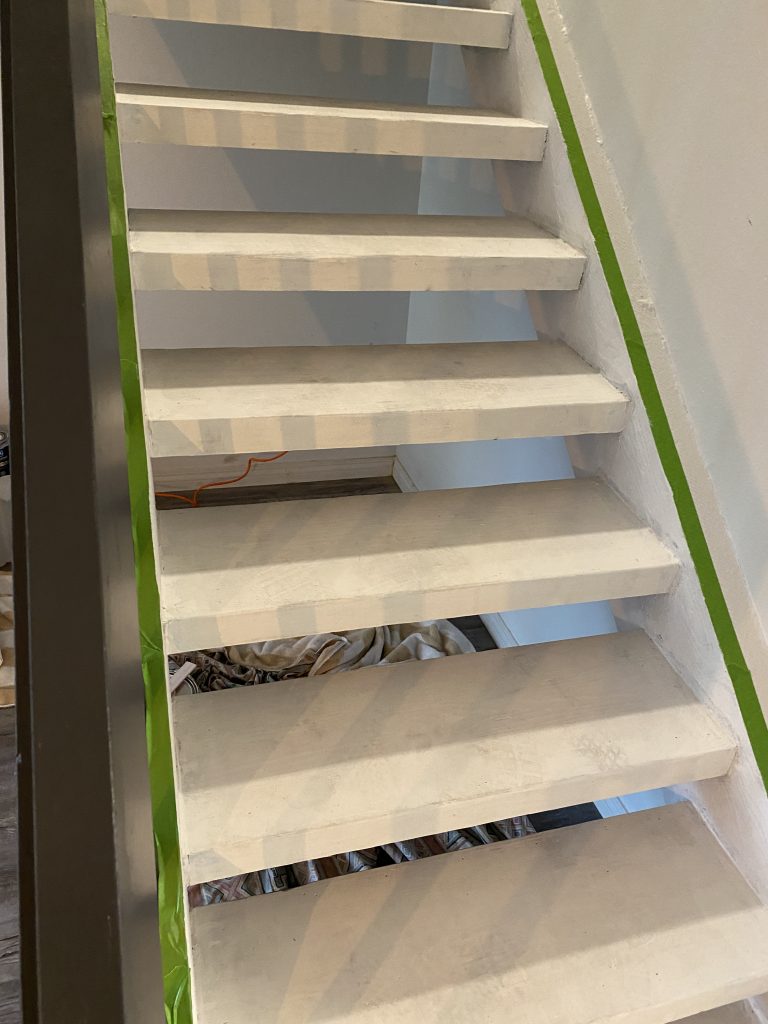
Painting day was finally here so I taped off the parts I didn’t want paint on (using green Gorilla tape) and got my primer on. I’m a fan of Killz 2 Latex All Purpose Primer because it works well and it’s not expensive. I waited a day and then applied my paint next.
Then Apply Paint
I painted the stairs using ” target=”_blank” rel=”noreferrer noopener sponsored nofollow”>Behr cabinet and trim enamel (from Home Depot), tinted with the color Behr Cracked Pepper. The lady in the Home Depot paint department recommended this paint since it’s designed to be very durable.
This paint is kind of thin and “sinks in” to the wood. You can even still see the grain of the wood underneath a bit so I kind of liked it.
My painting tools of choice were a small foam roller and a 2″ paint brush, and a small disposable paint tray.
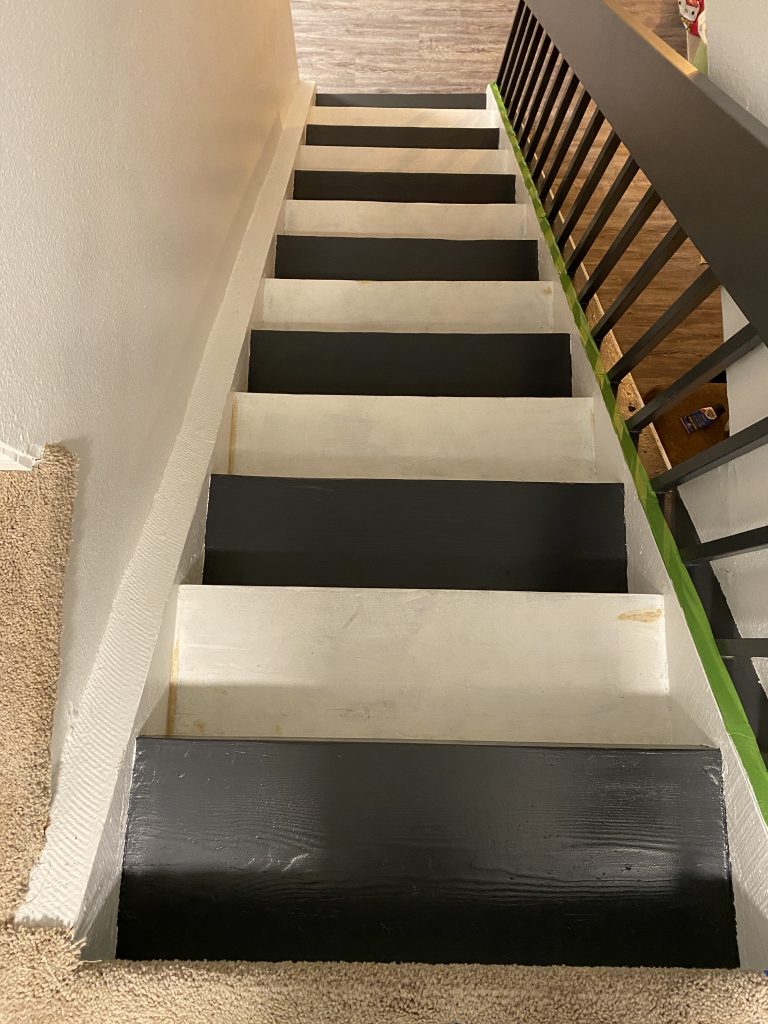
Two coats of paint did the trick, probably thanks to the Kilz primer. Here’s every other stair painted. We were able to walk on the white ones while the painted stairs dried.
Lastly, Apply Topcoat
After 2 coats of paint, I applied THREE coats of topcoat to protect the paint and get maximum durability. We used Varathane Ultimate Polyurethane in Semi Gloss from Home Depot.
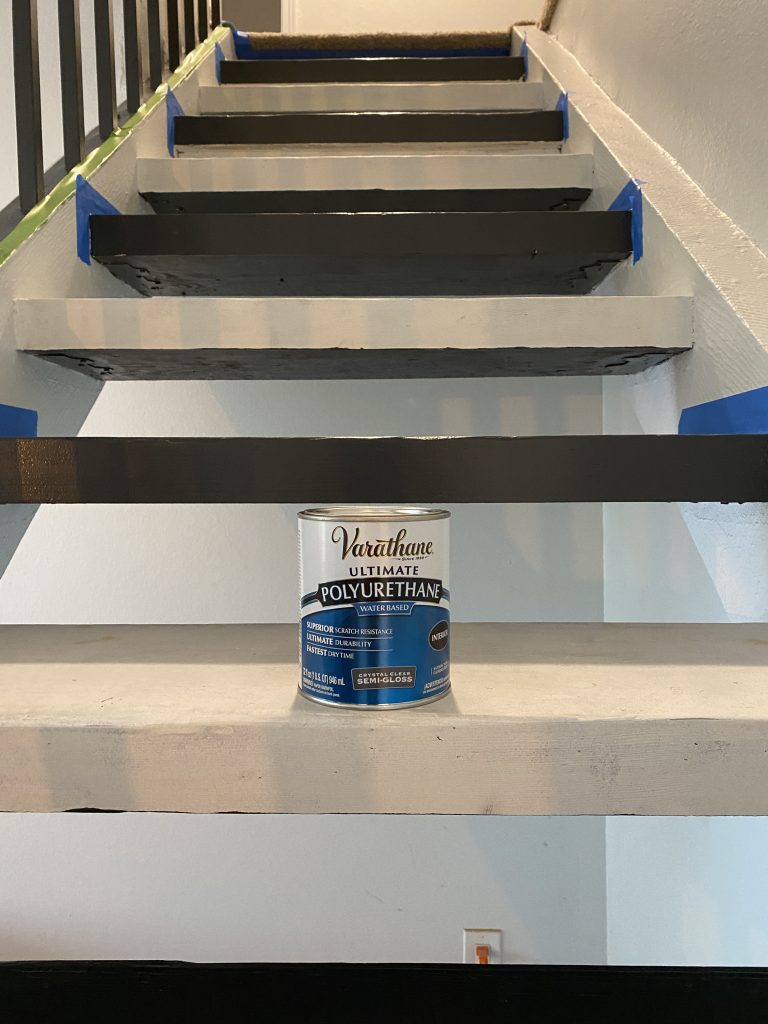
I did sand one of the steps in between coats (per the directions) but felt it messed up the final finish so didn’t do that on all of them. My recommendation is NOT to sand in between any topcoats to get a smooth finish.

For extra safety, I added in Seal Krete Clear-Grip non-slip paint additive that helps prevent slips from walking down the stairs in socks. You add it to your LAST coat of polyurethane and it’s invisible but helps your feet grip the stairs.
Once every other stair was done, I had to go back and do the whole process on the other stairs. In the end, it took about a week for all the painting (I do work full time, have a toddler, and write a blog so my spare time isn’t that plentiful).
Here is the final product:

Wrap Up & FAQ
Here’s a final before and after: from beige carpet to sleek black staircase. I was SO glad to be done, and so proud of my staircase makeover. My updated stairs now went with the rest of my home, matching the grey flooring throughout as well as having more modern, clean lines.

Before we go, I wanted to answer a few FAQ about this project:
How much does it cost to redo a staircase?
My DIY staircase makeover was well under $500. Some of the things I purchased: primer, paint, polyeurethane, 1/4 sheet sander, sandpaper, tack cloth, plastic tarps, painters tape, paintbrush, foam roller, staple remover.
I would say a professionally installed new custom metal stair railing is $5000 – $10,000. A completely new set of stairs and railing is likely $10,000 – $20,000 (or more) installed, and may need permits since there are all sorts of safety issues with stairs.
How do you modernize a staircase?
Making a staircase look more modern isn’t too difficult, and can be done mainly with paint. You can find a more modern color palette by searching on Pinterest and a little elbow grease.
Another way to modernize your stairs is to remove any carpeting or change out your rug runner.
If your stairs are stained wood, you can paint them or stain them a new color to change them up.
If you have a very dated stair railing, you may want to have a new metal or cable railing installed to give it a more modern flair. You can paint or reface the existing steps.
What to use to fill gaps in stairs?
Our stairs had huge gaps on either side, we used wood shims and a LOT of wood putty to fill in the gaps.
To make the stairs more secure, we drilled in countersink wood screws from the top through to the side of the stairs. The countersink helps you put the head of the screw below the surface of the wood, so it doesn’t create a trip hazard. This helped fix all our squeaky stairs too.
Hope this helps you do your own DIY staircase makeover with confidence. I would love to know if you have any questions about my project. Leave a comment below.