
Disclosure: This post contains affiliate links. As an Amazon Associate I earn from qualifying purchases, at NO extra cost to you.
Are you completely overwhelmed while staring at an empty room of the new home you just moved into?
Are you trying to update your home, but not sure where to start?
If you said yes, we have the solution! The best place to begin is to create a floorplan to layout furniture in a functional and stylish way. Creating a floorplan will make your decorating challenge seem easy and enjoyable. Plus, you won’t waste time and money buy buying furniture that won’t fit in your space.
First we’ll review the tools of the trade to create a floorplan on any computer or smartphone. Then, you’ll get some of the best tips we’ve found from interior decorating experts including:
- Where to start
- Determining focal points
- Furniture arranging tips
- Space planning
- Use of symmetry
- Using zones
- Filling empty space
We’ll be using a real-life example of the floorplan created for my living room redesign, so you can see each tip in action. By the end of this article you will be armed with the confidence you need to create a floorplan to make your room look thoughtful and modern, while functioning great for your family’s needs.
Let’s dive in!
Tools of the Trade:
Bust Out Your Tape Measure
This sounds silly but to create a floorplan, you literally need to measure the length of every wall, door, doorway, window, and architectural feature in your room. Even ceiling height should be measured.
Next, write all these dimensions down, or maybe draw it up with pencil and paper. Soon we’ll discuss the technology we need to create your floorpan, since the days of paper cutouts of furniture on graph paper are long gone, folks!
Best Free Desktop Software to Create a Floorplan: Roomstyler
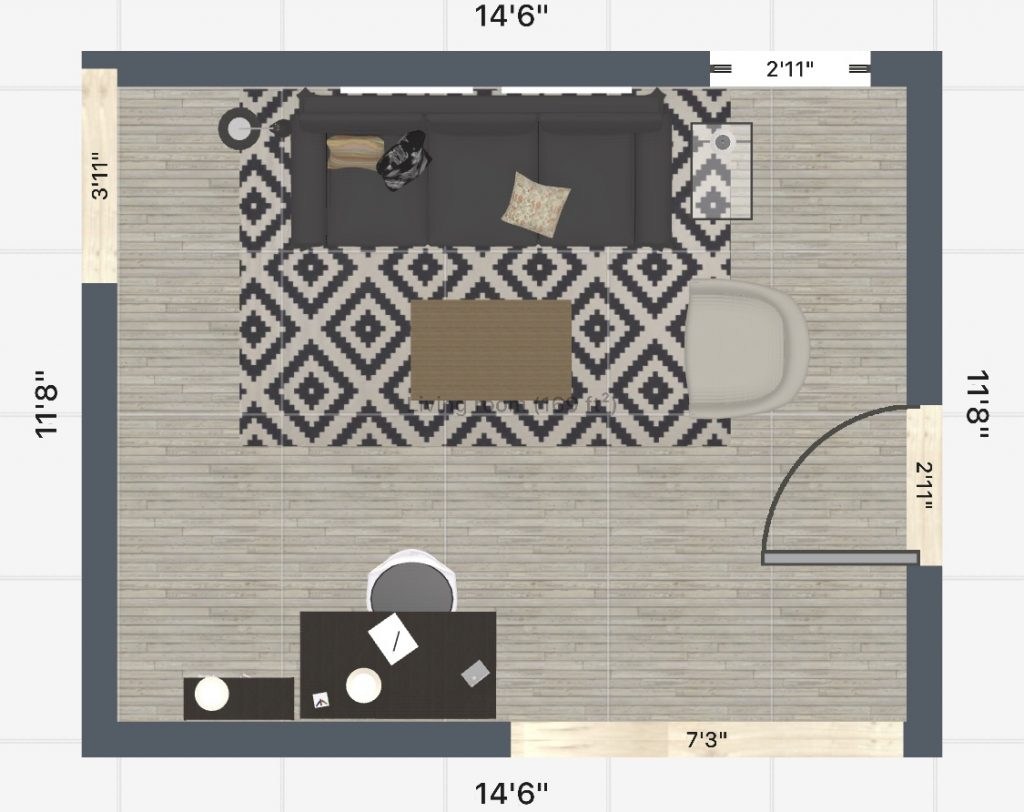
There were several desktop floor planning tools I tried to create my floorplan, but the one that was easiest and 100% free was Roomstyler. They have a tool called 3D Room Planner you can access by simply setting up a free account.
Roomstyler allows you to make the room’s dimensions to replicate your own home’s measurements. Then, you can add a TON of furniture and accessories. Once you create a floorplan, you can switch between a 2D or 3D design easily.
The only thing that Roomstyler lacks is allowing you to figure out the actual stores and sources for their massive furniture and home décor catalog. Also, their mobile app does not have the ability to create your own room, so stick to the desktop version.
Best Free App to Create a Floorplan:
Room Planner – House Design 3D
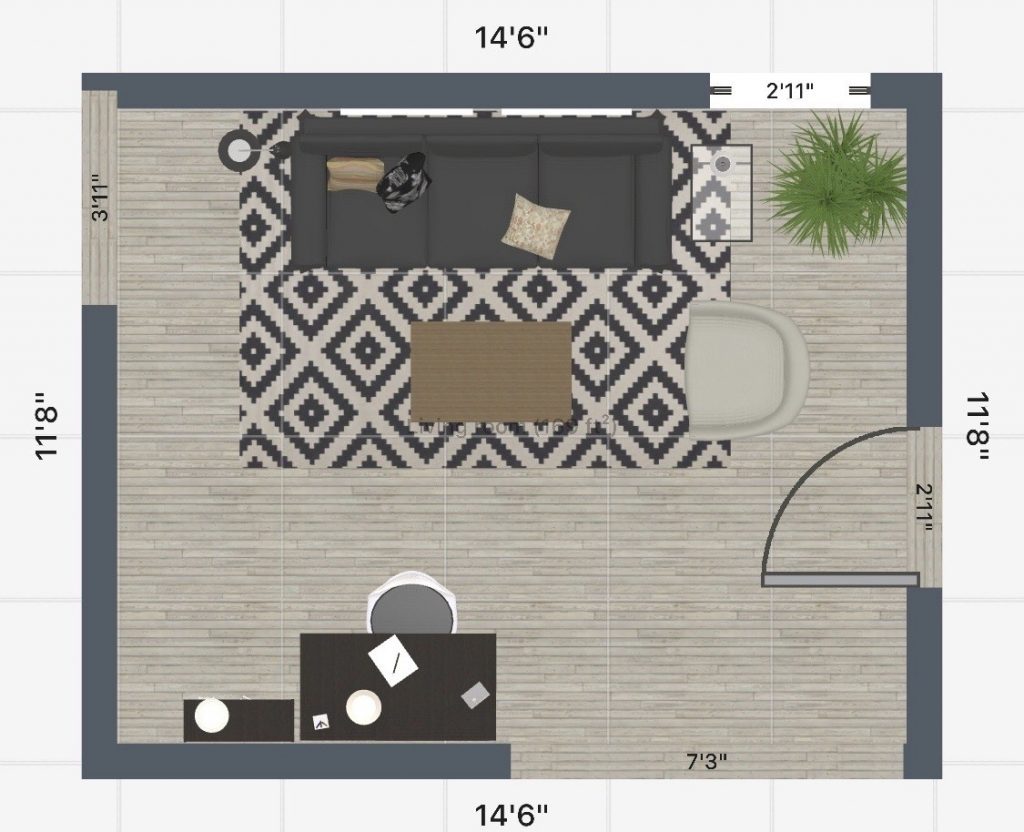
To create all the floorplans you see in this article, I used the free iPhone app – Room Planner – Home Design. It super easy to use, and you can make the room dimensions close to your own. Then, you can add doors, hallways, windows, stairs, etc. Next, you can select from a bunch of mainly Ikea furniture in the app to put as placeholders to see how many pieces will fit in the room.
Room Planner is a “freemium”model – meaning there are in-app purchases to be able to use more items. They do have a good selection of basics for free, so you should be able to create some great floorplans to understand how much furniture is needed and so on.
This amazing app goes in 2D or 3D – it’s really awesome to get a feel for how things will look – even down to where to place plants, lamps, art, etc. Check out my Resources page for more great apps and tools like this.
And now, the top pro tips to create a floorplan:
Tip 1: First start with a rug
I spoke with a designer from Living Spaces recently (talking to a designer there is free – just ask in the store), to try to get some advice and ideas for my living room redesign. She recommended we start by picking a rug first. I figure this must be a legit first step to create a floorplan, at least according to the Living Spaces designer.
Rugs work in a lot of living rooms. To start with, 8×10 is a pretty standard size for any room. Furniture should be added onto the rug by at least having the 2 front legs on the rug, with the back legs hanging off. Check out this article on Wayfair, called How to Choose the Right Rug Sizes for more tips on picking the right rug.

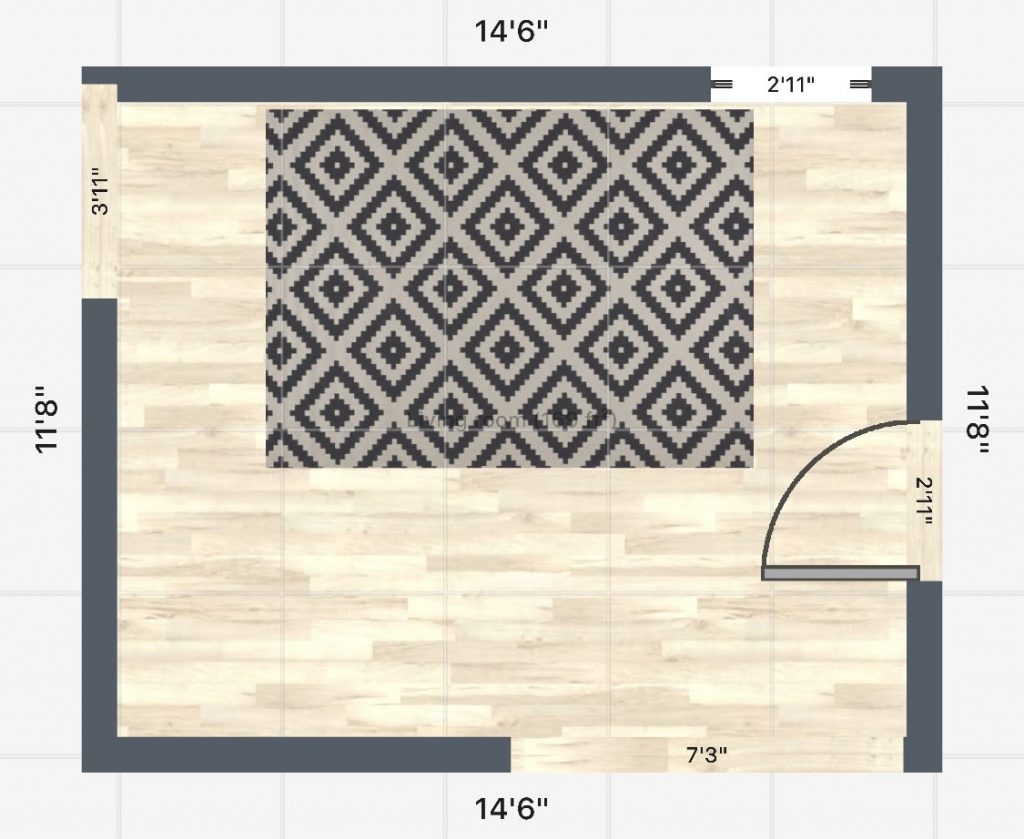
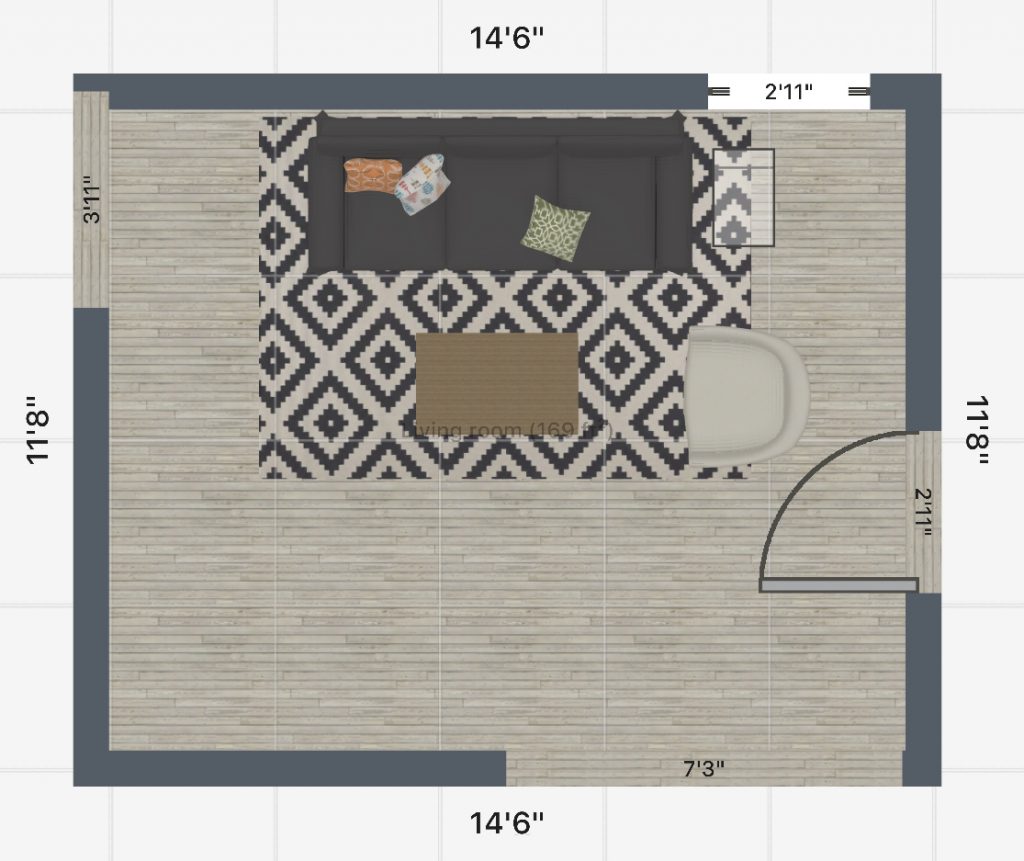
6’7″x9′ Rug
My floorpan helped me select the right size rug for my exact room. I made the room dimensions close to the actual room, then placed an 8’x10′ rug down. In the Room Planner app, you can actually change the dimensions of the rug too! The 8’x10′ seemed to take up way too much room, so a smaller (and cheaper) 6’7″ x 9′ rug was the preferred option.
Tip 2: Decide where the focal point(s) are in your floorplan
What is a focal point?
It’s where your eye is drawn as you enter a room – typically an architectural feature like a fireplace mantel, beautiful big windows, or built in bookcases.
If you don’t have any of that wonderful stuff, just pick the biggest wall and you could put a television, creative artwork, or large decorative mirror as your focal point. Worthing Court Blog has a great article on focal points, How to Deal with Multiple Focal Points.
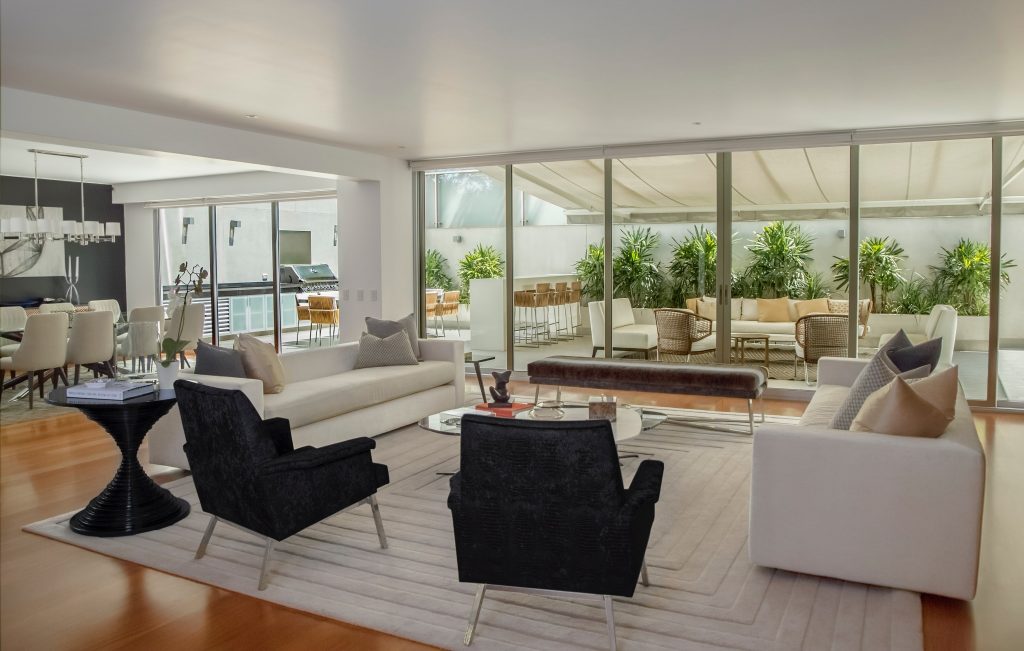
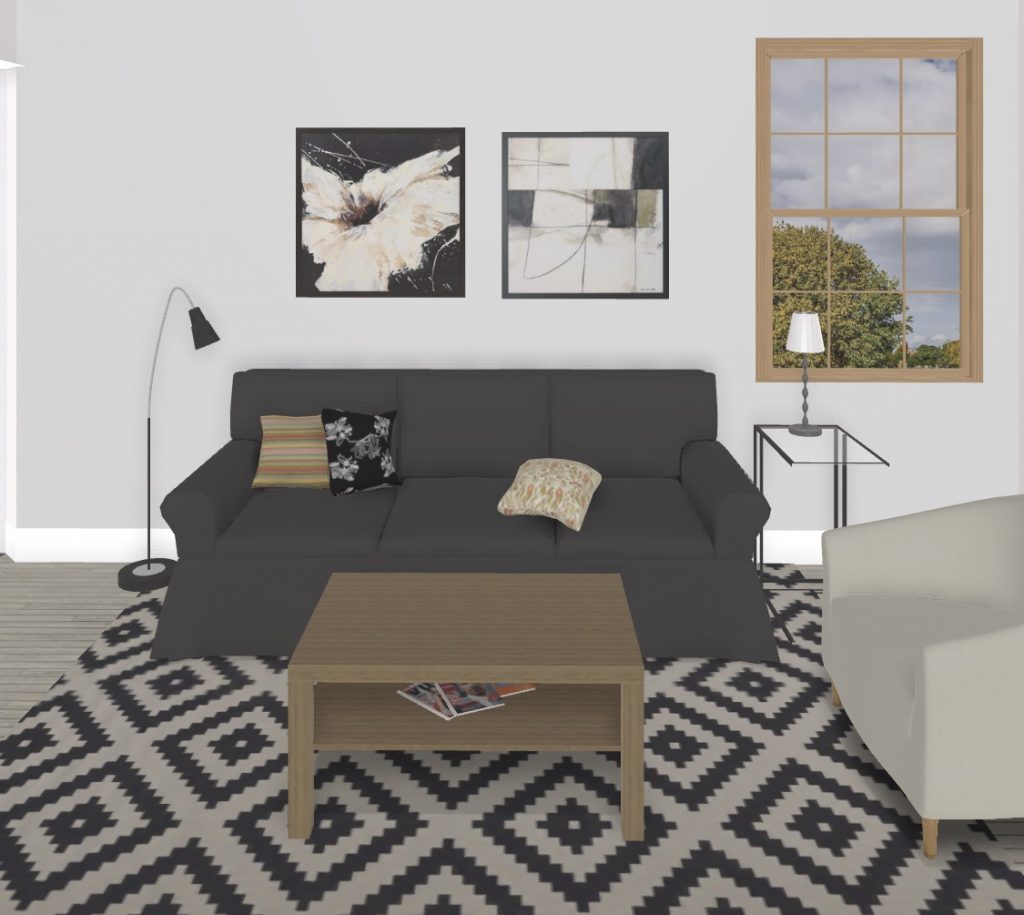
For my living room, we had huge sliding doors that overlook eucalyptus trees, which is a natural focal point during the day. However, I didn’t want to have my chairs facing the sliders, or in front of the sliders, so I needed a separate focal point.
I chose the longest wall in the room for my second focal point, right where the sofa will sit. That way, even at night I would have a focal point, which would be some large artwork above the sofa.

OK, I got my focal points, now what?
Tip 3: Arrange furniture around focal point
Seating arrangements
Now you can use the focal point(s) to orient your furniture and rug around, when creating your floorplan. You don’t have to make all the chairs face a window, but you would cluster large furniture around your focal point or use furniture to draw your eye towards your focal point.
If you have a fireplace, arranging furniture in a semi-circle or U shape is ideal. According to Crate & Barrel, leave no more than 8 feet between seats.
Another floorplan option is to “float” your couch and chairs in the middle of the room. You can also have 2 couches facing each other, or the couch and 2 chairs facing each other around a central coffee table.
If you really get stuck just remember a basic room combo that is nearly foolproof: 2 chairs and a couch for a living room. This article at Ballard Designs will help you with some basic furniture layout tips and tricks.
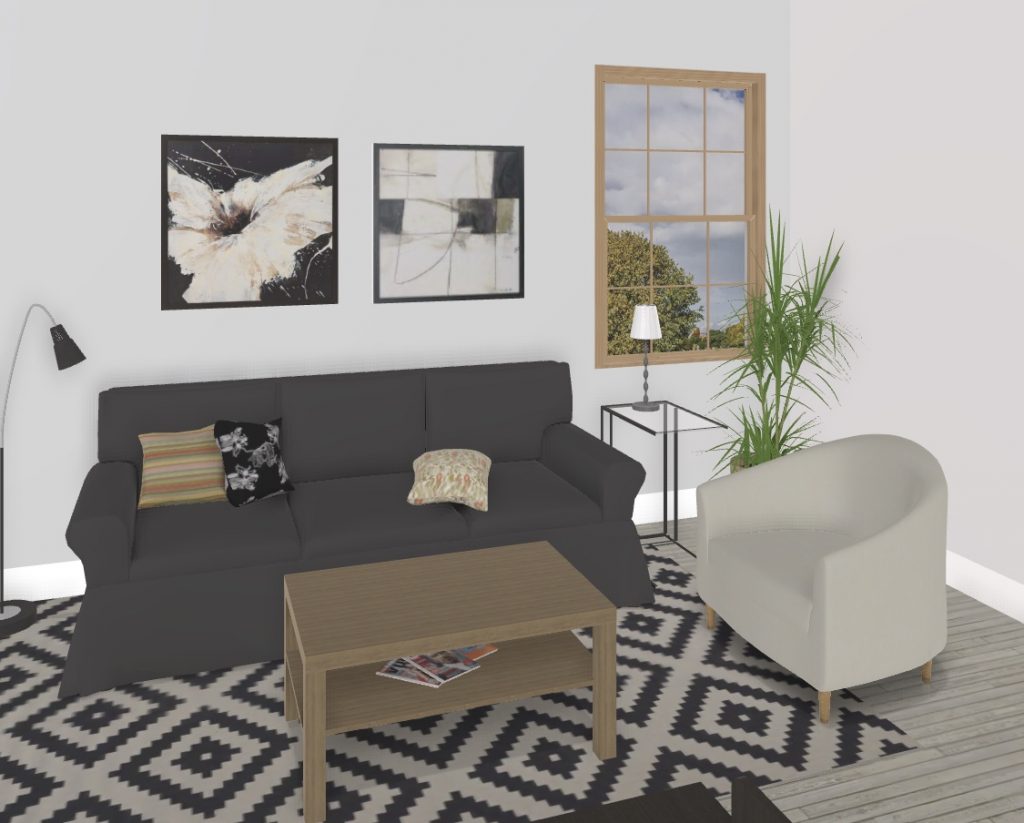
For my living room, I wanted my couch on the same wall as my focal point, so I arranged my couch and chair around that focal point. I toyed around with adding another chair, but due to the fact this was also a playroom/office, I just couldn’t make another chair fit.

Next arrange tables & cabinets
Once you set your seating up, you can put in tables where it makes sense, for living rooms – it’s mainly a place to put your drink. Then you can add in things like cabinets, sofa/console tables, side tables, and ottomans. Crate & Barrel goes into more detail on how each of these items can be used.
I knew the coffee table would be in front of the couch, but had a hard time deciding between one or two side tables. We were using this as a multipurpose room, so I went with smaller and fewer tables so we’d have room for my toddler to play.
Place floor and table lamps
According to Crate & Barrel, floor lamps should replace a side table when creating your floorplan. So, you want to make sure a coffee table is nearby for placing drinks. Table lamps are easy – just make sure they don’t take up the whole table. Keep this in mind when buying furniture online – look at the specs of side tables to make sure they will work for your needs.
I wanted at least two lamps since our room didn’t have any overhead lights. These were just placeholders but the floorpan helped me decide where to put my floor lamp and table lamp.
Tip 4: Leave enough space
According to Better Homes and Gardens, leaving enough space around and between furniture is key to make a room functional in your floorplan. They recommend allowing 30 inches between pieces that you must walk around. Then leave 14-18 inches between a couch and coffee table. This will ensure your drinks or whatnot are within arm’s length.
Other tips for space planning for your floorplan include:
- Leave 36″ inches space for major walkways
- Leave 24″ in between pairs of chairs
- Viewing distance for a standard TV is 8 to 12 feet max.
Tip 5: Symmetry in your floorplan
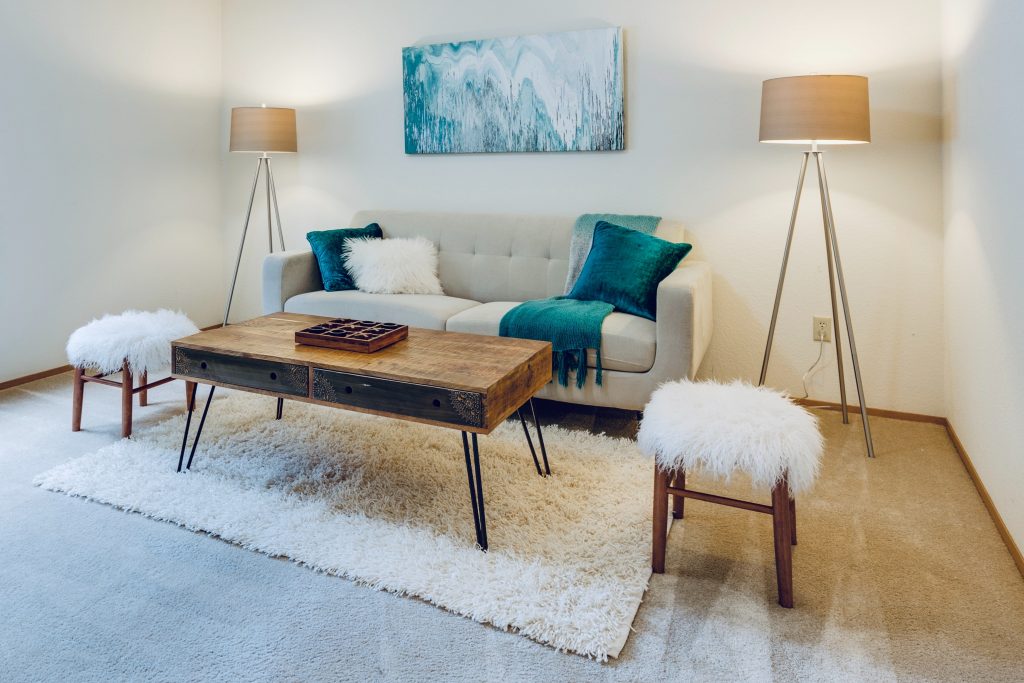
Trying to remember to use symmetry to create a floorplan is important. It makes it seem more traditional but very intentional and planned. An example of symmetry is in the above photo with 2 lamps and 2 stools. If you can’t get 2 of the same pieces of furniture, you can also use symmetry in terms of accessories, wall décor, or lighting.
I’m totally breaking the symmetry rule for furniture since I only have room for one couch and chair, but am going to use 2 framed art prints (with the same size frame) above the couch to get my symmetry on!
Tip 6: Use zones in your floorplan
Zones are great if you have a large space to work with. You can have a reading zone, conversation zone, or office area, you name it. Most people have rooms they want to serve multiple functions, so using zones is a great way to serve your family’s needs.
Furniture is a great way to designate each zone, but you can also use lighting, rugs, or room dividers. For more info, check out the design experts at Lenore Designs for a brief post on using zones in open floorplans.
For our living room floorplan, we needed a multifunctional room that included play area for my son, desk/office area, and a conversation zone for when we had guests. Making sure I could squeeze an office area in a 12×14 room was a major challenge!
Tip 7: Fill up empty walls and corners
Large empty walls can make a home feel sterile, but can be intimidating to figure out what to do with.
Corners can be made more interesting with a cute occasional chair, an awesome plant, or an armchair/lamp combo to make a reading nook. Other ideas include using a bookcases, pedestal, or bench.
This article by Ballard Designs goes into most of these points in a lot more detail.
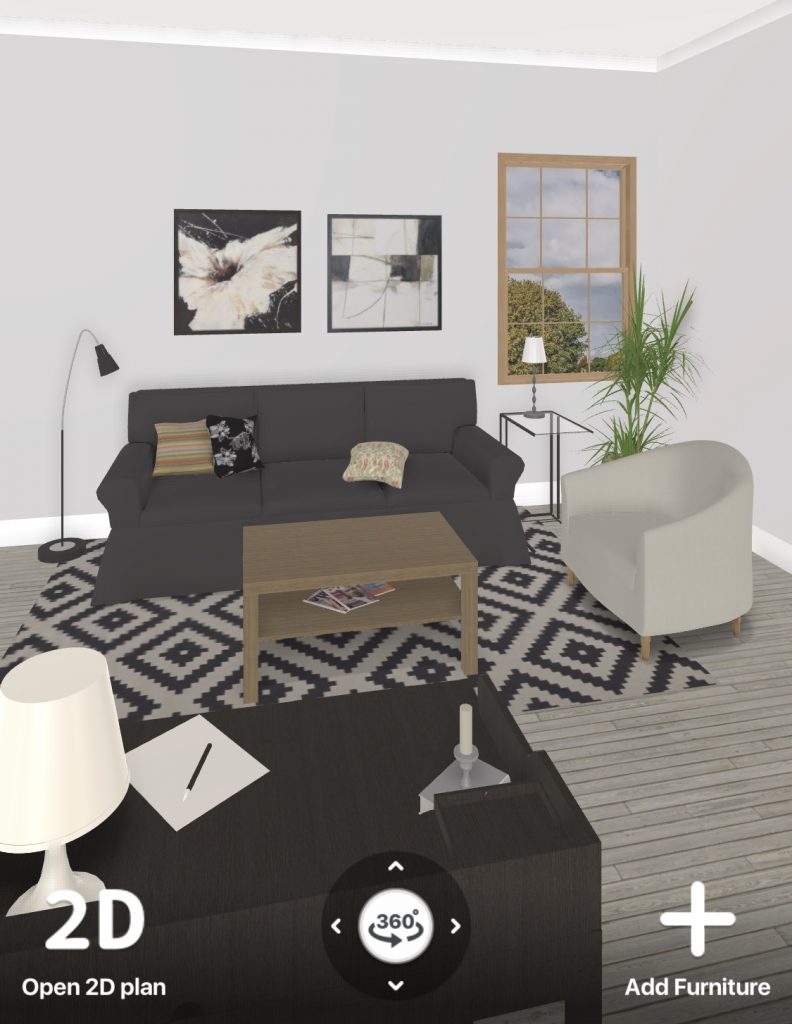
I saw a lot of my Pinterest inspiration photos with a tall plant in the corner of the room, so I wanted to see how this looks in my floorpan. I tried a few different options using the Room Planner app. When I switched to 3D view, I could see how it looked, and was able to place a floor lamp on the opposite side of the couch to “balance” things out a bit.
Some great inspiration photos for using greenery indoors at this article on Freshome.com.
Wrap up
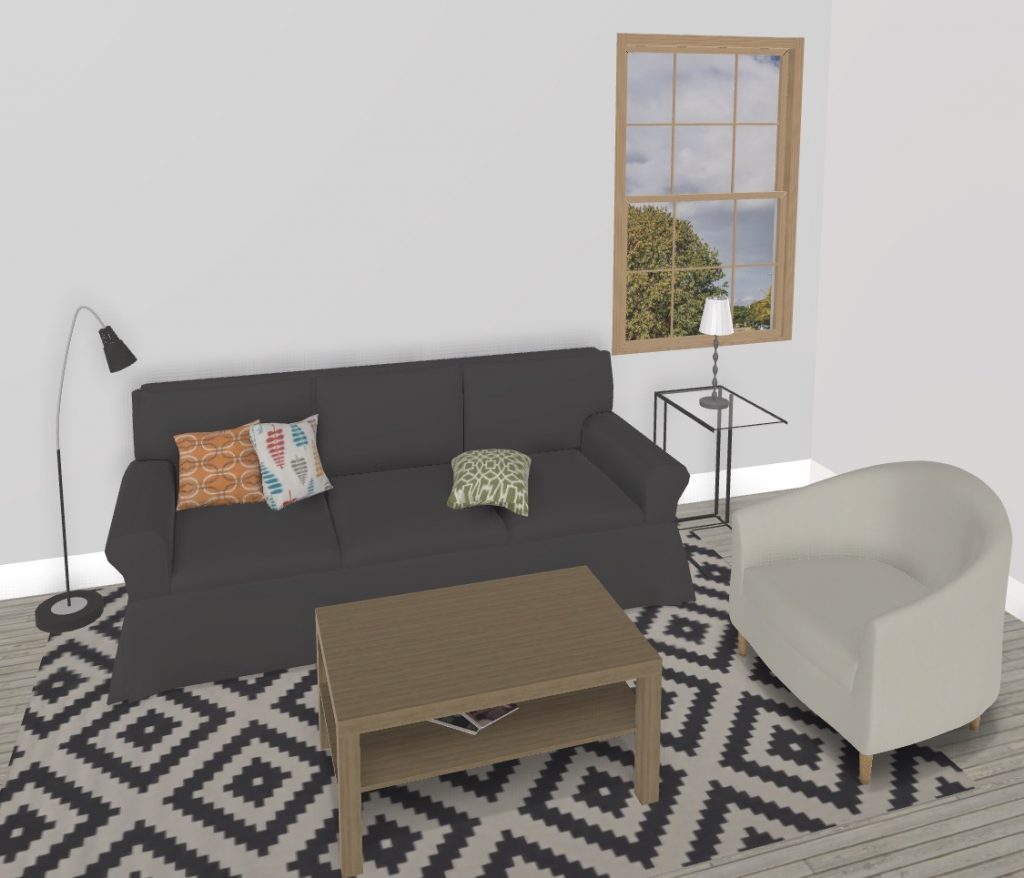
Hopefully by now, you are seeing how these tips can be brought together to create a floorpan that rocks! You should use both the 2D and 3D viewpoints of the room planning software to help make things look balanced and planned. The Room Planner app even gives you a “realistic photo” rendering of your 3D design. Check it out:
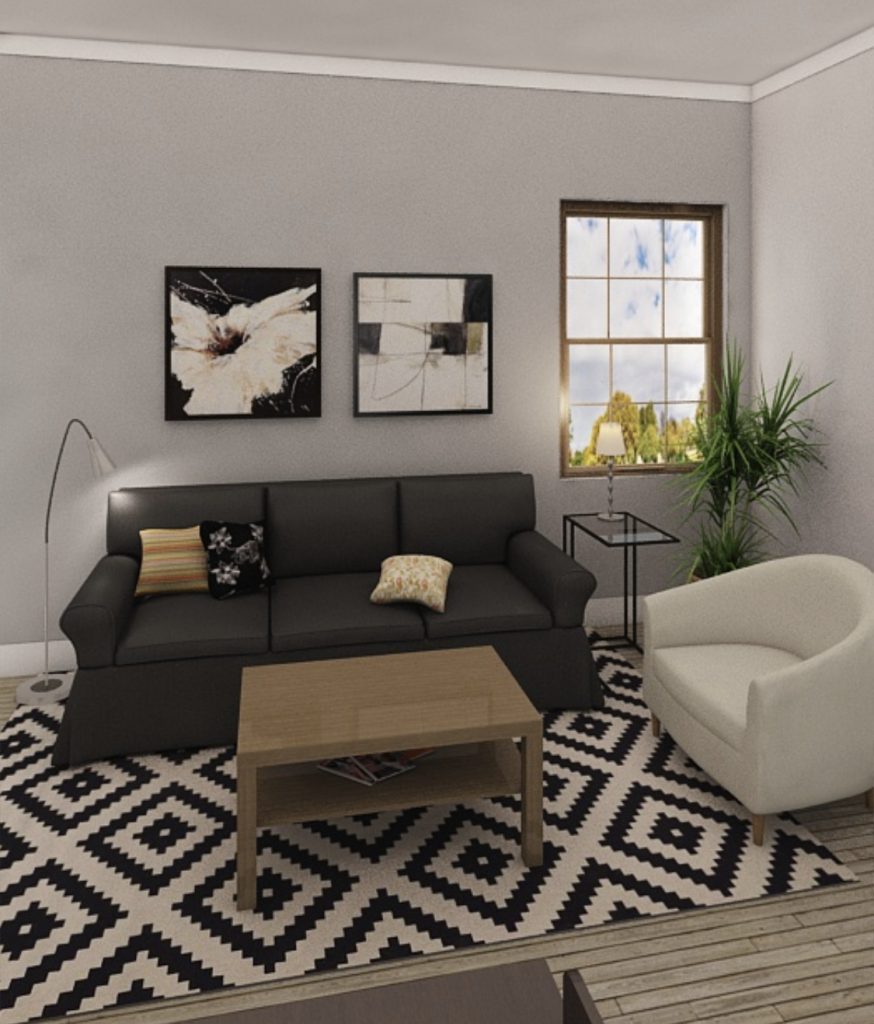
I hope my “live example”of my living room redesign helps you feel confident that you can do this too. From getting the recommended tools, to furniture configuration and space planning, you can see it really isn’t that hard to create a floorplan yourself.
I hope these tips make you feel like a floorplan guru so your room feels fresh, welcoming, and super-functional too! Did any of these tips help or surprise you? Leave a comment below…