
Disclosure: This post contains affiliate links. As an Amazon Associate I earn from qualifying purchases, at NO extra cost to you.
Did you just move into a new place, and have new, empty rooms screaming at you to learn how to design a room ASAP?
Has your room design been the same for the last 10 years and sorely needs a update?
Do you have family coming over for the holidays, and need your place to look “all grown up” with a cohesive, modern design?
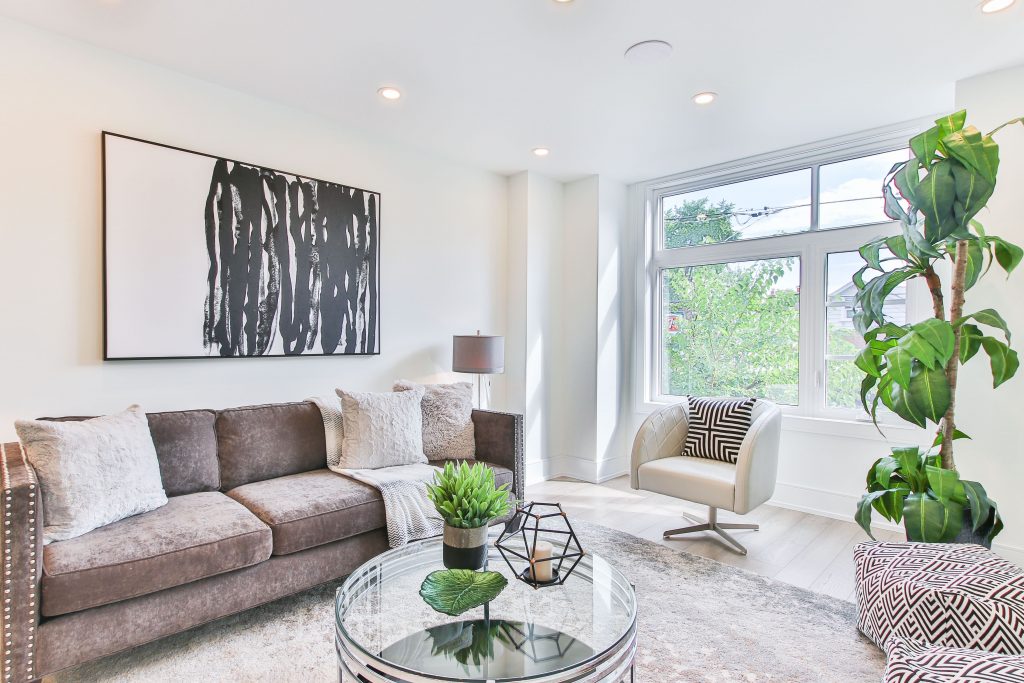
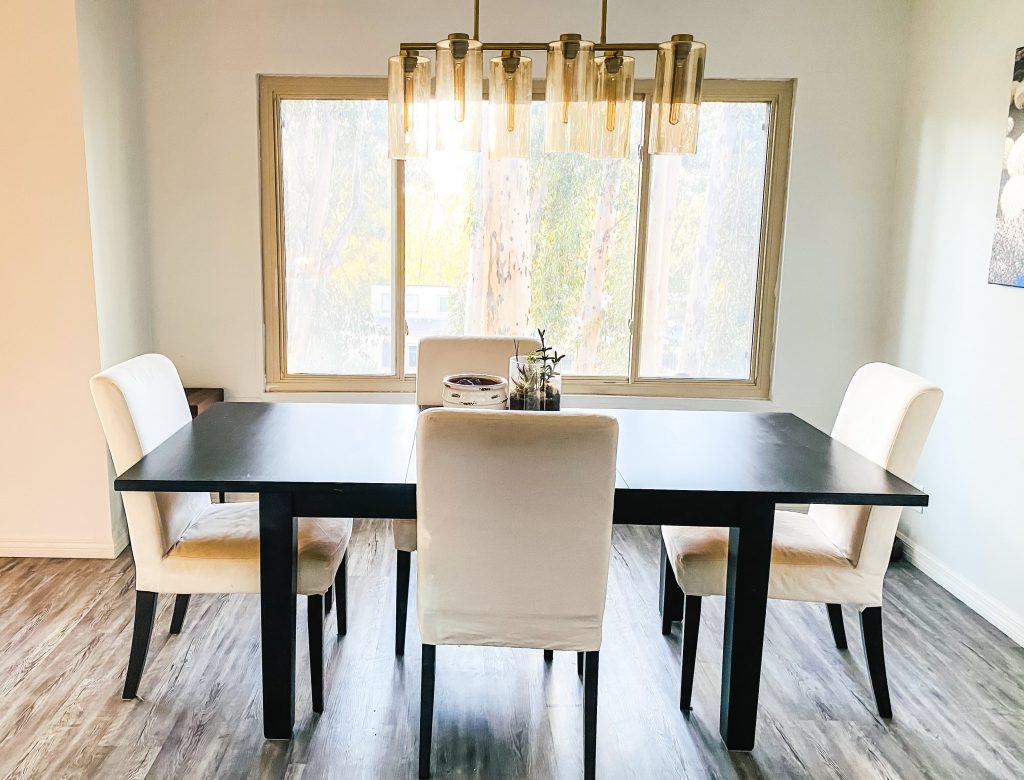
Then you are in the right place! This is the ULTIMATE step-by-step guide to how to design a room – with a “real life” example. Yep, I’m taking you along as I design my living room. My “before” photo is below, and you are invited to witness every step (and mis-step) on my journey to fix this “situation.”

By the end of this guide you will know a basic process for how to design a room and get a cohesive, purposeful look. This new knowledge will make you feel like a modern day Martha Stewart. Here’s what we’ll cover:
- First we’ll learn about function
- Then we’ll find inspiration
- Next comes planning and budgeting
- Last (definitely not least) is execution (aka Go Shopping!)
- End result: A “blueprint” to help elevate your living space
I’m not going to front – this isn’t something I made up myself, since I’m not an interior designer. BUT I’m a great researcher, so I’m learning and sharing all my findings with you to help save you time (and money).
What I did was use the basic process from HGTV’s post, “11 Steps to a Well Designed Room,” and expand on it by researching other related blog posts and guides (especially when I didn’t quite get what they were talking about).
I hope sharing my own journey helps in making your home look elevated and insta-worthy, and shows that YOU can design a room too! Let’s get started!
Step 1: Figure out the purpose of the room.
The first step in how to design a room is to ask yourself a few questions:
- Is this a room where people will be sitting and relaxing, like a family room?
- Is the room for eating?
- Will it be used for entertaining?
- Will you need storage in the room?
- Do you have high traffic areas of the room to get somewhere else in the house?
These are key questions to understand the layout and types of furniture and decor you need to buy. A great guide for understanding how to layout a room can be found on the Ballard Designs blog.
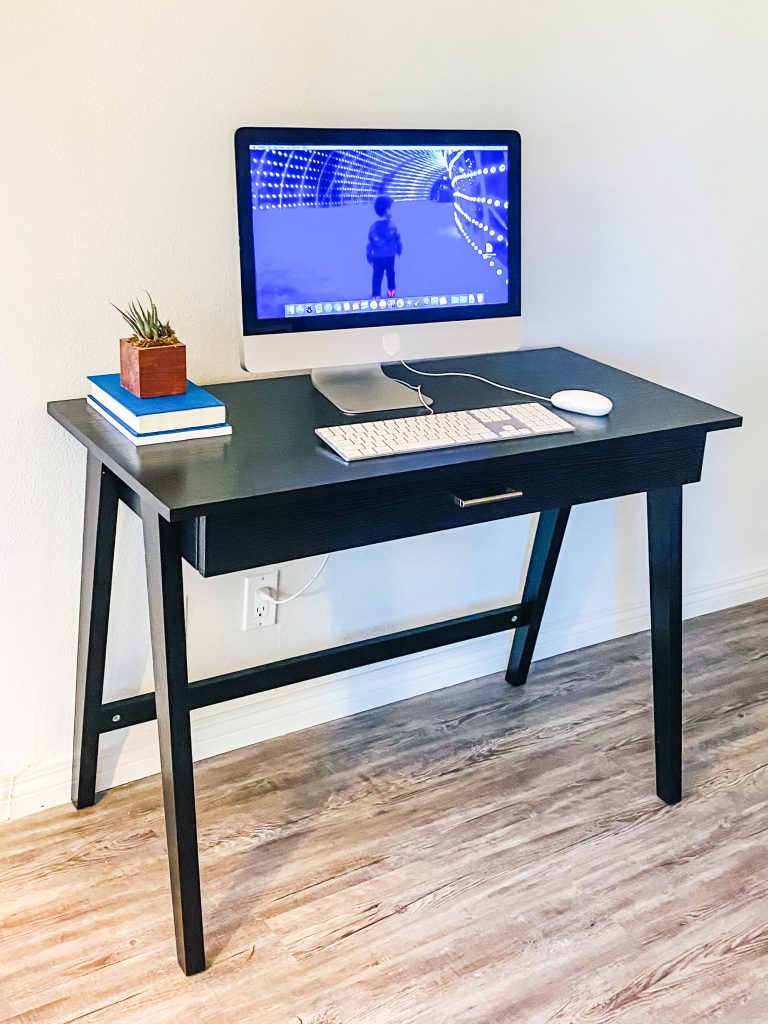
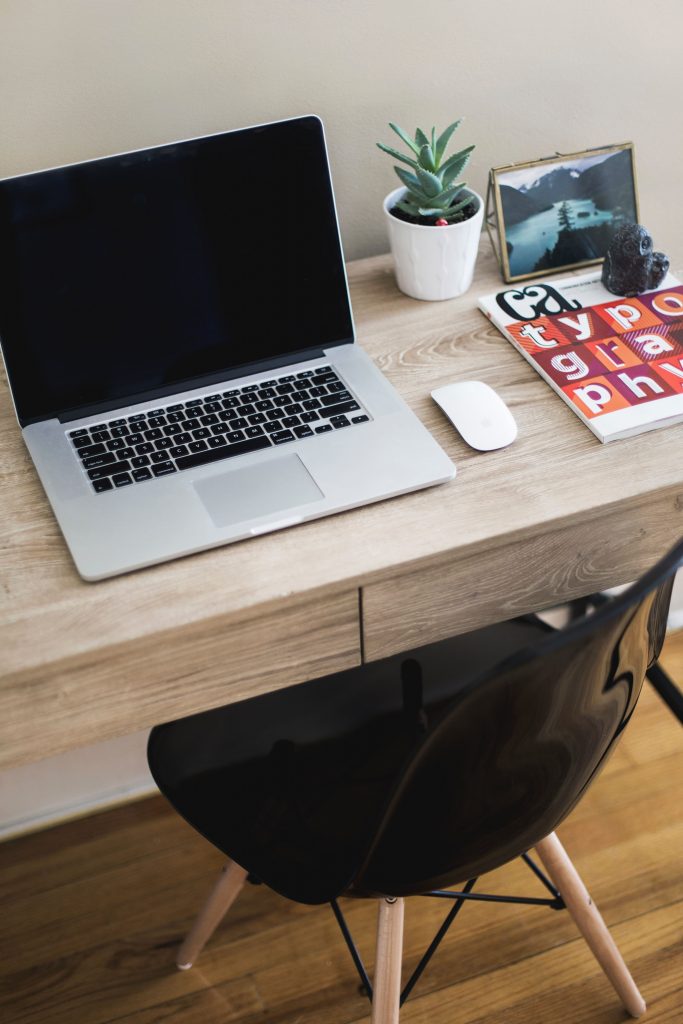
For my living room design – I knew this was becoming a multi-purpose room to put my son’s train table, do some entertaining when we had people over, and a place to put my desk to write this awesome blog.
Step 2: Who will be using the room?
- This is really asking – do you have kids?
- Little ones or older kids?
- Will older adults or just regular adults be using the room?
- Will this room be used for guests when they visit?
The users of the room will definitely influence what type of items you would buy and how you actually design the room.
For my own space – I knew my toddler, husband, and myself would be the primary users, and also occasional guests. Having furniture that would be safe from a toddlers antics was a must-have. So, we definitely won’t be buying a glass coffee table or white couch!
Step 3: Make a wish list
The third step to design a room is to write up a wish list of all the items you want to buy, and decide what items you want to keep. Then, prioritize your list. There’s a little more info about designing a room in this post from the Bless’er House Blog.
This is super useful because it gives you a starting point for your budget. Plus when you start blowing your budget you can decide what you want to buy now, versus what can wait for a little bit later.
Since I knew I was keeping my current couch and swivel chair, I created a wish list with the following items:
- Rug
- 1 or 2 Lamps (it was always super dark in this room due to lack of overhead lighting)
- Coffee table
- Side table(s)
- Wall Décor for above couch
- Throw Pillows
- Pouf
- Some kind of artificial plant life (I’ve killed a cactus, people)
Step 4: Find inspiration
This is the fun part. Finding swoon-worthy photos on Pinterest is easiest, or take screen shots of Instagram or other websites. Check out my resource page to find links to modern design inspiration. Keep it to photos that REALLY make you happy. For beginners learning how to design a room, I would keep it to about 5 – 7 photos, too much and you start to feel overwhelmed.
Check out my Living Room Pinterest Inspiration Board here.
Step 5: Measure (twice) and make a floorplan.
Making the floorplan is a super important step in learning how to design a room. The floorplan should be as close to your actual room as possible, to make sure everything fits and you have “flow.” Check out the post I created showing 7 simple tips to create a floorplan to help you make a floorplan like a boss.
Get out your tape measure…
Measure your room – I mean every dimension! The length and width of each wall of the room, the doors and doorways, the windows, how far each window/door is from the corner, the height from floor to ceiling. Also mark down and measure architectural features like fireplaces. Don’t forget to measure all the furniture you are keeping. Measure everything!
Draw it out (or use an app!).
Use the measurements to make a basic floorplan on paper, graph paper, or use some free floor planning software. A great option for creating floorplans on your desktop computer is Roomstyler.
There’s an app for that!
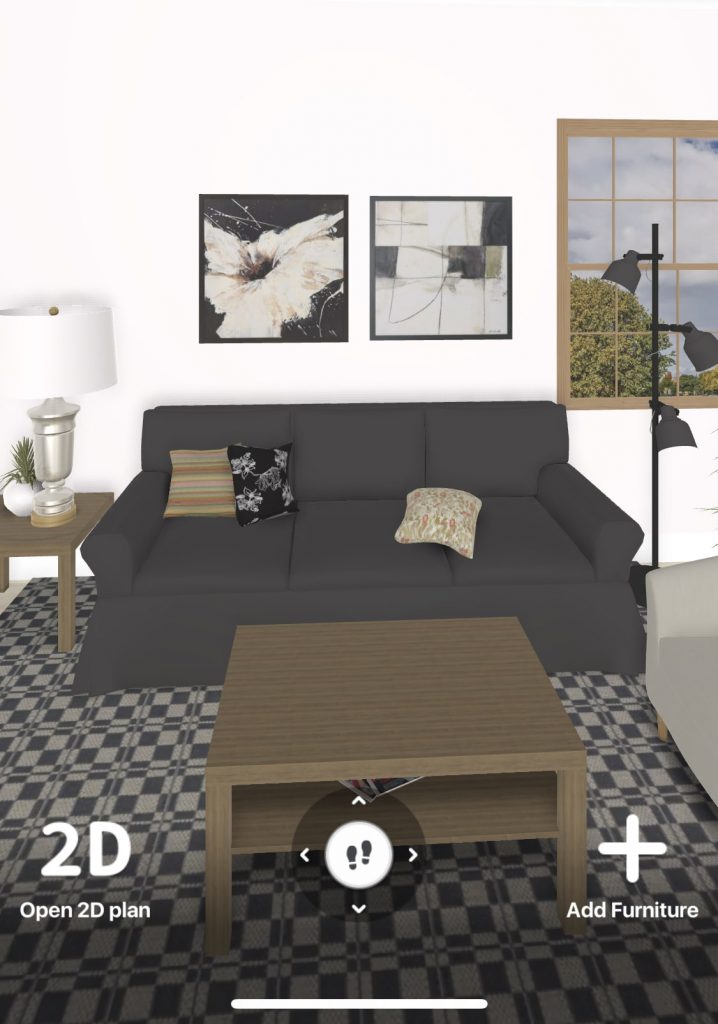
If you want an app, try Room Planner – Home Design 3D, which super easy to use, and I could make my room dimensions close to real-life. I then selected from a bunch of furniture in the app to put as “placeholders” to see how many pieces will fit in the room and to test out different furniture layouts.
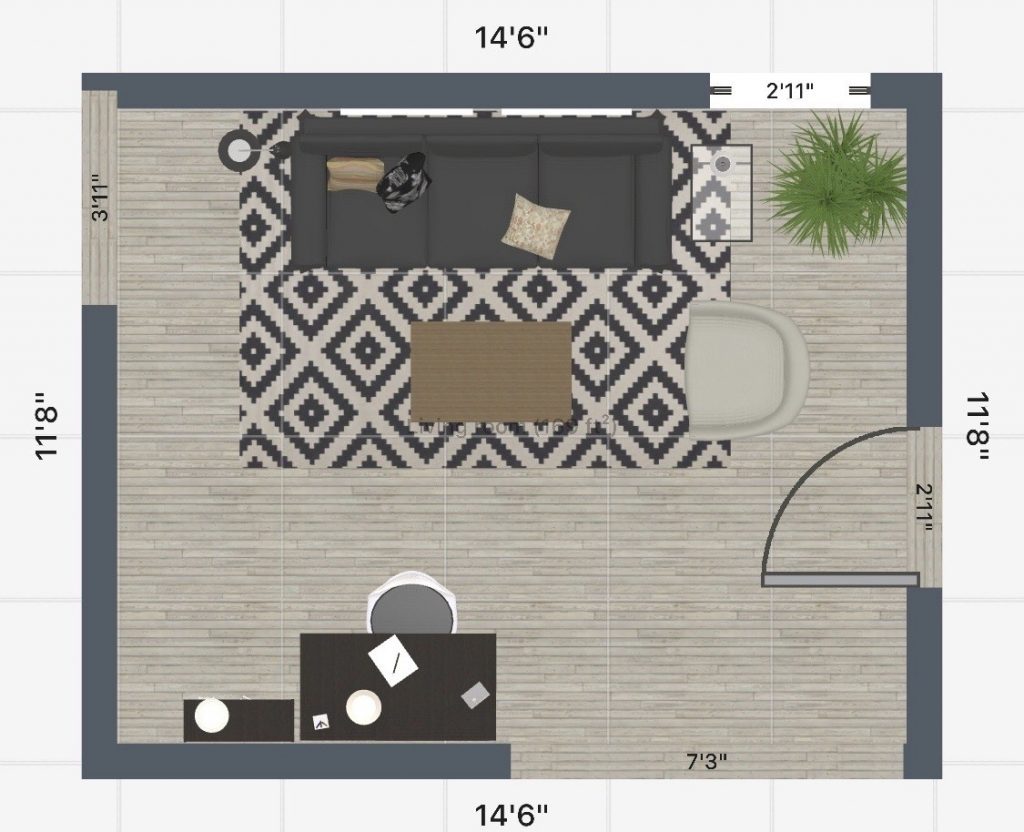
I totally skipped this step, then ended up with an awesome mood board of all the stuff I wanted to buy. Then I totally freaked out that I didn’t have “symmetry” by having 2 chairs, so I made a floor plan (below) to see if I needed to buy an extra chair.
Once I made the floor plan, I realized I simply did not have the room for another chair due to a major traffic pattern going through the room.
Don’t skip making a floorplan when you design your room! It will make things easier and you won’t buy the wrong stuff.
Here are the top 3 tips from my post, 7 simple tips to create a floorplan, to get you started.
Tip 1: First start with a rug.
I spoke with a designer from Living Spaces recently (talking to a designer there is free – just ask in the store), to try to get some advice and ideas for my living room project. She recommended we start with by picking a rug first. I figure this must be a legit first step, at least according to the Living Spaces designer.
To start with, 8×10 is a pretty standard size for any room, but if you create a floorplan you can see what size rug is the best fit. Check out this article on Wayfair, called How to Choose the Right Rug Sizes for more tips on picking the right rug.

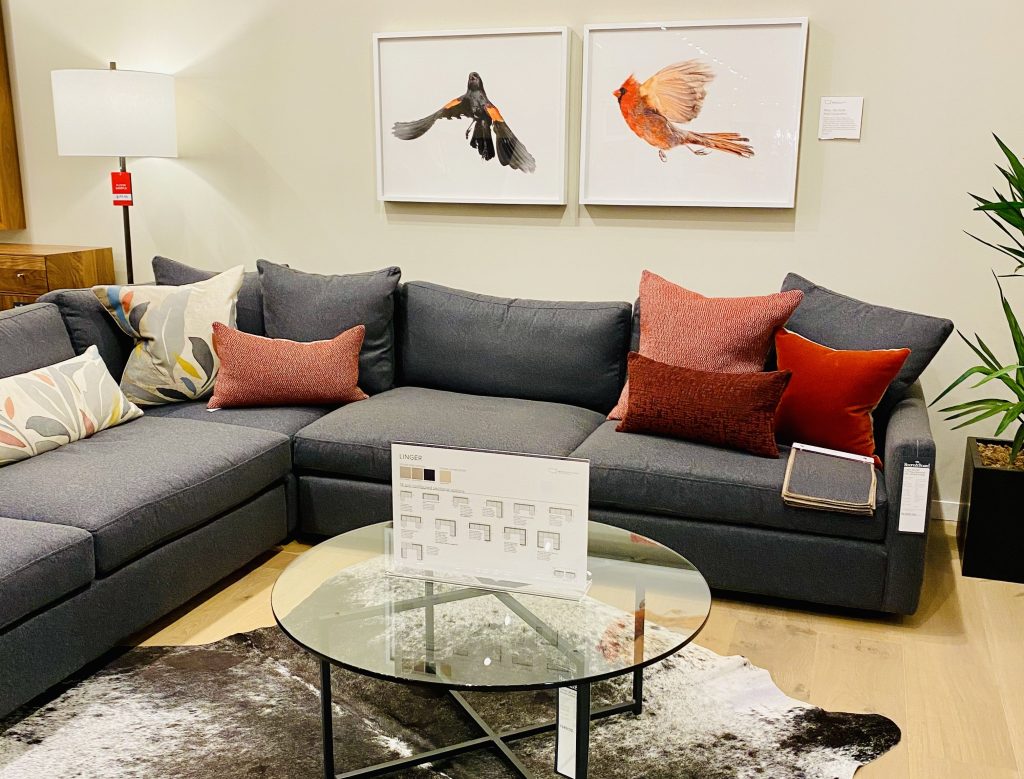
How did I pick a rug? I looked up “grey couch” (since I was keeping mine) on Pinterest and almost every dark grey couch pin had a rug similar to above Ivory Moroccan Trellis Rug from Amazon (affiliate link). So, I knew I would need something white or cream with some kind of geometric design. I picked something slightly different but Pinterest is a great guide if you have no clue!
Tip 2: Orient furniture around the room’s focal point
What is a focal point?
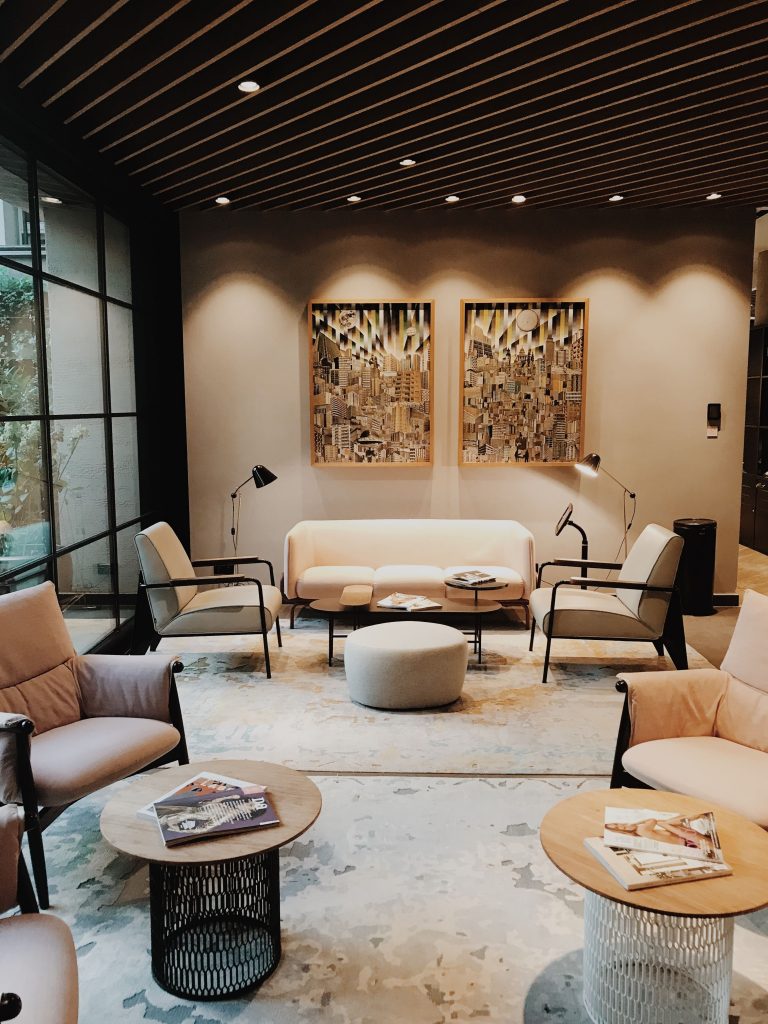
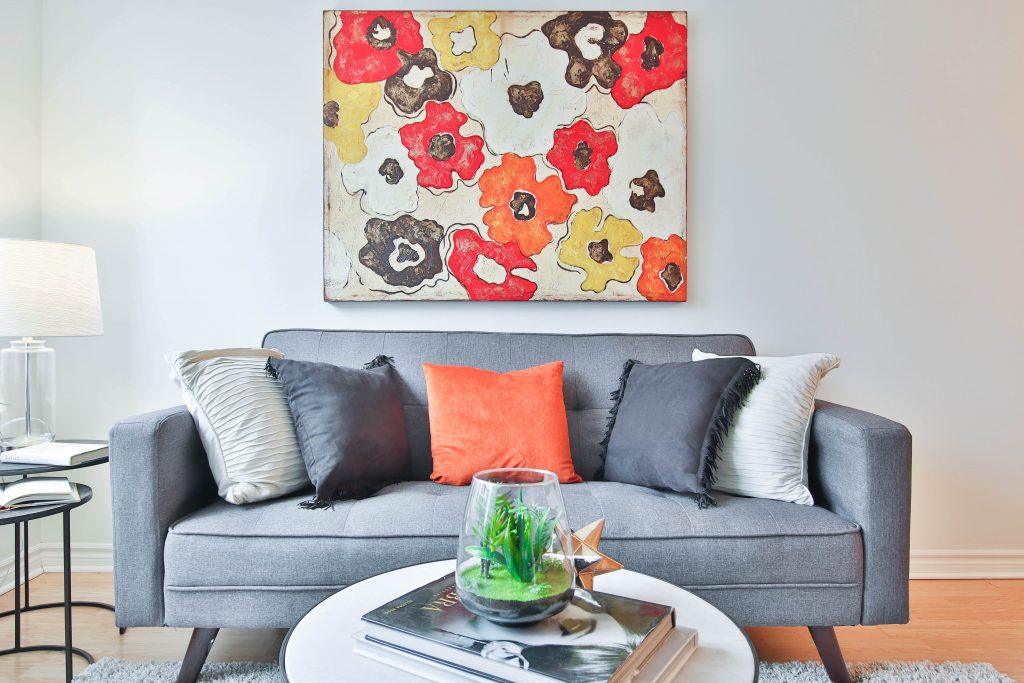
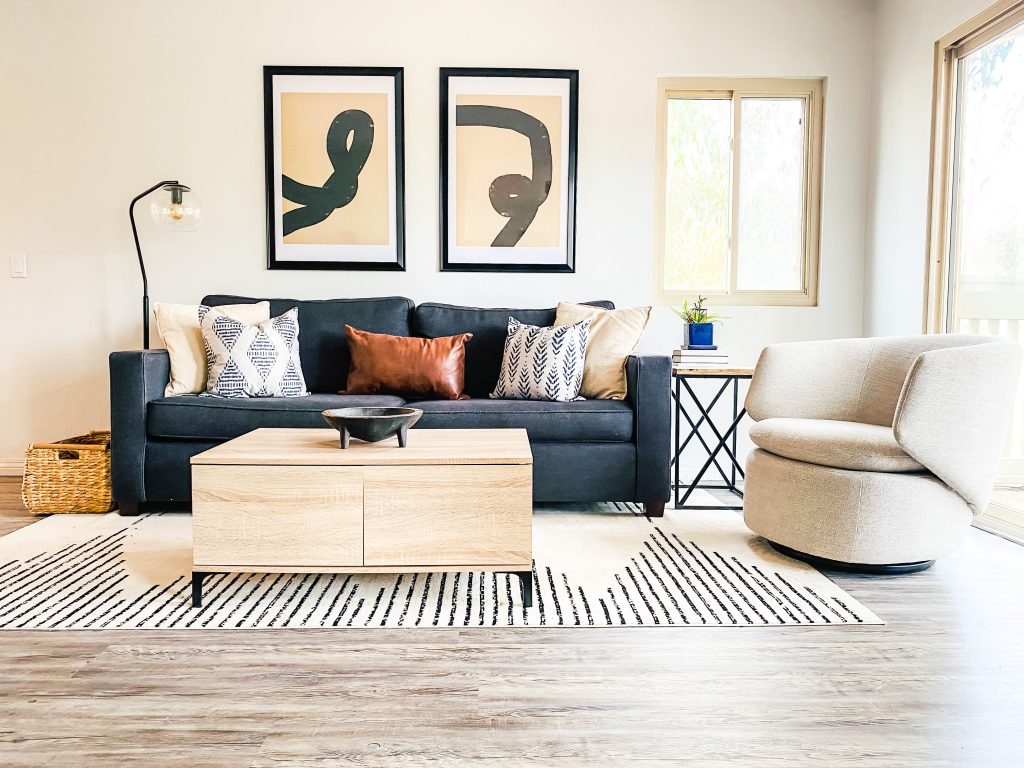
It’s where your eye is drawn as you enter a room – typically an architectural feature but it could also be a television, creative artwork (like below photo), or large mirror. Worthing Court Blog has a great article on focal points, How to Deal with Multiple Focal Points.
How do I use a focal point?
Now you can use the focal point(s) to orient your furniture and rug around. You don’t have to make all the chairs face a window, but you would cluster large furniture around your focal point or use furniture to draw your eye towards your focal point.
No fail combo
If you really get stuck just remember a basic room combo that is nearly foolproof: 2 chairs and a couch for a living room.
For my living room, we had huge sliding doors that overlook trees, which is a natural focal point during the day. However, I chose the longest wall in the room for my second focal point, right where the couch will sit. That way, even at night I would have a focal point, which would be some large artwork above the couch.
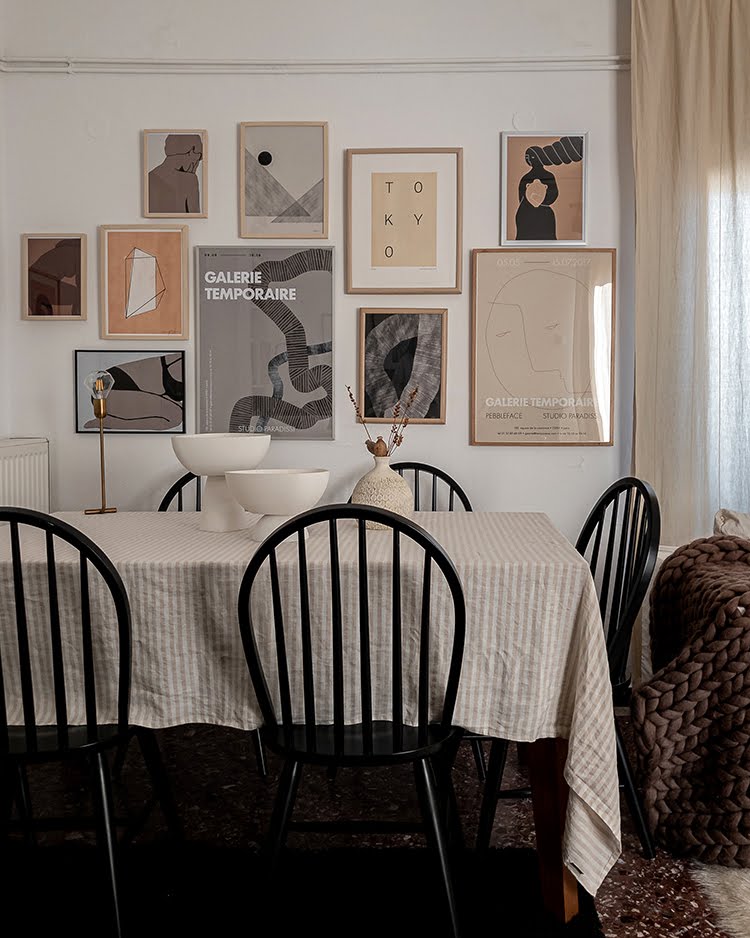
Tip 3: Use symmetry to design a room
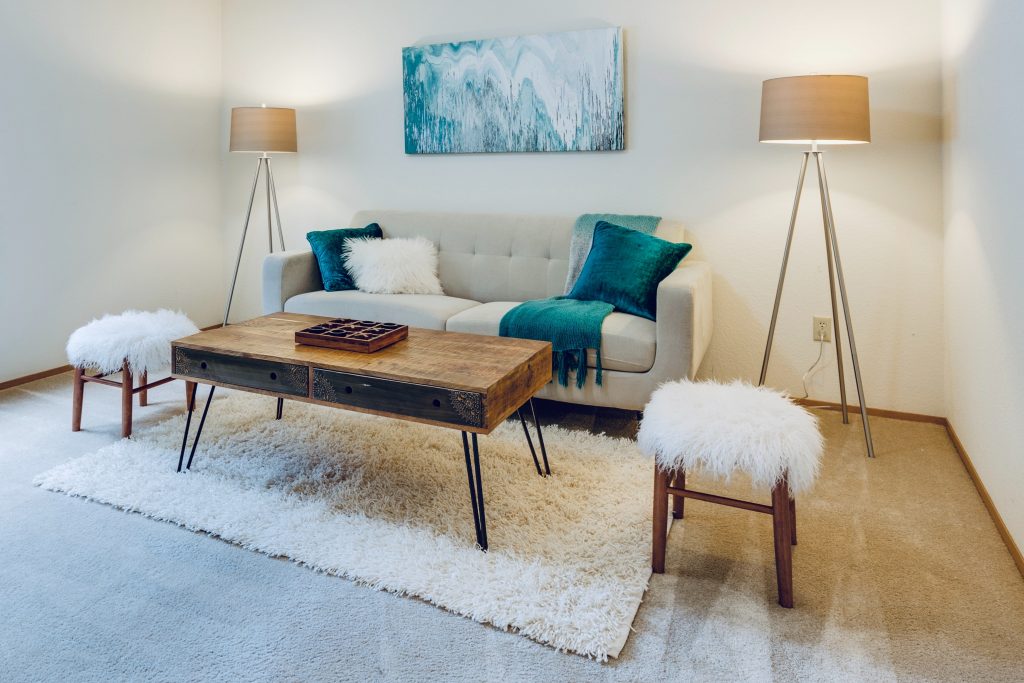
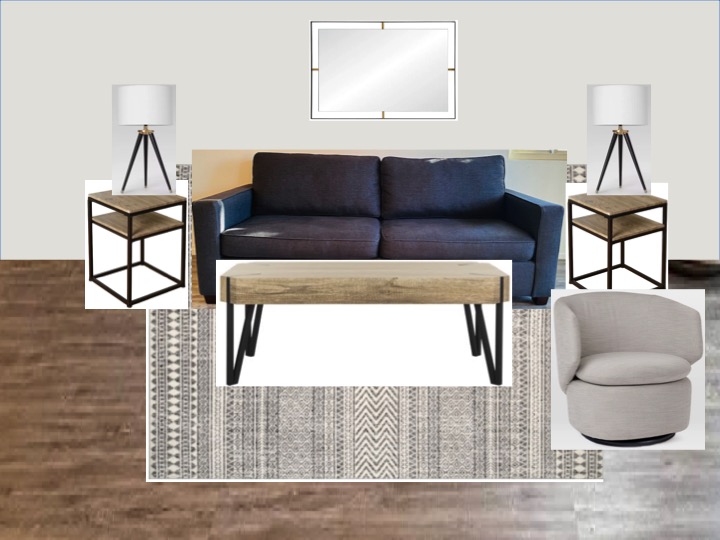
Trying to remember to use symmetry in room layout is important, and it gives a feeling of balance. It makes the design seem more traditional but very intentional and planned. An example of symmetry is in the above photo with 2 lamps and 2 stools. If you can’t get 2 of the same pieces of furniture, you can also use symmetry in terms of accessories, wall décor, or lighting.
My incorporation of symmetry is going to be the 2 pieces of matching artwork that will be a focal point above the sofa.
Step 6: Consider the rest of your home design.
Look at adjacent rooms…
Make sure you consider the other rooms next to the one you are redesigning. In the open-concept homes of today, this is especially important to stay within the color palette and design style of the whole open area to create a cohesive look.
Determine your whole house color palette.
One way to make sure your whole house stays within the same color palette, is to check out this great post, 7 Steps to Create your Whole House Color Palette, by the School of Decorating blog.
This process really helped me think about the color palette I could use for my whole downstairs (my upstairs still needs a lot of help). You don’t have to use this for only paint colors, you can use it for selecting furniture, pillows, and accents too. It makes shopping waaaay easier!
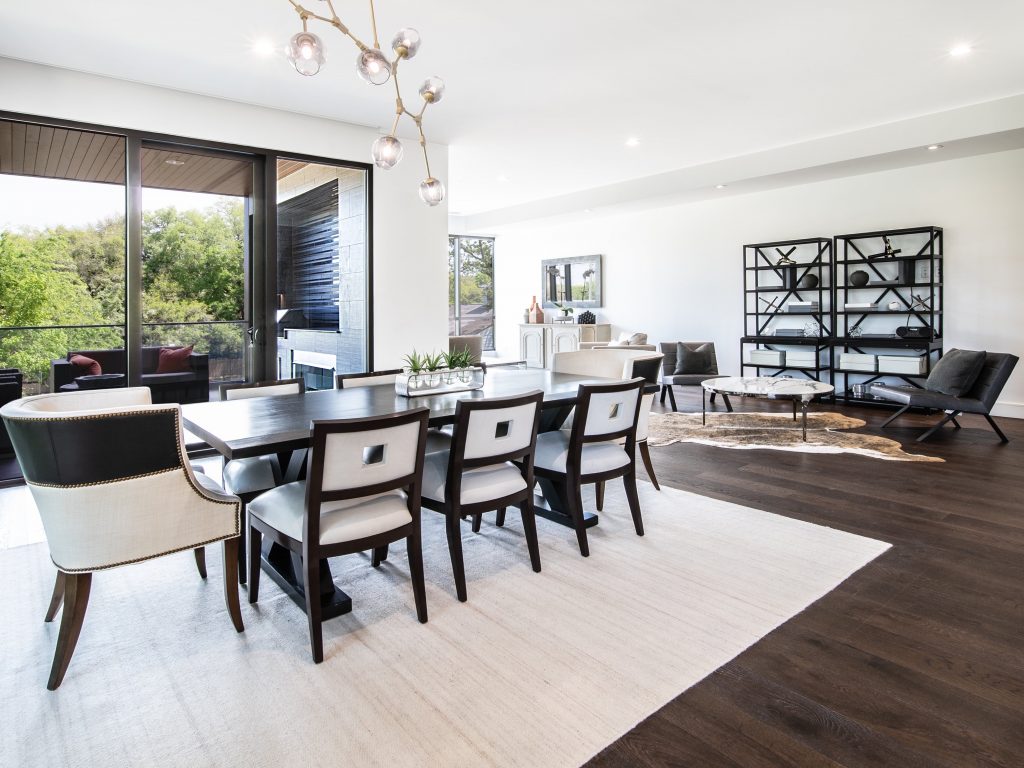
Using this process, I looked at my dining room and kitchen, which connect to the living room, and are mainly white, grey, black, with brass hardware and beige trim on all the windows.
Based on my existing color scheme, The whole house color palette I chose is pretty neutral: grey, black, cloud white, and beige, with accent colors of camel and brass to add some warm.. I used the Kelly Moore MyColorStudio Tool to put my whole house color palette together below.

Don’t know where to start?
What if you have a “blank slate” and don’t know where to start? One piece of advice I heard while we were renovating our first home, was to look at the clothing in your closet. Then, take note of what colors you (and your significant other) tend to buy of clothing.
Your clothes are likely colors you love, and would be great picks for your home too. This was totally true for me, I have tons of grey, black, white, and beige clothes too!
Step 7: Find your signature or lead piece for the room design.
This is a little design trick recommended by both HGTV and this great blog View Along the Way, of picking one of the most colorful items in the room first. It could be just a chair, a throw pillow, a piece of fabric or favorite artwork. The signature piece will help guide your color decisions for everything else, which makes shopping so much easier, and faster.
I didn’t think I needed this step but this blog post from View Along the Way changed my mind: Decorating 101: The Cheater Formula to Decorating a Blank Room. In the example below, the artwork is the signature piece.
For my signature piece I chose the beige and peachy bark of the eucalyptus trees, which are part of the amazing view you get from my living room windows. I used this color to inspire my coffee table purchase, pillows, and art.
I really wanted to warm up my primarily grey and white color scheme, to make things less sterile and more homey. This beige/peach combo did the trick perfectly!

Step 8: Make a budget – and stick to it!
This can be tough, but set something you are comfortable with. It can be really hard, I know, especially when you first buy a house, then remodel it, then you have hardly any money left to get new furniture (been there, done that).
In Step 9, you’ll start to put together a plan and shopping list, so you will get a feel for how much things will actually cost. There are ways to make everything “fit” into your budget – by using more of what you already own, painting your existing or pre-owned furniture, yard sales, thrifting, etc.
I decided to try to keep my living room redesign to $500. This was a personal challenge to myself since I wanted to showcase my skills at finding affordable modern furniture & decor to design my room.
Step 9: Make a plan.
First, gather your goodies…
Keep your work together that you’ve done so far, such as your inspiration photos, floorplan, whole house color palette, and your signature piece. Make sure you also add any fabric samples, flooring samples, and paint chips that you love.
Next design a mood board…
This is my favorite part! A mood board is basically putting the room together on your computer, with cropped photos of furniture, pillows, curtains, flooring, everything! The goal is to see if it all “goes” together to make a cohesive room design. Here was my “first draft” mood board. I can go through a lot of different versions!
Software Solutions
You can really use any program where you can arrange and layer photos together.
- You can use the Snipping Tool on PC’s or the Grab tool on Mac’s for cropping photos from furniture retailers on the web.
- I use Microsoft Powerpoint to make a mood board on a single slide, since it allows you to “bring to front” and “send to back” in terms of arranging photos.
- For a bunch of options to make a mood board, check out 5 Go-To Resources for Making a Moodboard by the Chris Loves Julia blog.
An art, not a science
This is way more of an art, than a science. Use your inspiration photos for guidance – look to the professionals on Pinterest & Instagram for how to add contrast, color combos, where to place lighting, chairs, etc.
Look to the pro’s for guidance
I looked to my inspiration photos & simple Pinterest searches for “modern living room” to determine:
- If I could put a floor lamp on one side of the couch, and a table lamp on the other (short answer: yes).
- Where and how to incorporate plants.
- What kind of rug I should contrast my coffee table and couch with.
- Even throw pillow inspiration and guidance!
Then make your shopping list…
I like to include the link (and price) of an item I found online in the notes section of my Powerpoint mood board, so I can easily go back and buy it when I’m ready. This is really what I use to develop a prioritized, fully costed shopping list – and identify what I can buy now versus later.
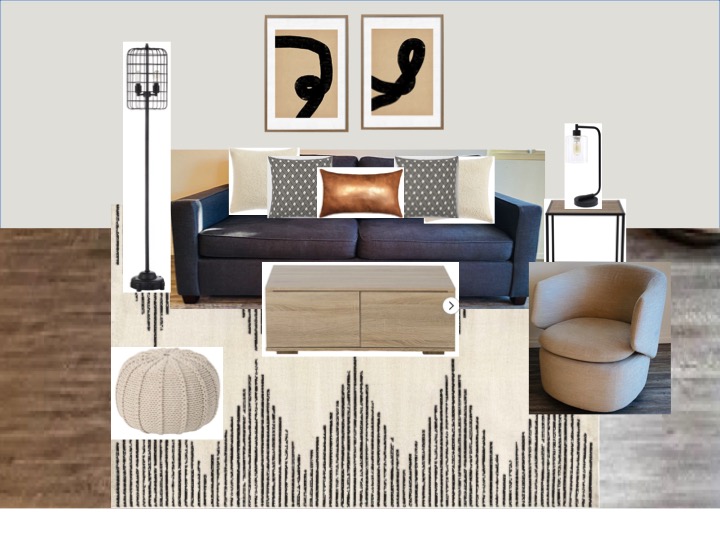
Here is my mood board with my living room design:
Step 10: Go Shop!
First thing is, make sure you made an online shopping list of items you put in your mood board. Then, Note down all the prices of each item, and try to make it fit into your budget by cutting corners when you can (& prioritizing).
Now it’s time to go out and try to beat those prices and find a bargain!
Prep for your shopping trip
Grab some of your swatches, paint chips, and load up your phone with photos of your mood board and shopping list (maybe even print it out).
Try discounters first
Go for the most affordable places first, like thrift stores, Big Lots, HomeGoods, Ross, Tuesday Morning, and TJ Maxx. Having your mood board with you will give you focus and keep you from feeling overwhelmed, or from getting off track. Make sure to check the clearance sections!

Online shopping next
Shopping online is also super awesome & convenient, although I like to buy online from retailers like Target, Home Depot, and Wal-Mart since you can take store-returnable items right back to the store. Also Amazon has tons (not all) of items with free returns for Prime Members.
A few major watch outs for online home decor shopping:
- Make sure you read the retailer’s return policies & watch for restocking fees. Free returns are pretty rare at online only furniture stores.
- Read both the good and bad reviews to know what you are in for.
- Check out the item’s measurements in the specification section. Remember with furniture – height matters, especially when it comes to coffee and side tables.
- Don’t do what I did and order a coffee table online, just to have it delivered and it’s 4 inches too short when I put it next to my couch! Good thing my hubby is handy and can add some legs to it!
Wait for a holiday (if possible)
Keep your eyes peeled during the holidays and check your favorite online (and in person) stores for sales like on Memorial Day, July 4th, Black Friday, etc. Check out my resource page for a full list of affordable modern furniture sources. Target.com often puts home decor and furniture on sale during holidays.
Try a simple DIY hack
If you really can’t fit everything you want into your budget – think about a small DIY project to give something you already have a face lift. Pinterest is a great source of DIY hacks and updates for almost anything. I decided I would try two things to save $:
- Update a floor lamp I have by spray painting it black and changing the lamp shade – savings of about $40.
- Get new pillow covers for existing pillows (not exactly a DIY but certainly saves $$). H&M Home and Amazon (affiliate link) are both great, inexpensive sources for pillow covers.

Amazon even has the above throw pillow cover sets (affiliate link) you can buy to take the guesswork out of mixing and matching pillows.
Mix it up
Try not to buy everything matchy-matchy but buy from different retail stores and brands. Keep to your budget, but it’s ok to make changes if you find a great deal!
Step 11: Embrace Design Trends, But Cautiously
Solid advice from HGTV was to try to keep super trendy items limited to accessories when designing a room. Ultimately it will save you money by not having to redecorate very often, if you avoid trends on big, expensive pieces.
Neutrals are good for pieces like your sofa or bed.
Pillows or artwork are great for exploring new colors, textures, and patterns. For example, Mud cloth pillow covers (affiliate link) may not be in style forever, but changing out a pillow is way easier than changing out a couch!

Step 12: Lighting is Key
Changing lighting can really change your room’s look and feel. In addition, a lot of lamps today are almost pieces of art in themselves, and are considered part of the design. There is lighting for doing specific tasks, checking email, ambient lighting, or mood lighting.
Our living room was super dark, as we had no overhead lighting. So, lighting was critical to my design. I knew I wanted at least two lamps for this area. This short lighting tutorial video from West Elm helped me figure out what type of lighting to get:
Since I didn’t want the more traditional look of the symmetry of two end tables on either side of the sofa, I went with one floor lamp and one table lamp.
I chose black metal lamps (example below), with a modern/industrial feel, to go with some of the furniture pieces I had in mind. The glass shade echoes the pendant lights I have in my kitchen, helping create a cohesive whole-house design.

Simple Designs, Black Bronson Desk Lamp. (affiliate link)
Step 13: Make It YOUR home.
Personal touch
The final step in learning how to design a room is to simply make it personal. Add your personal touch such as a beautiful photo, books you love, or collections. Even keepsakes like baby items or mementos could find themselves into room décor.
Get artsy
Finding artwork you love is another great way to reflect your personal style. It has never been easier (or more affordable) to order large prints (Shutterfly) or find printable original art online (Etsy), to create something unique that is just perfect for your space.
What I did was find an awesome & inspirational modern interior design blog, “My Paradissi“, who has a printable shop on Etsy. I just loved this woman’s design esthetic – she’s an architect and interior designer named Eleni living in Crete, Greece. Art is personal – pick something YOU love.
I bought a couple of Studio Paradissi’s abstract art printables for $8 each, then printed them out (Wal-Mart and Walgreens have inexpensive poster printing online). Once they arrived, I simply popped the prints into some black poster frames I already had (from Wal Mart). This was a total of about $50 for 2 large pieces of wall art!
Conclusion
Ok Wow! This was a long post, glad you are still with me. I wanted to make an ultimate step-by-step guide on how to design a room that would help out beginners at this whole decorating thing. In addition, I wanted to share my own experience and research to try to help someone else out too.
We covered everything from the idea stage, finding inspiration, planning, shopping, and incorporating a personal touch.
The final step…
The final step is putting it all in place. Your floorpan and mood boards should help guide you where to actually place everything in your room when you (finally) get everything home.
Hope this guide helps you to update and learn how to design a room to achieve a thoughtful, cohesive modern look.
Leave a comment!
Leave a comment below or message me if you get stuck along your own journey. I would love it if you leave me a photo of your before and after if you used this process – happy decorating!