Do you have an old, dated bathroom, but dream of a modern, beautiful, and insta-worthy one?
Interested in tackling a DIY Bathroom remodel yourself – but have never tackled such a big project, so not sure what you are getting into?
You’ve come to the right place! We recently remodeled TWO bathrooms so want to share all our tips, tricks, and mistakes. I’ll show you that you don’t need to be a professional contractor to do a basic bathroom remodel – you got this!
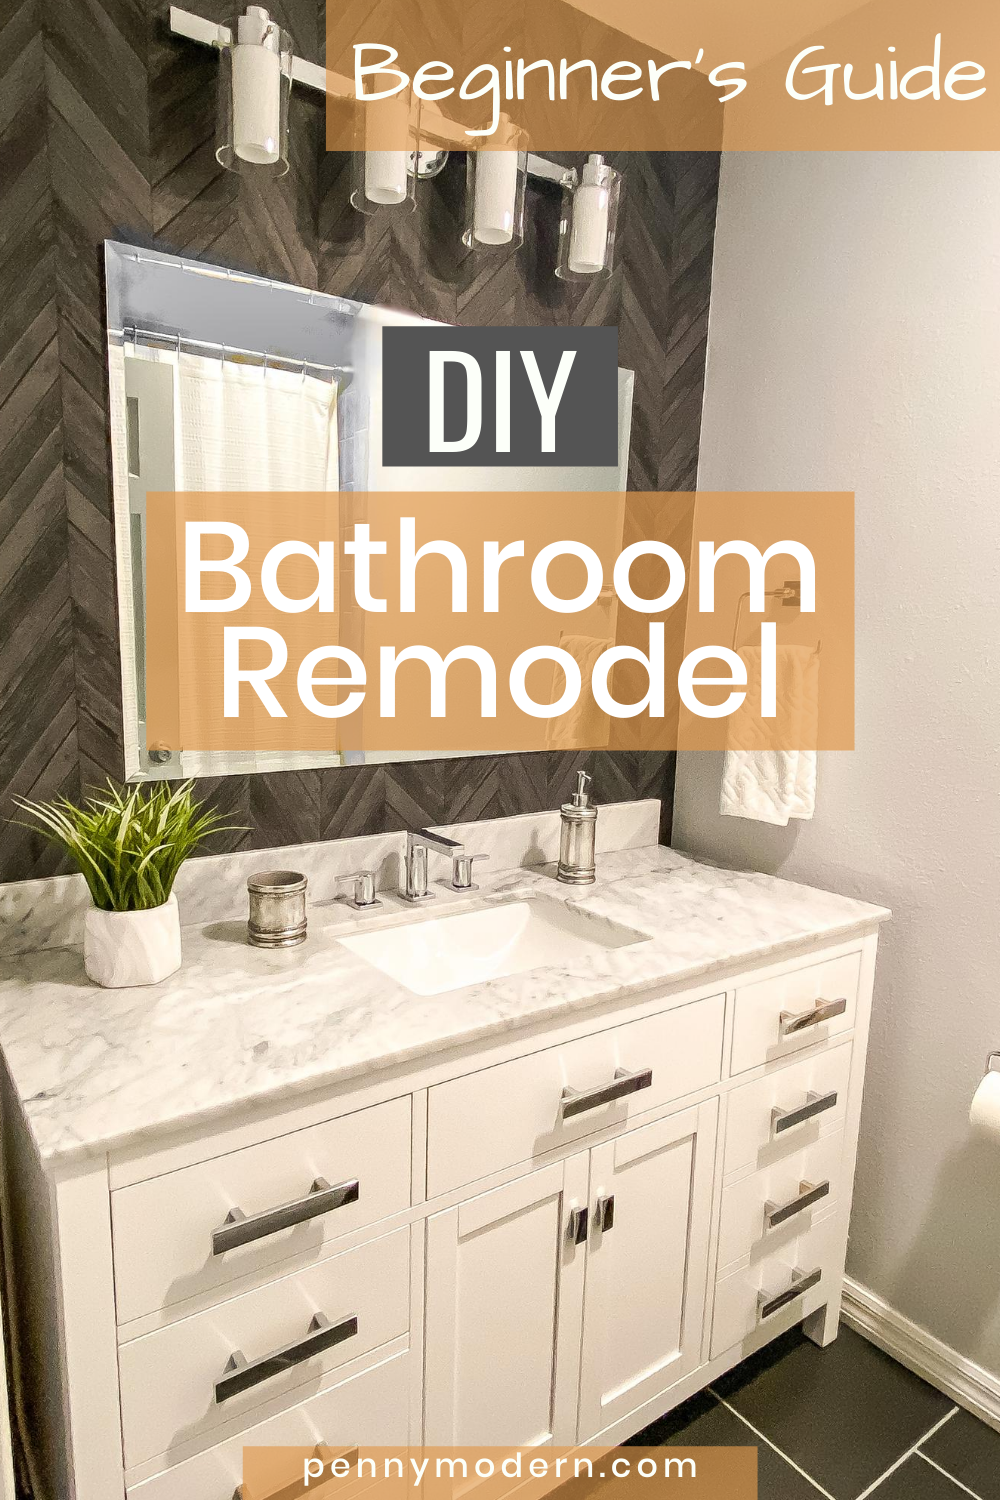
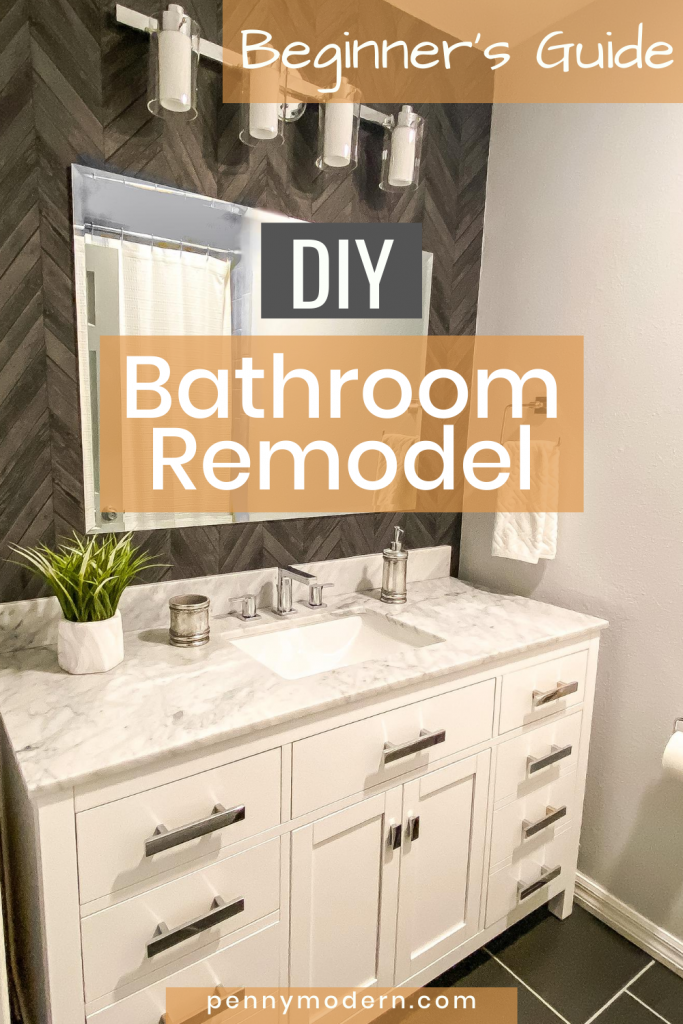 Save this Beginner’s Guide to Pinterest for later.
This article will outline the whole bathroom remodeling process from start to finish, specifically for someone who is a beginner DIY’er. You will get:
- Awesome, practical tips we learned at each step of our own bathroom remodel
- Learnings from all of our mistakes so you don’t make the same ones.
- Tips on planning and prep, budgeting, materials and labor
- More tips on demo, tiling, and shower/tubs.
- Info on selecting and installing things like vanities, toilets, and lighting.
I’ll take you along when we renovated our TWO small bathrooms (except for the tub/shower area) in one week, using our own blood, sweat, and tears. Yes there was blood, it was mine, and it was only a minor scrape (during the luxury vinyl tile install).
We are regular people just like you, although I do have a handy husband, and this was our first time doing such a big project ourselves. I thought our bathroom remodeling experience (and mistakes) could help out other first timers!
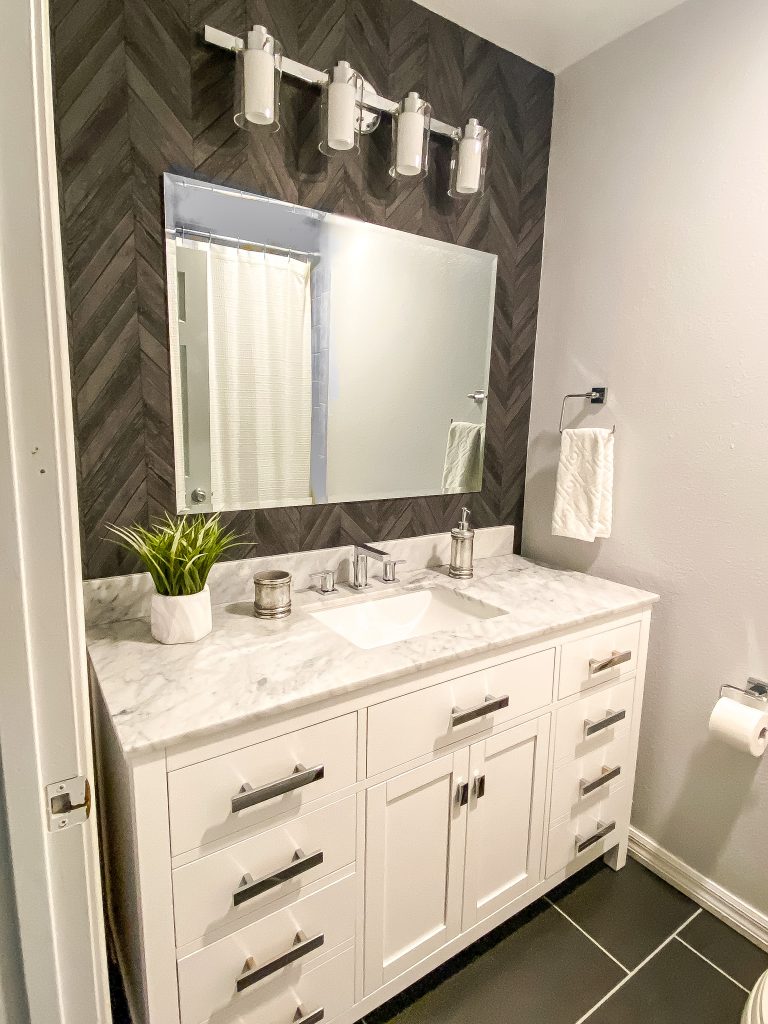
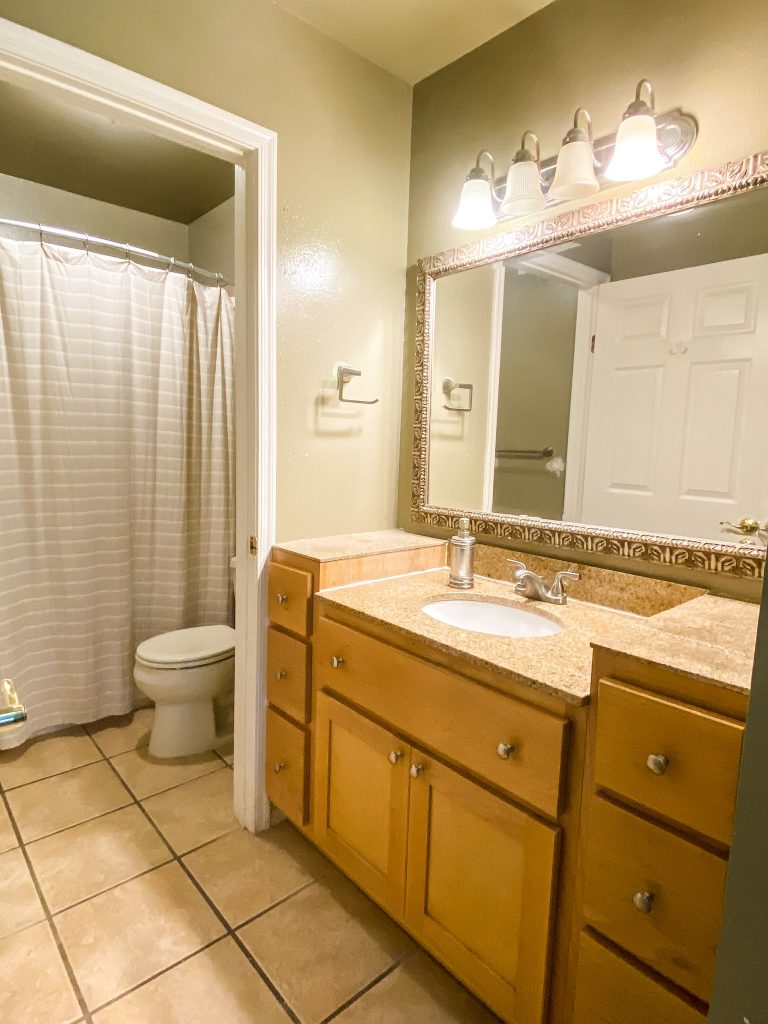
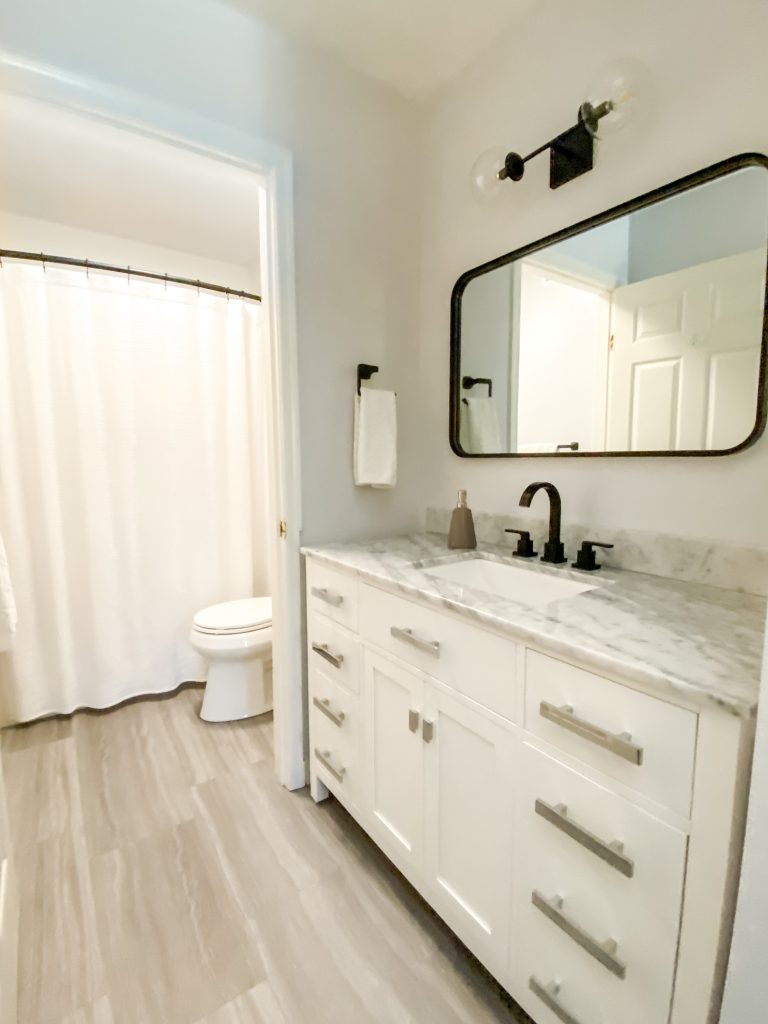
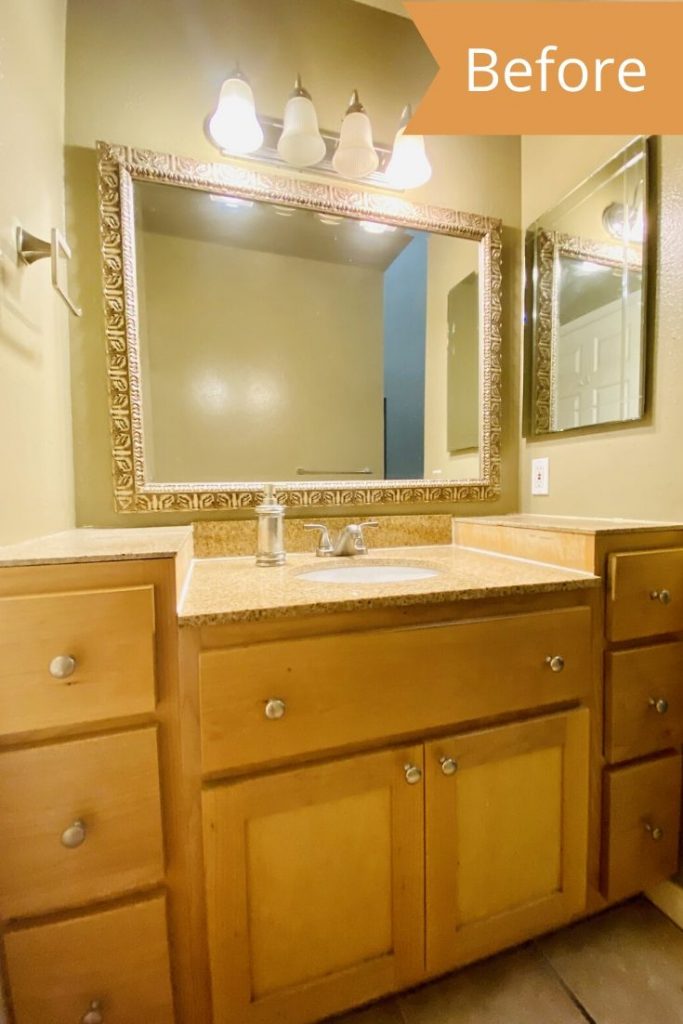
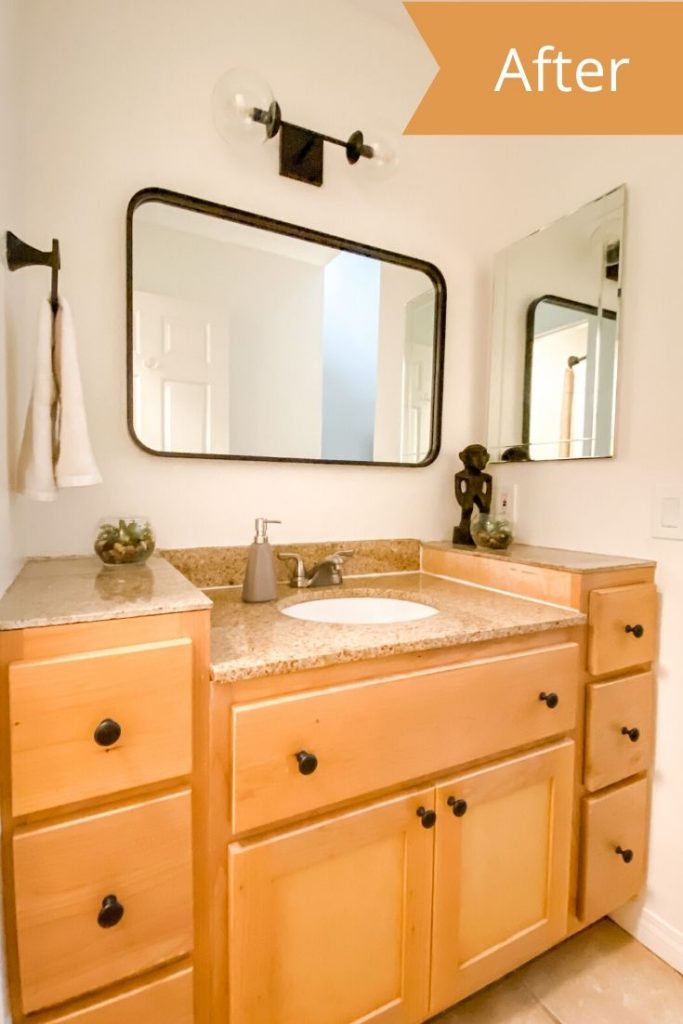
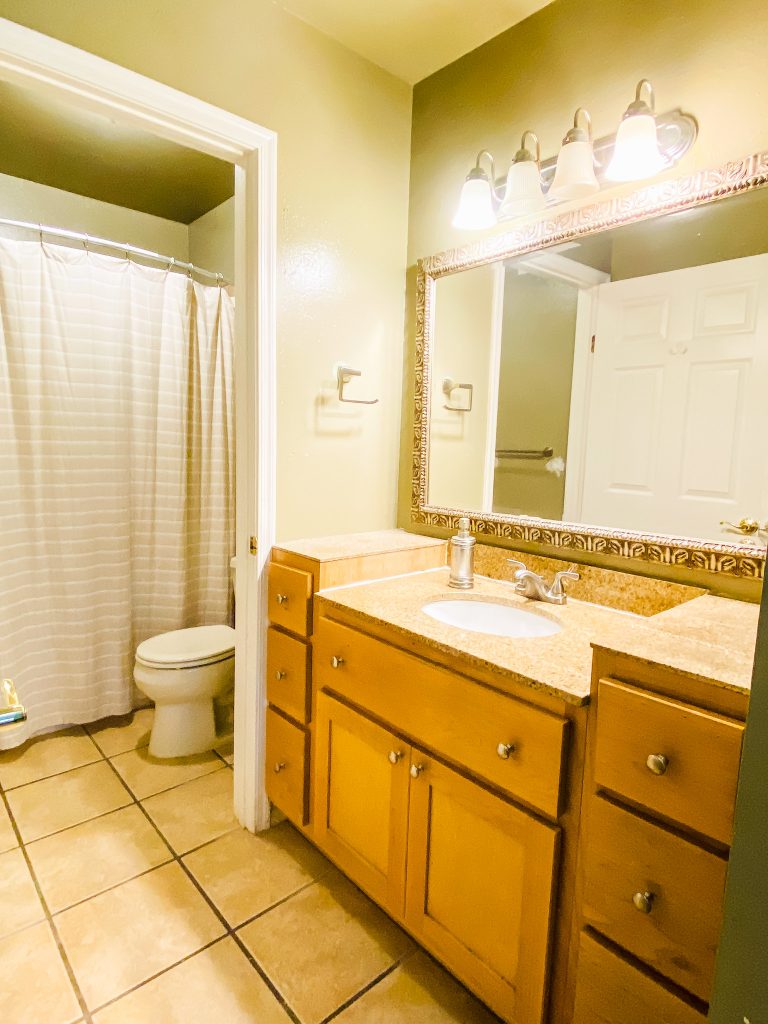
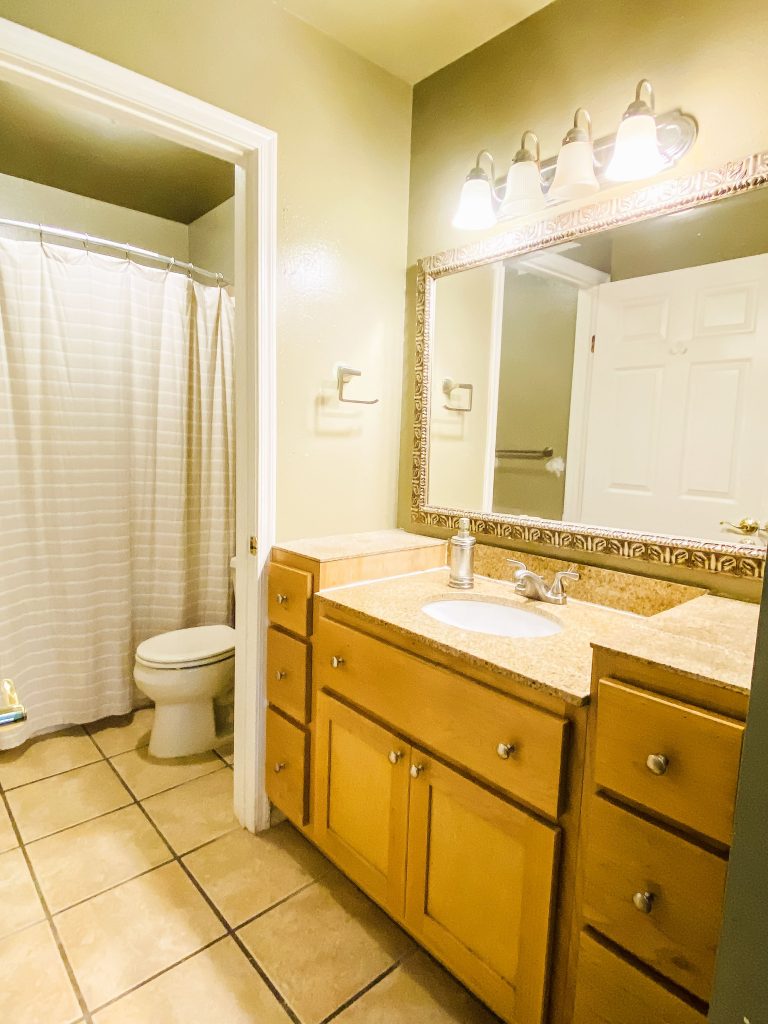
Before and after of our guest bathroom DIY remodel
After reading this, you will be able to tackle your DIY bathroom remodel with confidence, to get a stunning result that will last for decades.
Let’s get you the bathroom of your dreams, right this way!
Disclosure: This post contains affiliate links. As an Amazon Associate I earn from qualifying purchases, at NO extra cost to you.
1. Make a design plan
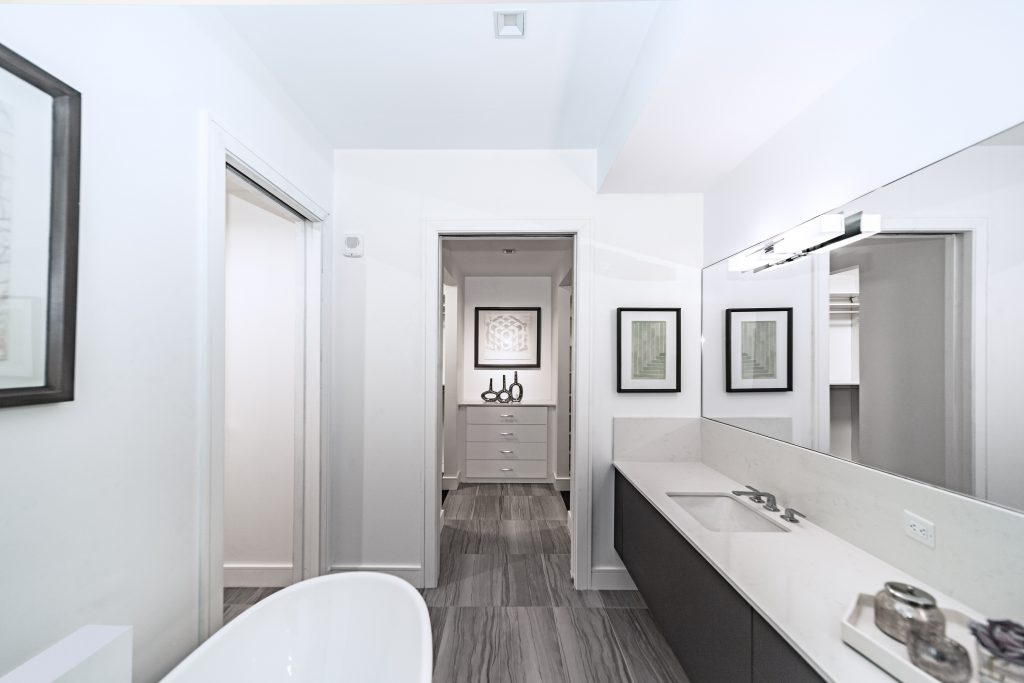
Before and after of our master bathroom DIY remodel
First things first, I needed to come up with a plan before we started any demo. We had a 1 week timeframe to finish TWO bathrooms, which is how long we took off work for our “vacation.” First I needed to figure out what I wanted to do.
Get inspired
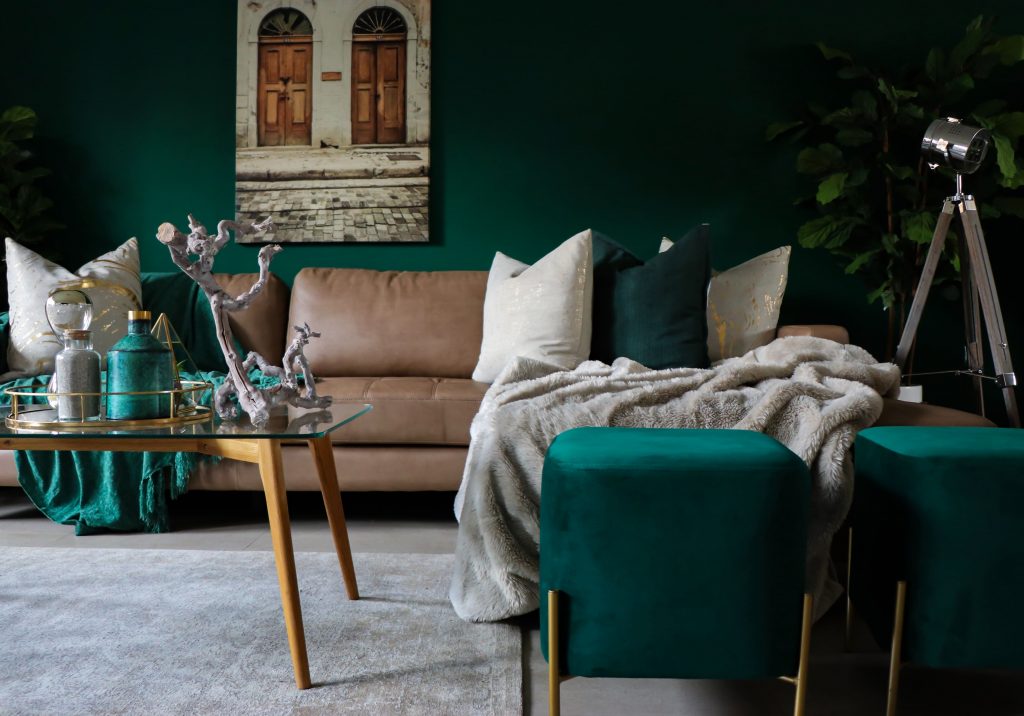
 Inspiration photo courtesy of: Random Sky via Unsplash
This is the fun part – looking on Pinterest and Instagram for beautiful bathrooms for design ideas. If you have flooring stores or fixture showrooms, go there and look around. Grab tile, flooring, and paint chip samples if you can. Even Home Depot and Lowes are good sources of inspiration.
Here are the Pinterest boards I created for my own project:
Grey and White Bathroom Ideas
Black and White Bathroom Ideas
Pick a color scheme and design style
Picking a color scheme and basic style are two tasks you need to complete right away, as it will help narrow down your options when shopping.
Search online using your chosen style name “modern bathroom ideas” or color scheme “grey and white bathroom ideas” on Pinterest and pin away! A lot of stuff may be unaffordable, but it can give you an idea what types of looks and styles to aim for in your design plan.
A great article by That Homebird Life, for helping you choose your materials, finishes, and colors is the Step by Step Guide to Choosing Materials for a Bathroom Renovation.
Use what you got
One way to save both time AND money, is to leave things right where they are. For example, changing your bathroom layout will be much more complicated than just replacing what is already there. If this is your first DIY bathroom remodel – I advise you to just replace what’s already there.

In terms of the design – you can also use the other parts of your home to drive the design. For example, our kitchen cabinets were white shaker so I wanted our bathroom cabinets to match.
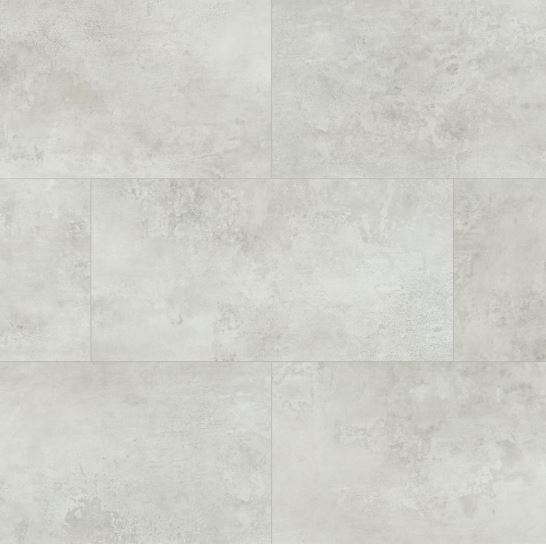
Our flooring on our main floor was a grey wood look luxury vinyl plank, so I knew I wanted bathroom flooring in the same color family – grey or black.
You don’t have to match everything exactly, but staying in the same color family will help make your home look more cohesive and thoughtful.
You do NOT have to do it that way, if you want a beige bathroom with a blue kitchen – that’s ok too! You could always bring in accent colors like backsplash, towels, rugs, accessories, or artwork to tie the two rooms together.
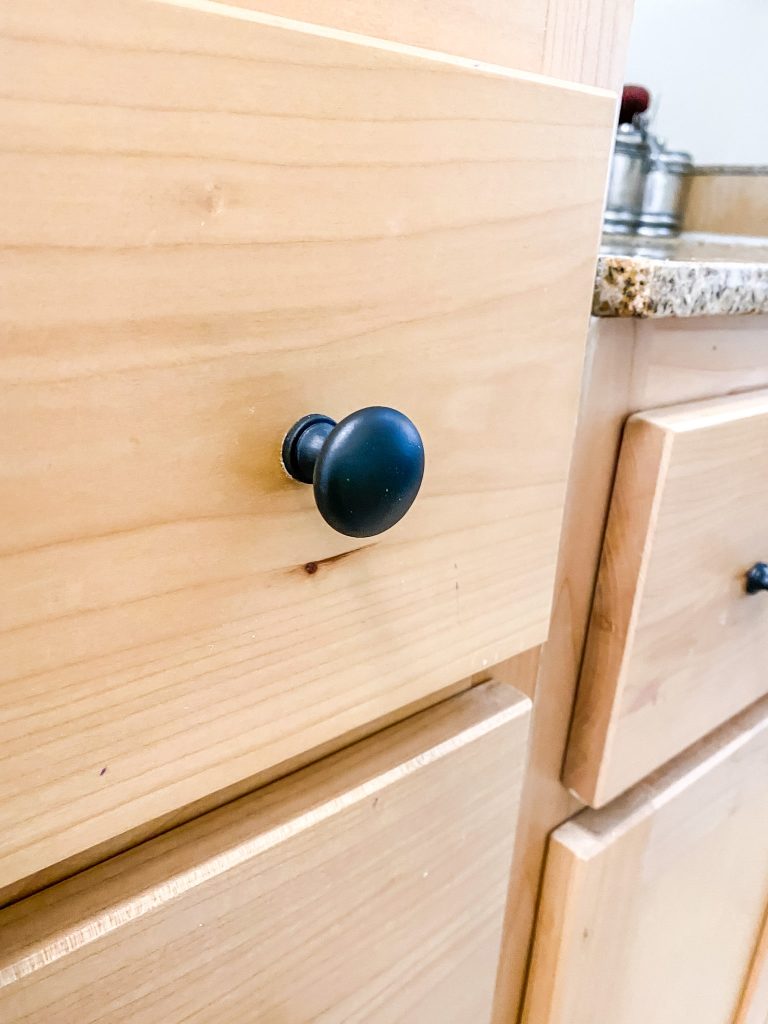
Another way to use what you already have, is to keep some elements of your bathroom that are still in good shape. That could mean using or painting an existing vanity, or keeping or painting your hardware.
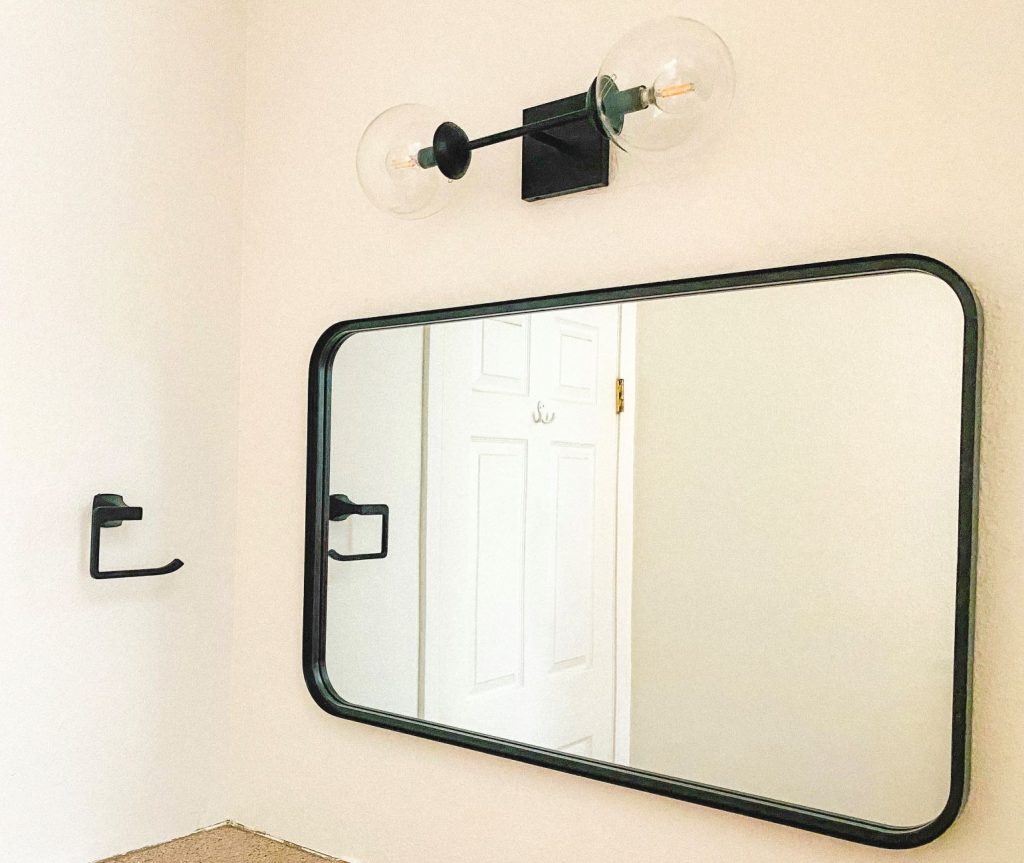
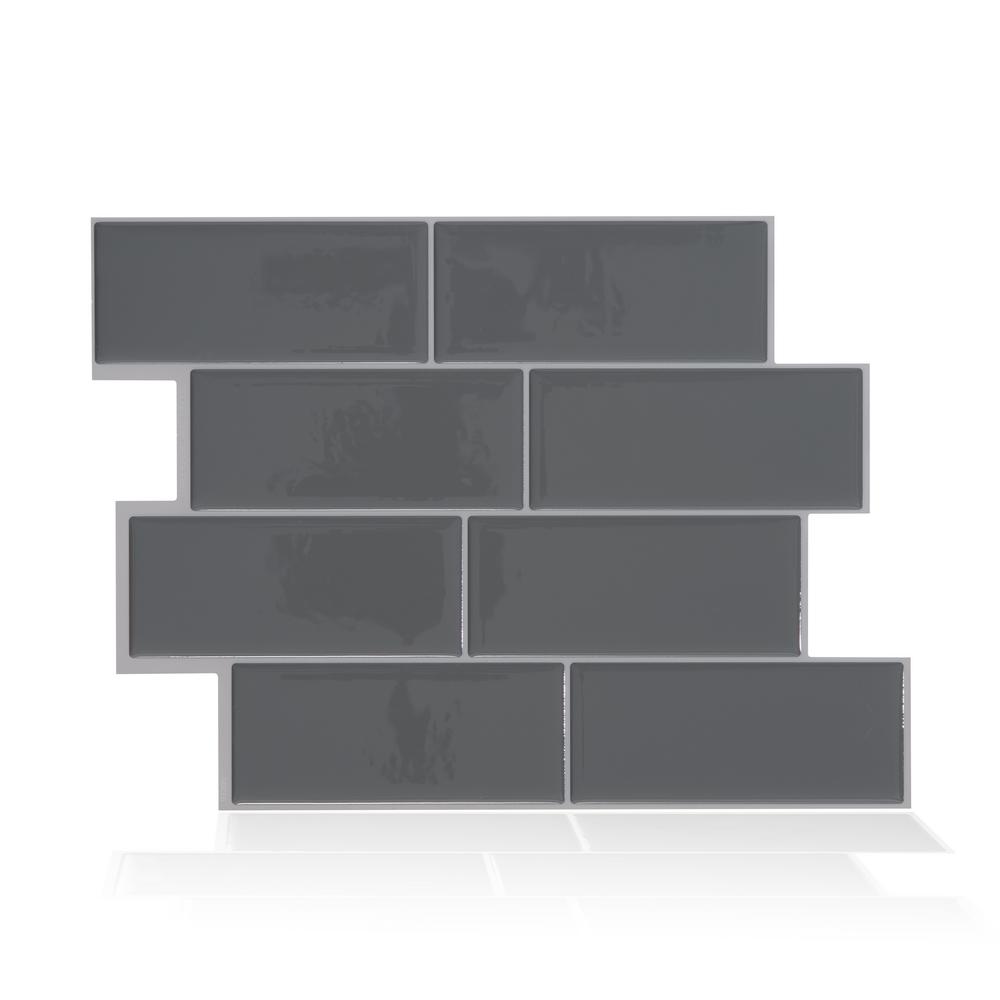
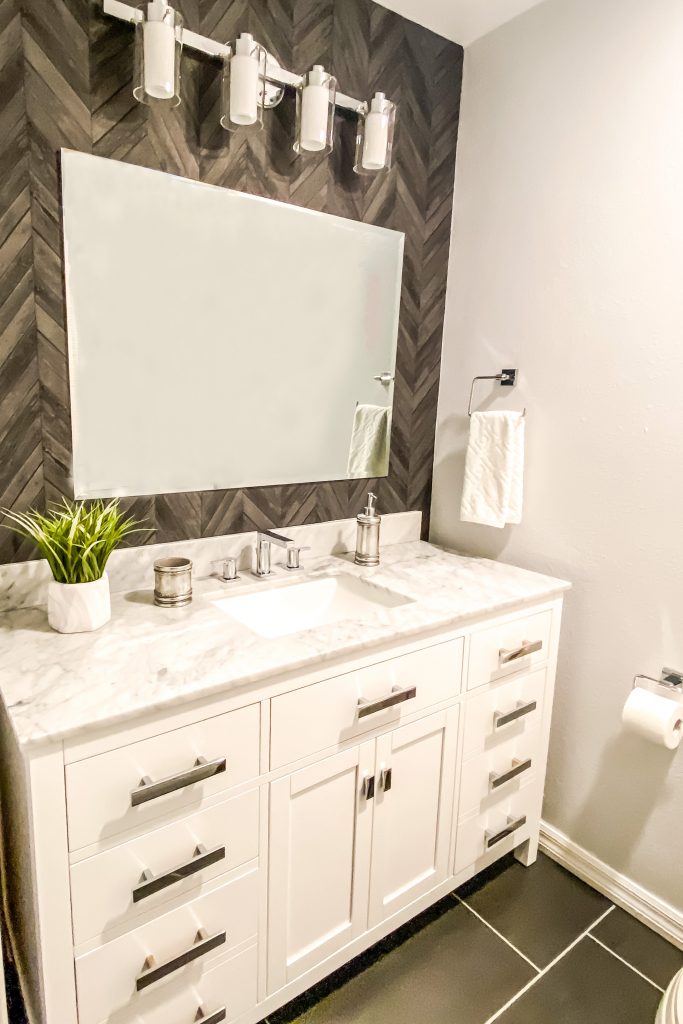
I decided to keep some items in one bathroom that I had recently updated, a black framed mirror, globe light, and flat black hardware. This made me want to go with a black/grey/white color scheme in both bathrooms.
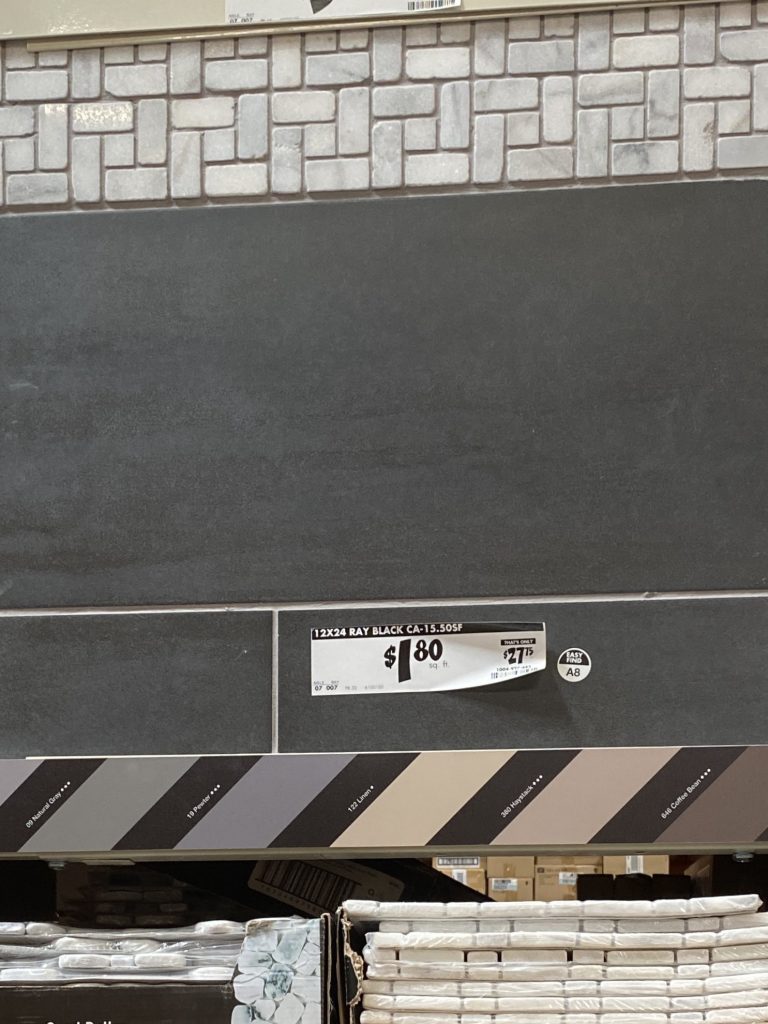
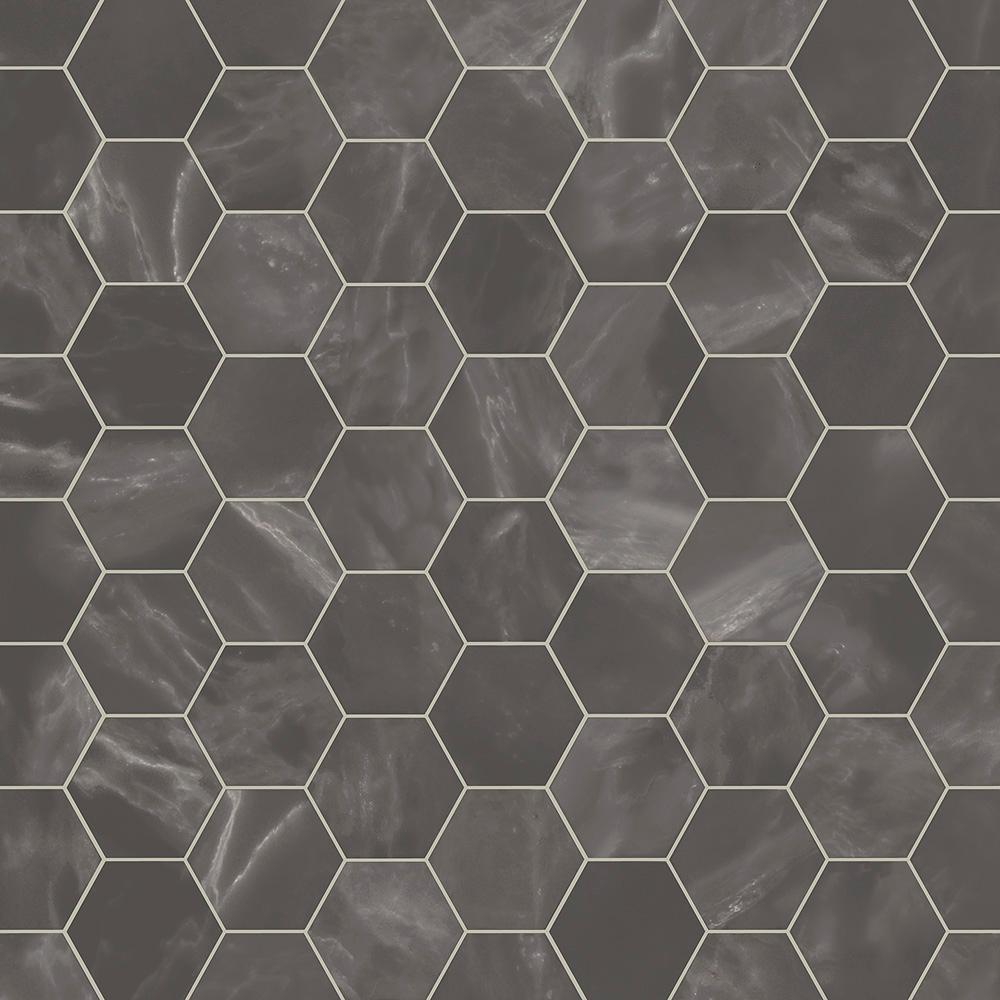
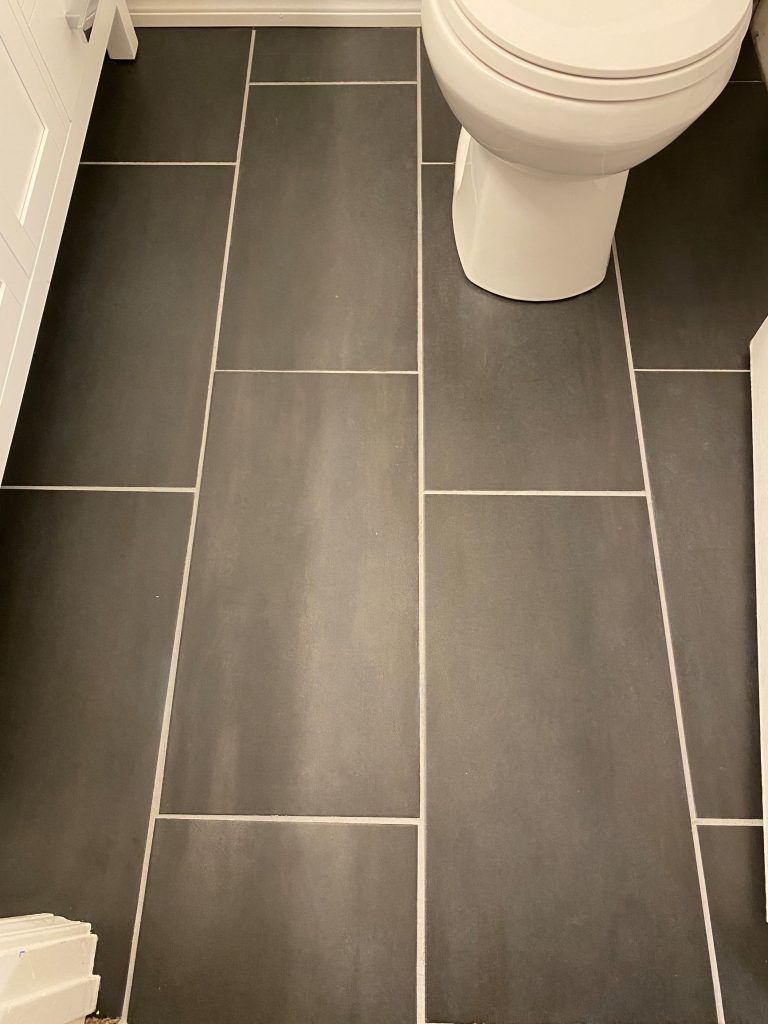
The 12×24 inch ceramic floor tile we selected was called Ray Black from Home Depot. It was less than $2 a square foot so a great deal!
After you get inspired and come up with a basic design plan and color scheme, you need to create your budget…
2. Determine your budget
How much does a DIY bathroom remodel cost?
According to Home Advisor, the average bathroom remodel costs around $10,000 in the United States, and depends on where you live which can drive up (or down) labor costs. For a small DIY bathroom remodel, it might be closer to $5000 refreshing your basics.
In San Diego, California, our full bathroom remodel will cost between $9,000 – $13,830 for each bathroom. That is with doing most of the work ourselves, except for the shower/tub area (we are using professionals for that).
If you leave the shower/tub area out, it would come in closer to $1500 – $5000 if you do everything yourself. The tub/shower is about 70% of our total cost, probably due to all the skilled labor involved.
How do you make a budget for a DIY bathroom remodel?
First cost out your basic essentials
Here’s the basics you need to find and price out:
- Shower/tub
- Toilet
- Vanity, countertop, sink, backsplash
- Flooring (measure your floors length and width, figure out square footage, and add 10% for waste)
- Mirror
- Lighting and bathroom fan
- Fixtures (showerhead, knob, tub faucet, sink faucet)
- Hardware (towel bars, toilet paper holder, etc.)
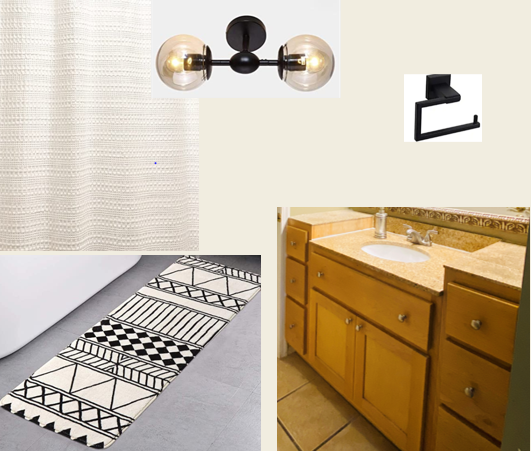
I like to shop online, then snip digital photos and paste into Microsoft Powerpoint to create a mood board. Then you can make sure everything “goes” together and fits your design plan.
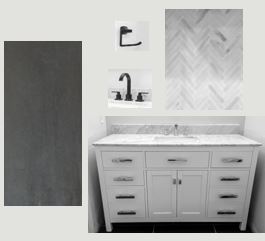 Example of our mood board for our primary bathroom
As I shop, I write in the notes where each item is from, along with the cost. This builds my budget along with my mood board at the same time. Then I can remember where each item is from when it’s time to buy. Here’s my initial budget based on my mood board:
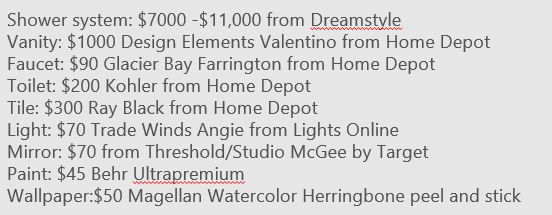 Original budget for materials for primary bathroom
This will give you a high level cost, without any labor, tools, or the smaller items you might need (paint, paint supplies, pipes, wires, switches, baseboard, grout, etc).
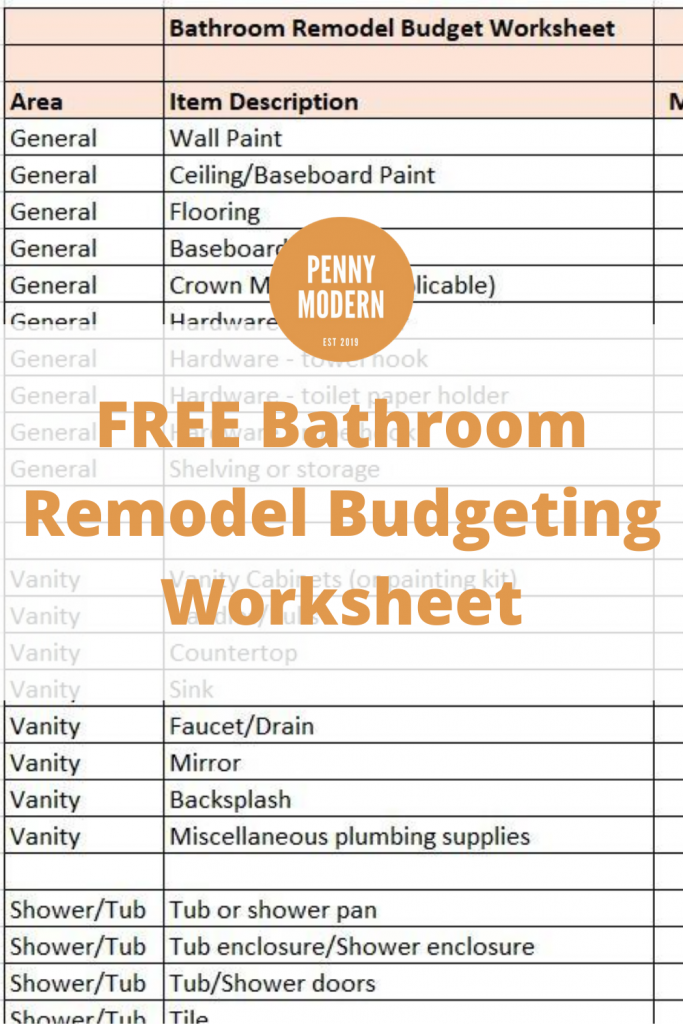
Want a pre-made Bathroom Remodel Budgeting Worksheet to get started on your bathroom remodel right now? Read on…
Next determine labor costs
 Labor can cost almost half the cost of a bathroom remodel
This is a big step since you need to determine who is going to provide the labor. According to Home Advisor, around 50% of a bathroom remodel’s cost is from labor.
You have a few options that are on the less expensive side:
- Do most/all of the labor yourself or have family/friends help
- Use a handyman to help on some of the tasks
- Use a general contractor or specialized trade (i.e. plumber or tile installer) to do some of the more challenging stuff
A handyman can likely install things like ready-to-install vanities, sink faucets, vanity lighting, toilets, and luxury vinyl plank or waterproof laminate flooring.
For certain things, like a shower install or real stone tile flooring, or complicated backsplash, I would recommend skilled or specialized labor.
Cost out tools and ancillary materials
Tools and all the little extras can certainly add up. Don’t forget about this part as you’ll need a lot of special tools for tile, plumbing, and painting.
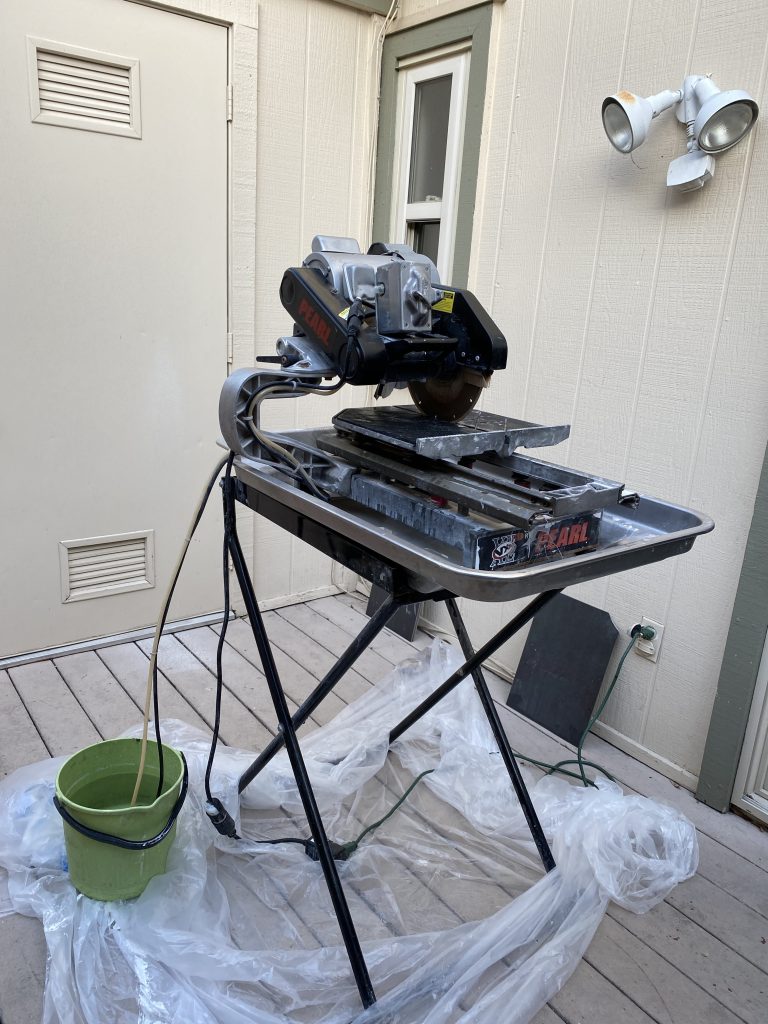
Our large tile saw rental was about $85 for 24 hours from Home Depot. We were working well into the night, to be able to take that baby back on time.
3. Expect the unexpected
This is a really important tip for your budget, and your timeline during any DIY bathroom remodel. When remodeling a bathroom, keep in mind that this room has been exposed to a lot of water and steam over time. Anyways, once you remove things or open up any walls, you may find something gnarly.
Asbestos, mold, and termites are real. If your house was built pre-1980, it is likely to have one (or more) of the above. Also some older homes will likely have lead paint in some of the older paint layers, which is also a concern when you sand the walls, or rip out drywall.
Add 10% to your budget for something unexpected, also called a contingency.
What do I do if I find something unexpected during my bathroom remodel?
For us, we started demo’ing our tile on a Friday night, and found a layer of tile under the tile. I took one look and knew it was that old, thin, ugly, asbestos tile.
 Demo can expose some nasty stuff
We stopped everything, left it alone, got it tested the next day at a local lab (Yelp helped me find one). The results came out positive for asbestos and then we called a couple of asbestos abatement companies to remove it safely (Yelp again).
We got the asbestos tile professionally abated for around $1000, for a 30 foot square floor. It was about a 2 day delay, but we did some tasks in the other bathroom while we waited.
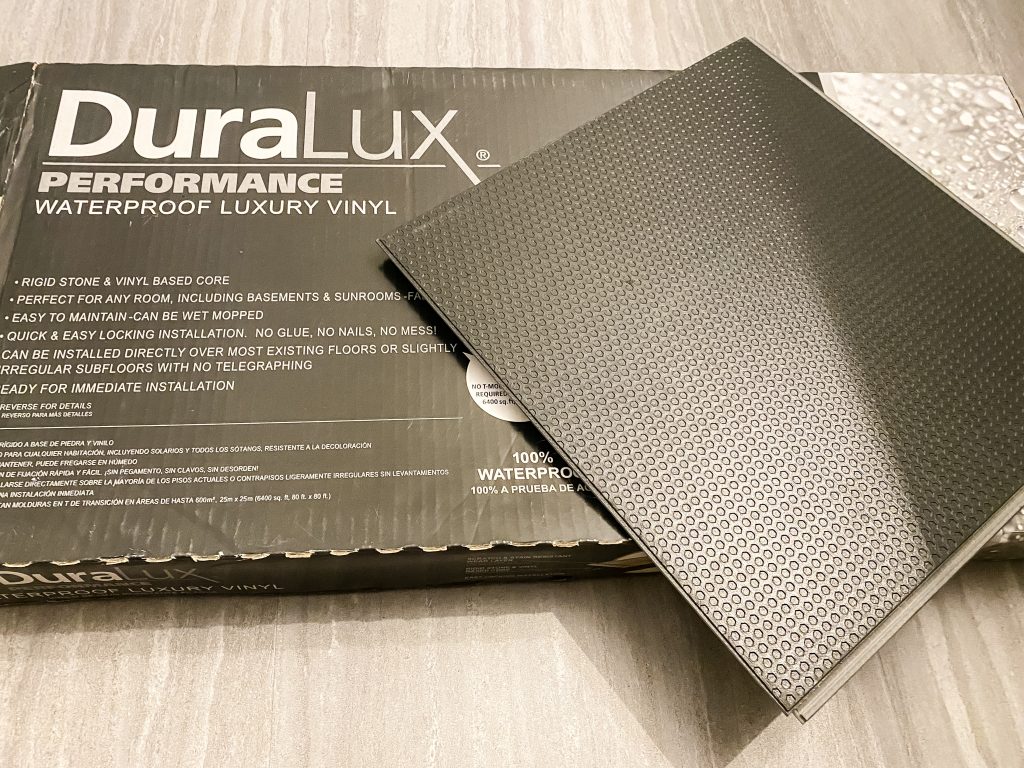
This also changed our design plan for our other bathroom. We chose to put this awesome waterproof luxury vinyl tile on top of the existing tile, vs ripping it out.
If you think you find asbestos, mold, lead paint, or termites – my advice is to call a specialized professional to deal with the issue. Ignoring it could create a health hazard down the road, so this is important stuff.
This tip is all about needing to be flexible and roll with the punches during your bathroom remodel.
4. Watch How-To Videos before you demo ANYTHING

If you are going the DIY bathroom remodel route, and have not remodeled a bathroom before or for a long time, DO NOT SKIP THIS STEP.
Also, don’t be like us a watch the how-to video literally as you about to do the thing. There will be something you didn’t do or buy that they recommend that you will wish you had known 2 or 3 days ago.
So, a few days before you begin the project, make sure you go on YouTube for the things you are going to do yourself (clickable links below to YouTube videos we found super helpful).
Best YouTube Videos for DIY Bathroom Remodel:
Hopefully you get the picture. With the tile, we rented a tile saw by the day, before we watched any videos. Then we learned we needed to do a TON of prep work on the floor before cutting a single tile. Had we known that, we would have waited to rent the tile saw another day. Laying tile is complicated – watch a LOT of how-to videos first.
5. Build out a timeline

This step is important if you are on a tight schedule, like we were. We took one week off of work, so needed to do all our major tasks in one week. We had to turn this dated beast into a modern beauty – fast!
First you need to know what steps you need to take, the order to do them in, and how long each one will take.
What are the steps to remodel a bathroom, and in what order?
- Demo everything you are replacing
- Install shower/bathtub
- Drywall repair & paint
- Install flooring
- Install toilet
- Install vanity/countertop
- Replace lighting & mirror
These are the “major” things we needed to do for our DIY bathroom remodel. We wanted to get all those things done in one week, except the showers. We decided to go with Dreamstyle Shower Systems, and they were going to come in a later date, and be installed by professionals. The showers are supposed to be first, but we are doing them last, so I’ll update this post later if that was a totally terrible plan.
How long does a bathroom remodel take?
The timeline really depends on how big your bathroom is, if you remove the drywall, and if you change the layout. Also, if you find any “surprises” once you do the demo that can extend your timeline.
I can attest that we basically got two full bathrooms done, with the exception of the tub/shower areas, in 1 week. We only did ceramic tile on one bathroom, we did vinyl tile on the other. We also had a 2 day delay due to the asbestos abatement.
Here is a rough estimate of the time needed for each task:
- Demo – 1/2 day to 1 day. Depending on if you remove walls, shower, tub. We did everything but the walls and tub/shower and it took us 1/2 day or less per bathroom.
- Install shower/bathtub – 2 – 5 days. Dreamstyle says it takes 2-3 days per shower system but they are the 3 wall type, not tile w/ grout. Real tile could probably 2 – 5 days depending on how much tile you do. Remember there is a lot of prep work, and you should replace the pipes, valves, and plumbing while you have opened things up.
- Install flooring – 1 – 3 days. Vinyl or waterproof laminate could be done in one day. Ceramic or stone tile will take a bare minimum of 2 days. One day to prep, cut, and do the mortar. The next day would be grout. You likely will need to do some leveling in your prep, so give it 3 days to be safe.
- Replace toilet – 1-2 hours.
- Install vanity/countertop – 1/2 day to 1 day or more. Depends if you get the prefab ones that come w/ the top attached. Those can take half a day or less, including the plumbing hookups. If you do separate custom/semi-custom cabinets then then have to attach sink and the prefab countertop separately it could take a day.
- Install lighting & mirror – 1 – 2 hours. If you don’t make any changes to the lighting placement, should only take an hour or two max.
Total time needed for basic DIY bathroom remodel without shower/bathtub: 2.5 to 5.5 days.
Total time needed for basic DIY bathroom remodel with shower: 5 days to 10.5 days.
I budgeted about 3 days per bathroom for our basic DIY bathroom remodel, but we did plan on doing some things on the same day – such as texturing, painting, then installing both toilets and vanities on the same day.
Don’t forget you might find something unexpected which could add 1 day or more to your timeline, so be prepared to roll with it!
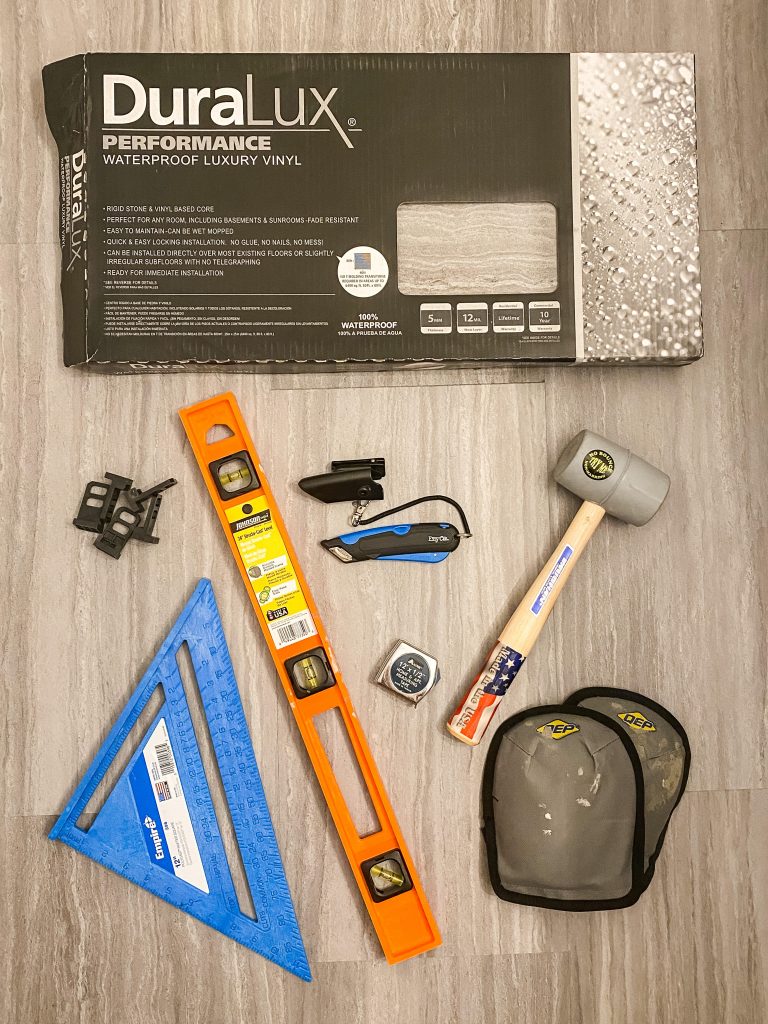
6. Purchase & gather materials and tools
 The lighting aisle at Home Depot
Ok, so I find shopping for home improvement stuff relaxing, and love to roam home improvement stores looking at stone tiles, fixtures, and lighting. However, when you are on a tight deadline to find something for your install that’s tomorrow, it’s not so fun.
My tips for your materials and tools are:
- Try to stick to your design plan and mood board, but be flexible on the exact items. The exact item you wanted might sell out, or have a delivery date that doesn’t work for you, so you gotta roll with it.
- When buying materials online, go through the checkout process to see the estimated delivery dates. A lot of stuff, like vanities and lighting, are “dropshipped” from the vendor, so it can take a week or two to get delivered.
- You may find it easier and faster to go to a big box store like Home Depot or Lowes, but their in-store selection is much more limited than their online selection. Order online and leave time for delivery.
- Make sure everything delivers at least 1 week before you start the job. This gives you some wiggle room if anything gets delayed or damaged during shipping.
- When replacing things like pipes or spigots, take photos, measurements, or the exact item with you when buying a replacement.
- Expect to have to run to the nearest home improvement store many times during your DIY bathroom remodel. It’s totally normal (although annoying).
- Save your receipts in case you need to return anything if it doesn’t work out!
7. Schedule contractors or labor accordingly
- Refer back to step 5, where I told you the basic steps to remodel a bathroom, in order. This is how you should schedule your labor, if you are contracting any activities out.
- Schedule your contractors at least 2 – 4 weeks in advance. Most contractors, in the busy season, are booked up at least 4 weeks out.
- Be prepared to have to juggle folks around or get creative, as something might take longer than expected due to an unexpected surprise.
8. Demo Day!

Demo is fun, but a pain in the butt. Her is our demo’d bathroom after installing the waterproof backerboard. Below are my demo day tips…
- You don’t always need a sledgehammer, that’s just for HGTV. We didn’t use one at all.
- A crowbar is pretty useful, and a regular hammer, along with a power drill to remove most items.
- Try not to cause huge holes in the wall, so use some finesse when removing things from the wall. Cut the caulking first.
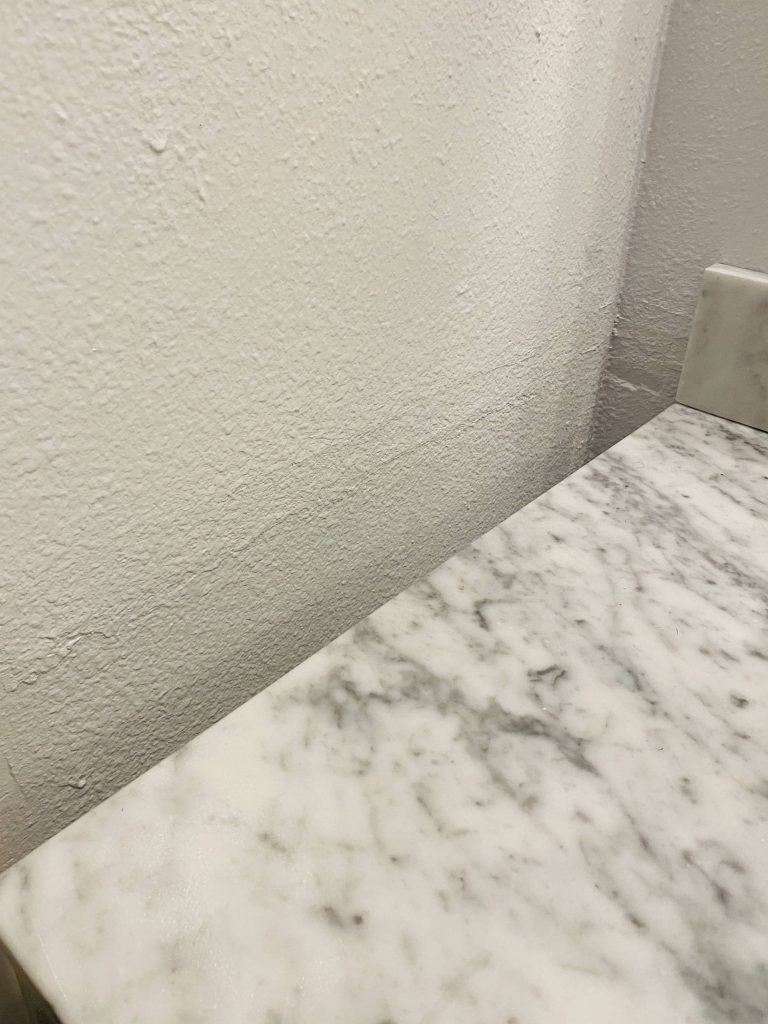
- Be on the lookout for things like mold and termite droppings. Mildew is pretty easy to clean – I just use a bleach based bathroom cleaner to scrub the walls behind our old vanity.
- If your home is pre-1980 I would assume there is asbestos or lead paint somewhere. Take the appropriate precautions or call a professional.
9. Drywall repair
Oh, drywall. Drywall repair is one of my least favorite parts of a renovation, but it’s very much needed if you are not replacing the walls. It’s actually seldom talked about in most DIY tutorials, but I’ve now done 3 bathroom remodels and have had to re-texture whole walls to make it look good.
There are three main types of drywall repair you may need to make during a DIY bathroom remodel:
- Drywall repair when you remove your built-in vanity and/or wall tiles.
- Repair when a towel bar or toilet paper holder is moved or changed out.
- Repair from when you remove a glued-on mirror from the wall
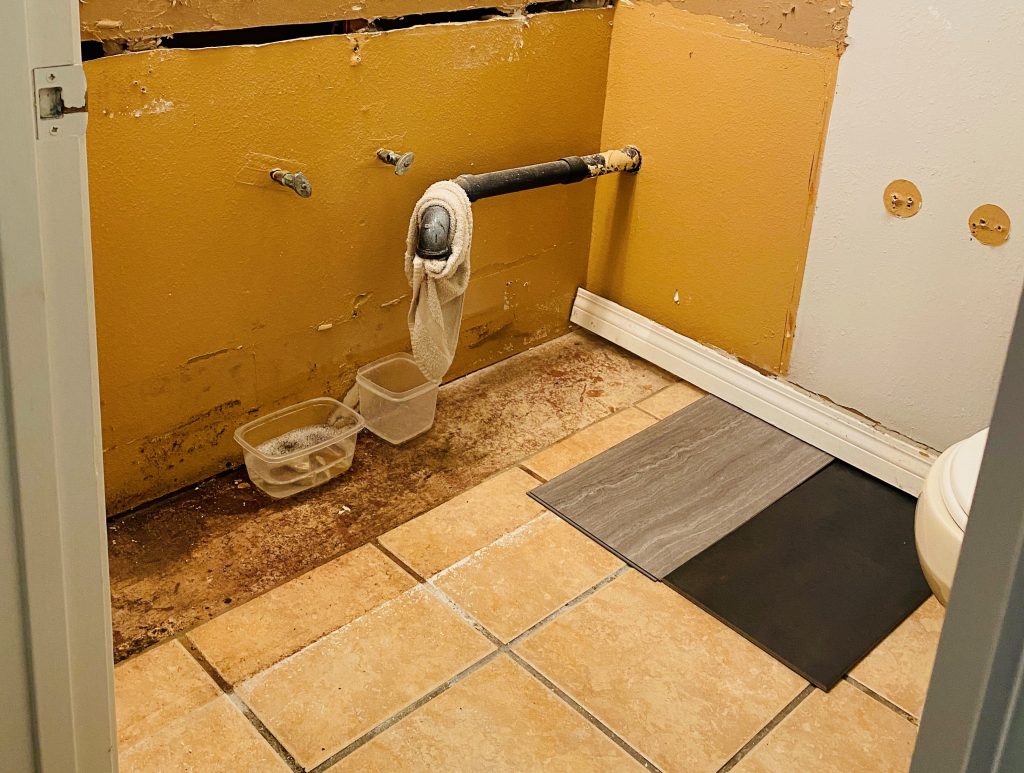
Example of drywall repair after removing a built in vanity. You can see my putty & texturing skills are not perfect, but I’m learning. Here are my tips on drywall repair:
- Do watch a few videos on drywall repair on YouTube. Each situation is different and the repair will depend on the texture of you existing walls (smooth, orange peel, etc).
- Do finish you drywall repairs and paint before installing your new vanity, mirror, lights, etc. It’s just way easier.
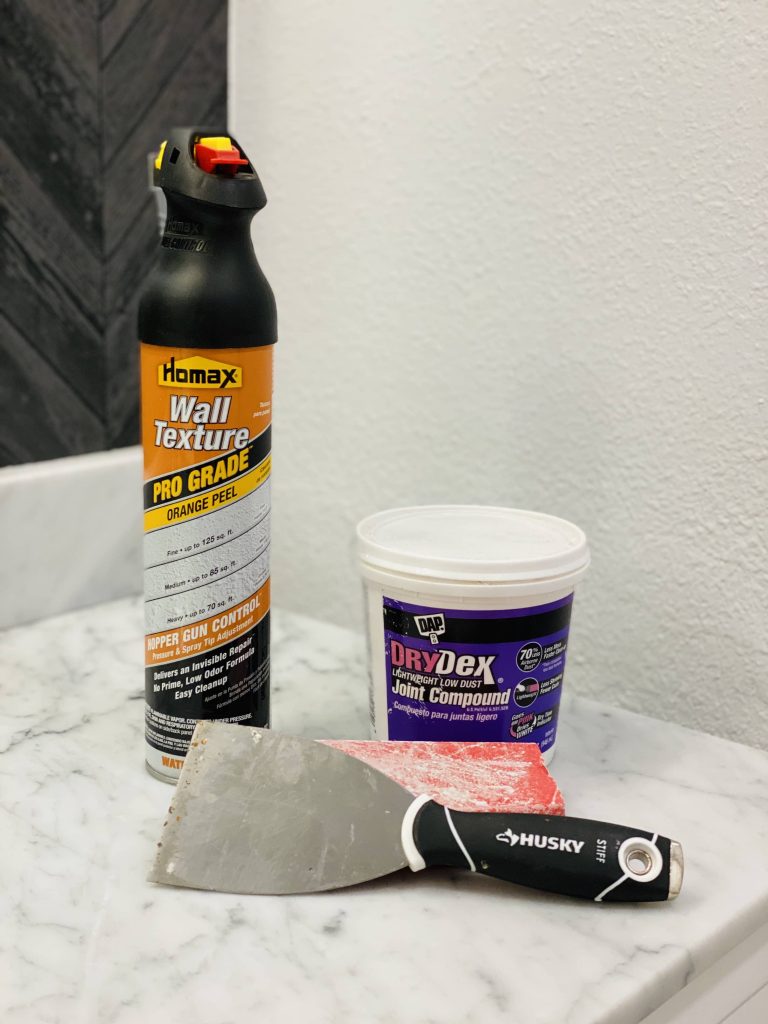
- If you just need to hide your old towel bar holes, you may just be able to apply some DryDex Spackling Paste from Dap and be done with it. Make sure you sand it a little after to make it blend in with the rest of the wall.
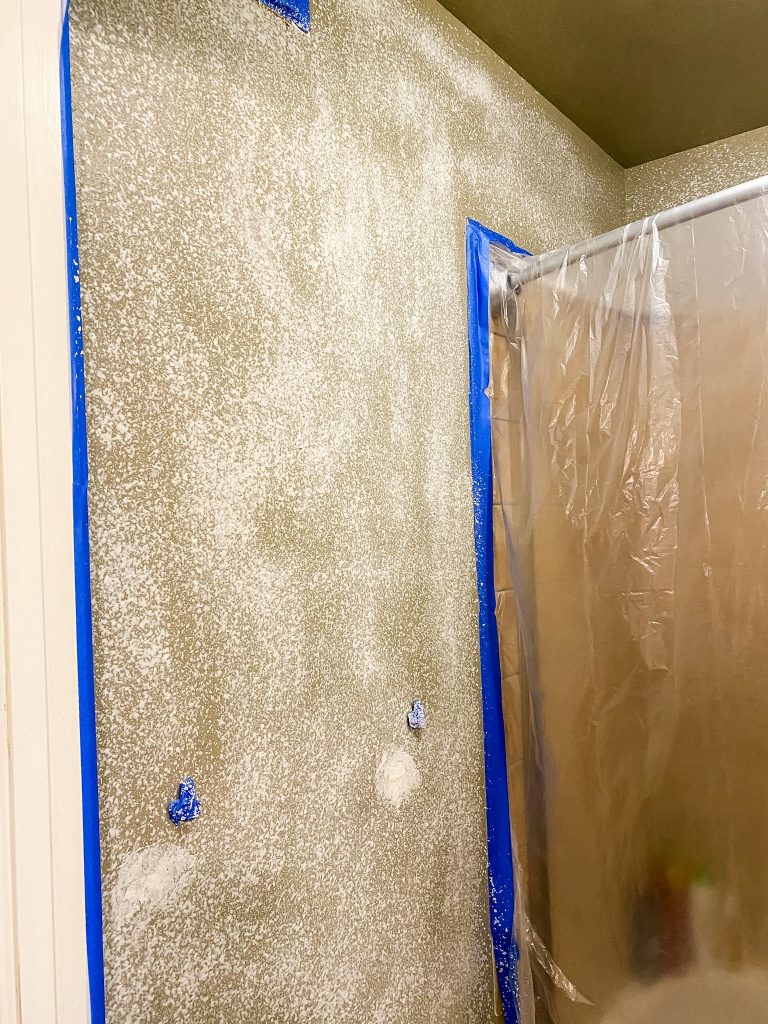
- I’m a fan of the Homax wall texture – the Pro Grade version kicks butt (get the low odor kind) if you have large areas to do, as the squeeze trigger makes it really easy. I basically did my whole bathroom with Homax Pro cans of texture since the original texture job was completely horrible.
- Do practice – if using cans of texture, practice first on cardboard to see how it comes out. It will look really bubbly and thick at first but it does smooth out a bit once dry.
- Do apply layers. A light layer of spackle, lightly sand, then a few light layers of texture. It’s hard to get right. I’m still working on mine, obviously!
- If you have the time, the best result will certainly come from applying a fresh skim coat, which makes your whole wall smooth. Then reapply texture to match the other walls. I didn’t do this and kind of regret it.
- If you really mess up your texture, you can always sand it down and try again, or just apply a new layer.
Some of my fave drywall repair products:
10. Install shower/tub & fixtures/plumbing
This part we skipped (for now) but I can give some general advice.
- Do replace, don’t reconfigure. Keep the configuration exactly how it is if this is your first DIY bathroom remodel. Keep the drains, tub spout, and shower head in the same exact place to avoid more complicated and advanced work.
- Install your shower/tub before the flooring, to avoid messing up your tile when you remove everything.
- If this is not your forever home, keep in mind what buyers might like (neutrals/white) in the future vs buying something that is very unique or trendy in terms of tile. Showers are very costly to replace and you would not want to turn buyers off by something that will get dated quickly.
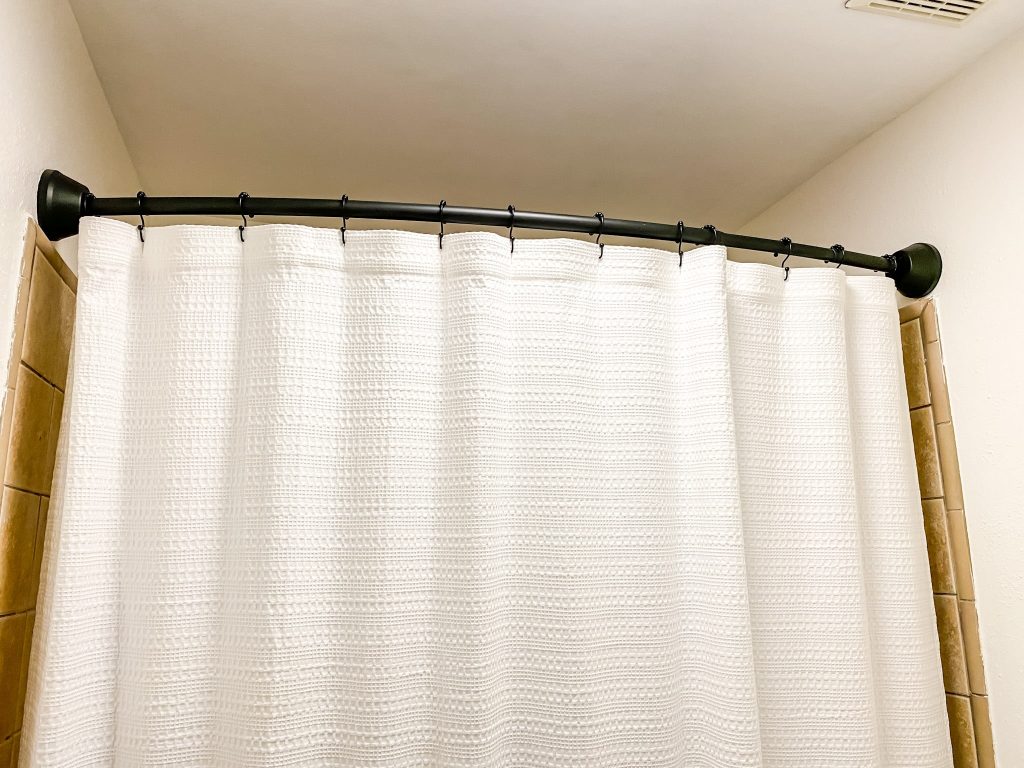
- The 3 piece shower wall systems have a lot of benefits vs grouted tile. They are a quicker install, and you don’t have to worry about getting dirty grout.
- Grouted ceramic/stone tile is preferred by a lot of buyers but remember that white grout can get moldy and mildewy so it’s a little bit more maintenance and cleaning.
- Real stone tile, although beautiful, requires special preparation and also has different maintenance (sealing for example) and cleaning requirements than ceramic.
- Bigger is better (my opinion) in terms of shower head. Go big or go home!
- Radically changing your shower, like going from a normal shower head placement to a rain shower head coming out of the ceiling is best left to the professionals.
11. Paint walls & ceiling
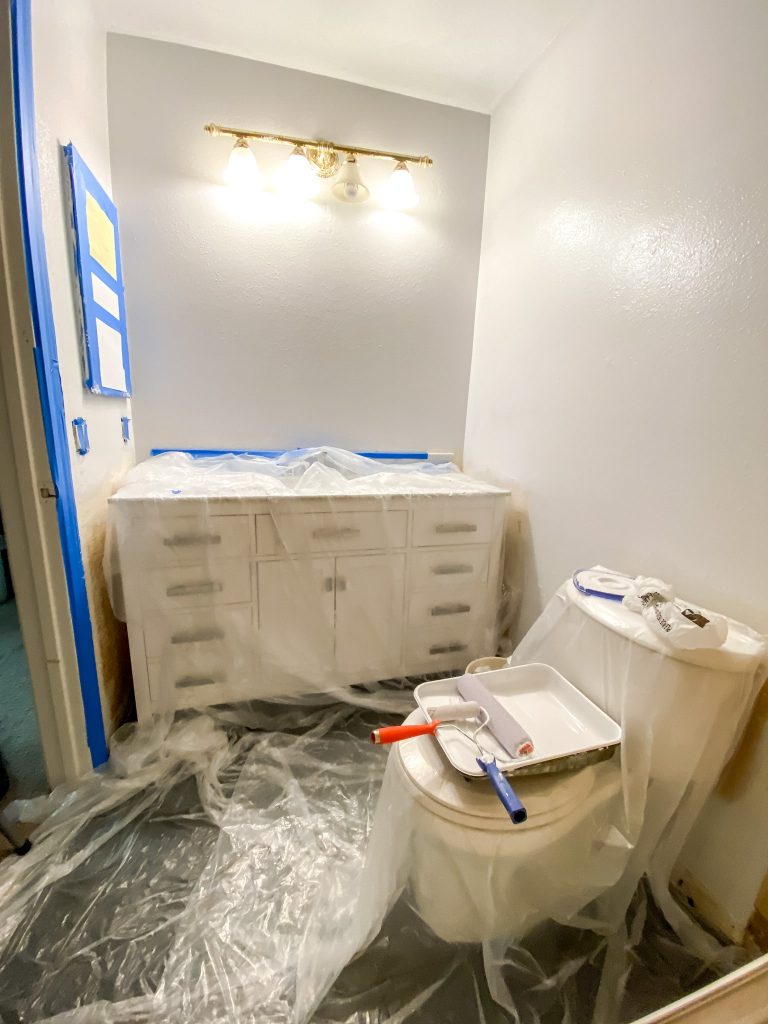
Here’s our guest bathroom in the middle of painting our walls Behr Premium Plus in Pixel White. Should have done this BEFORE installing the vanity and toilet but oh well. I’ve painted all my bathrooms, in two different homes, by myself, so have quite a few tips on painting.
- Do paint before you install all your new stuff like the vanity, mirror, light, switch covers, hardware, etc. It’s just way easier to not worry about that stuff.
- Make sure you remove all light switch covers, electrical outlet covers, etc.
- Paint the ceiling before the walls, it’s easier.
- Prep before you paint and wipe down your walls, then apply blue tape to all the stuff you don’t want to get paint on like ceiling, light switches, fixtures, tiles, baseboards, trim on doors, etc.
- Do choose an interior semi gloss paint (not eggshell/flat) for bathrooms as it will help prevent mildew/mold in a damp environment.
- Ceiling paint can be just an ultra white semi gloss paint for a bathroom. You will probably need two coats if your ceiling is not already white (trust me on this one).
- Start first with small paintbrush and do your corners and edges, then use the roller to fill in the large spaces.
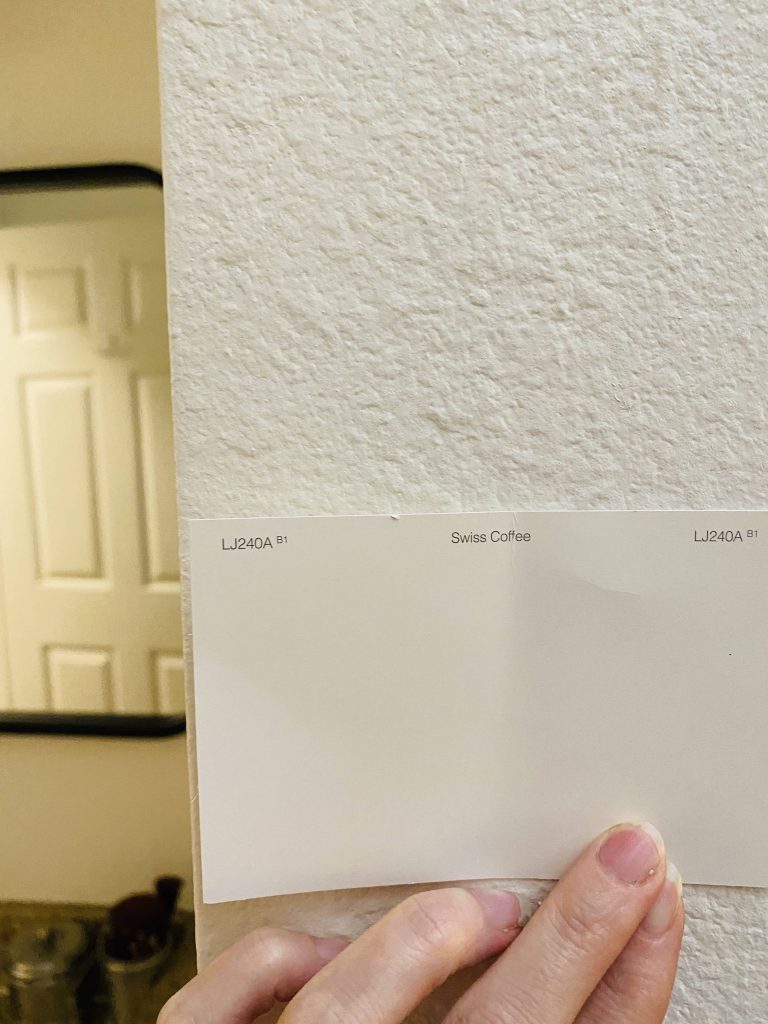
- Most paint will require 2 coats. I did use the Behr Marquee One Coat Guarantee Interior Semi Gloss paint to go from swiss coffee (an off white) to pixel white (a greyish white) and it was basically one coat. This is amazing paint and I highly recommend, although it is a little pricey.
- Do save your leftover paint for touchups at the end of your remodel. Accept the fact you might have to do some touch ups afterwards, especially after do all your installs.
- I used this Shur-Line edger tool from Home Depot for less than $4. It saved me so much time since I didn’t have to apply tape to get amazing edges, so I highly recommend.

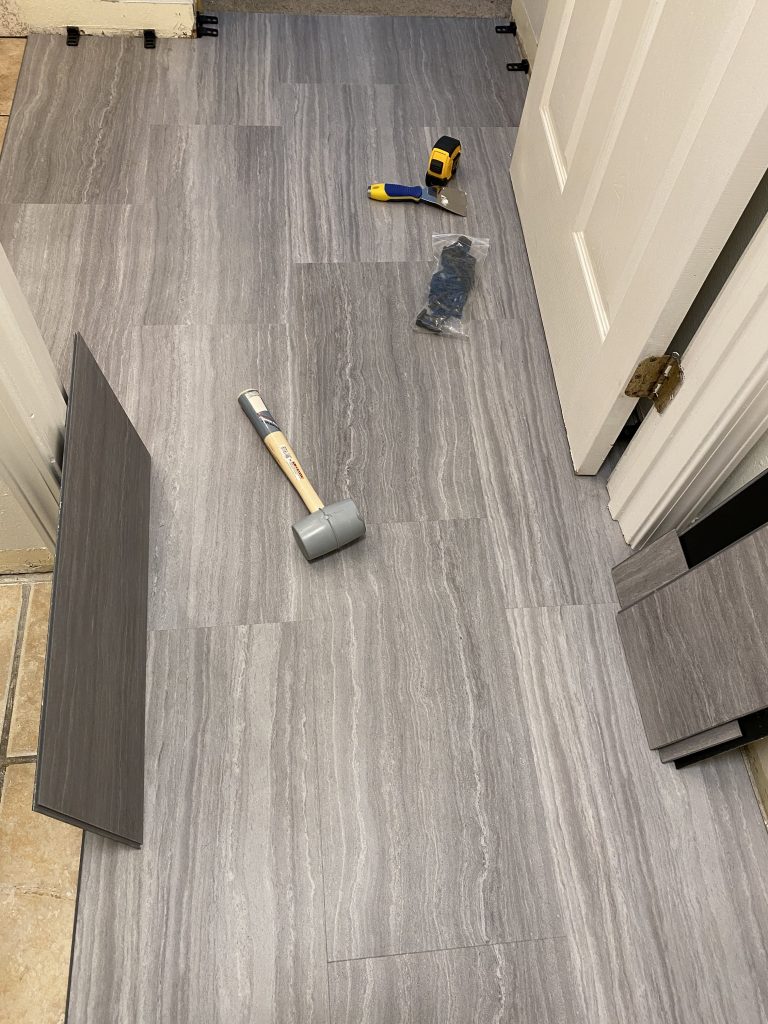
12. Flooring tips and tricks
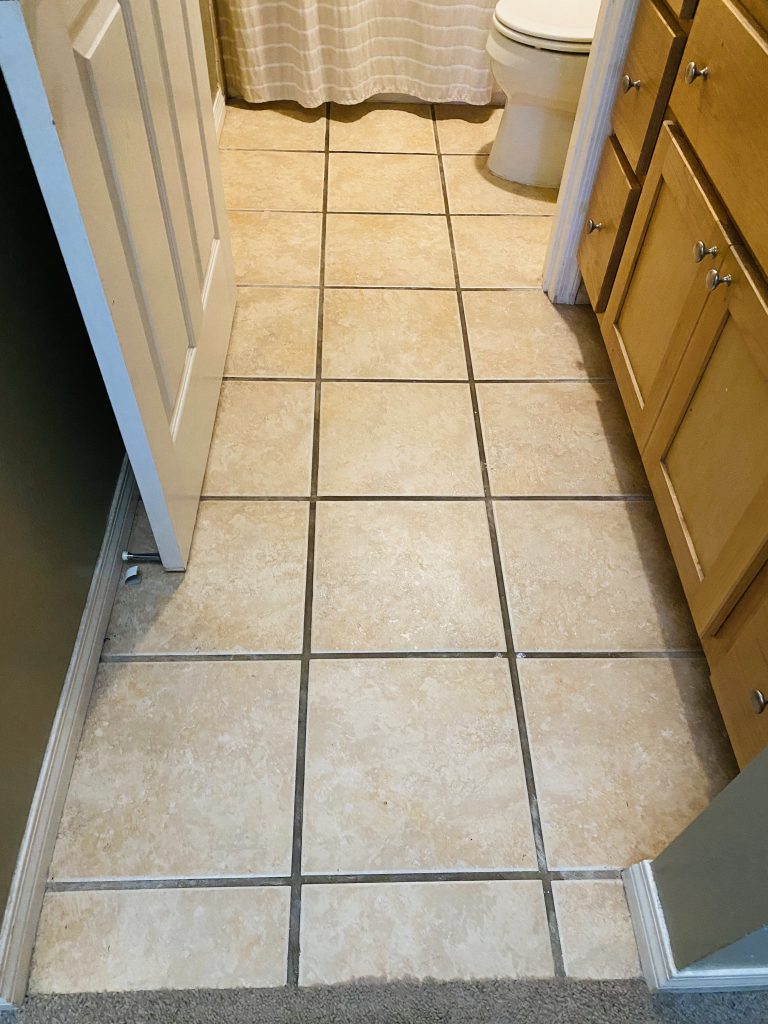
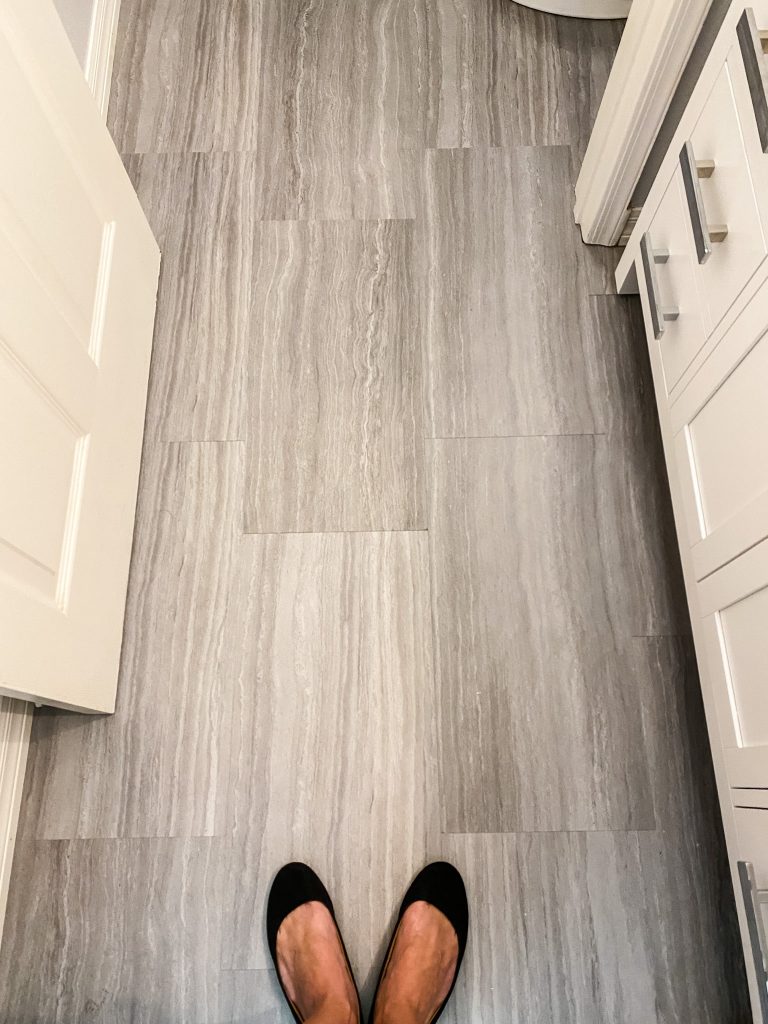
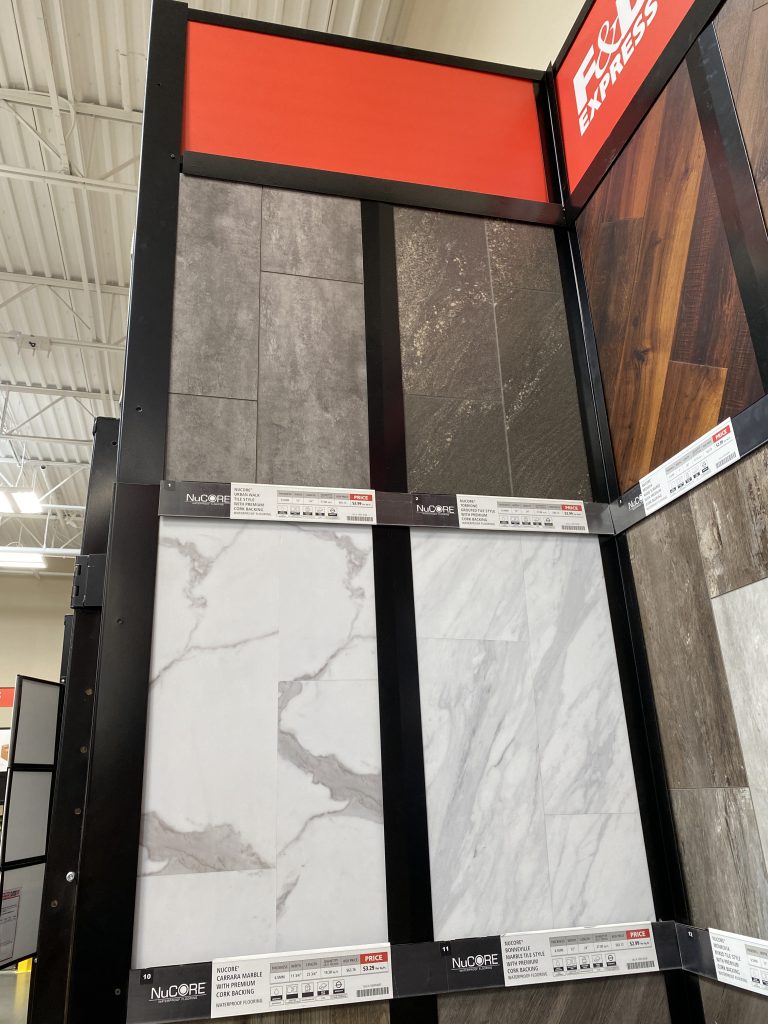
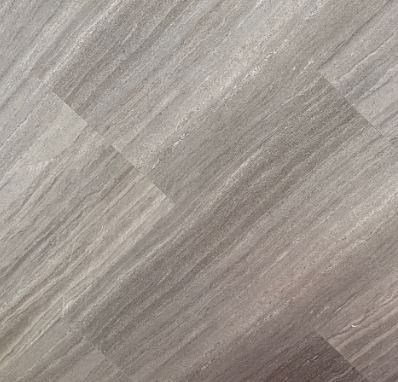
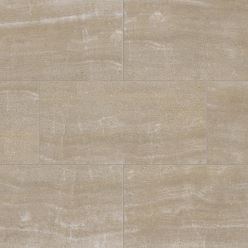
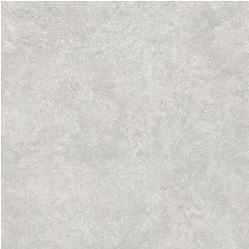
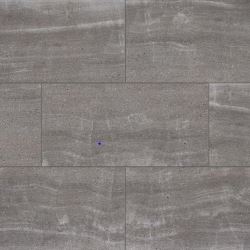
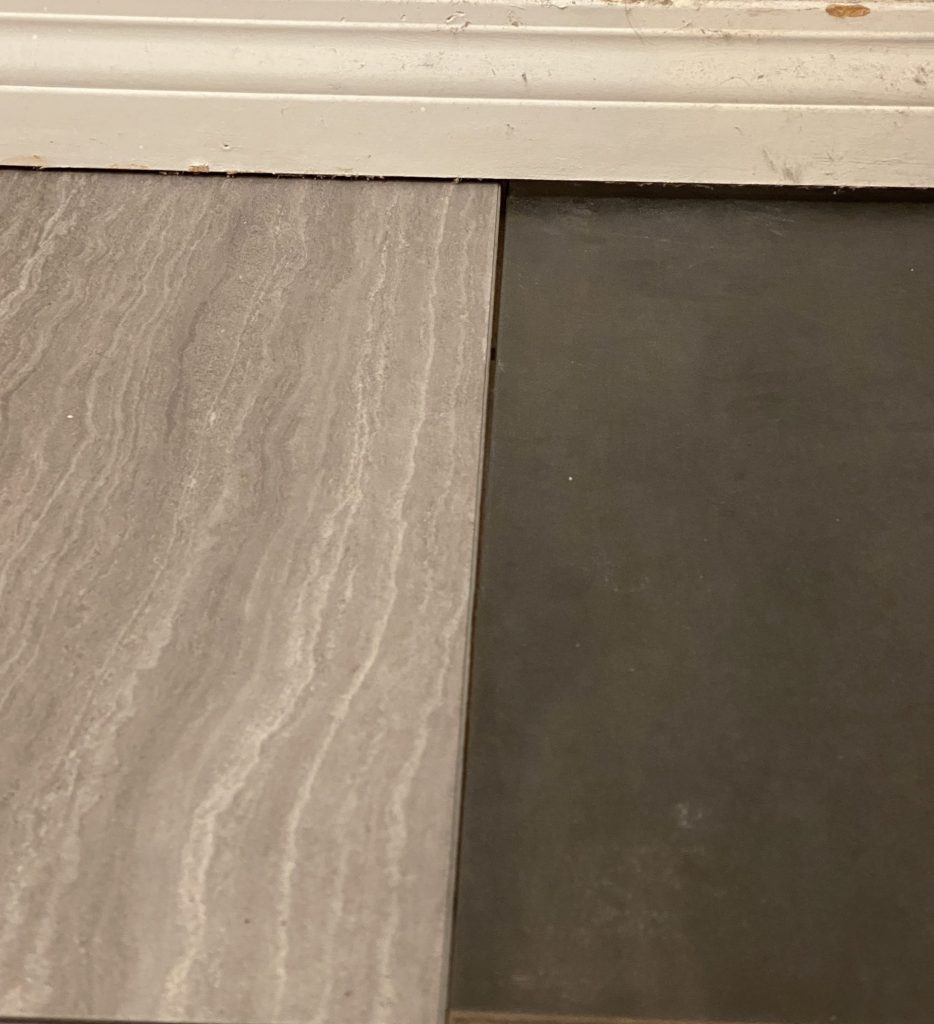 Deciding between samples of the luxury vinyl tile vs the ceramic tile
I am going to write a separate post on luxury vinyl tile vs ceramic tile since we did both at the same time basically. Here are some tips on each type of flooring, based on our experience during our DIY bathroom remodel. I highly recommend the luxury vinyl tile as it took one day to install, versus three days for ceramic tile.
For any type of flooring, you want to remove the baseboards and toilet first, then install the flooring. This makes it look way better, trust me.
Tips for installing ceramic tile flooring:
Tips for prepping for tile
- Do watch a lot of YouTube videos days before you attempt this for the first time.
- Do build into your timeline the 24 hours EACH it takes for leveling compound to dry, for the mortared tile to dry, and for the grout to dry.
- Do prep your floor, and know this could take 1 day to complete, especially if you use self leveling compound, which takes time to dry.
- Do make sure your floor is level. Self leveling compound is your friend and you will probably need it. We did not do this and our tiles shifted in a couple of spots.
- Do use a schluter edge strip for the doorway, to make it even. If you don’t, you will probably need a transition strip.
- Do not rent/borrow a tile saw until you watch several YouTube videos AND have prepped and leveled your floors.
- Do team up – two people will make measuring and cutting tile go faster.
- Do get the special saw to make the circular cut on your tile for the toilet hole. We didn’t and you can see our square cut behind the back of the toilet,
Tips for during the tile install
- A tile saw will make cutting the tile way faster and easier than using a hand/manual saw. Make sure it’s the right size for your tile – we needed a “large” tile saw since we had 12″ x 24″ tiles.Do a dry fit where you cut and place all your tiles (with spacers) before applying any mortar.
- Grouting is not absolutely necessary to install the vanity or toilet on top of, but it’s probably a good idea.
- Do note that high contrast grout lines will show uneven grout lines and mistakes a LOT more than grout that is same/similar color as the tile.
- Do remove “grout haze” after you finish grouting – I used a Magic Eraser and it was super easy in removing all the haze fast.
- Read the label on your grout and/or tile to determine if it needs a sealer after installation.
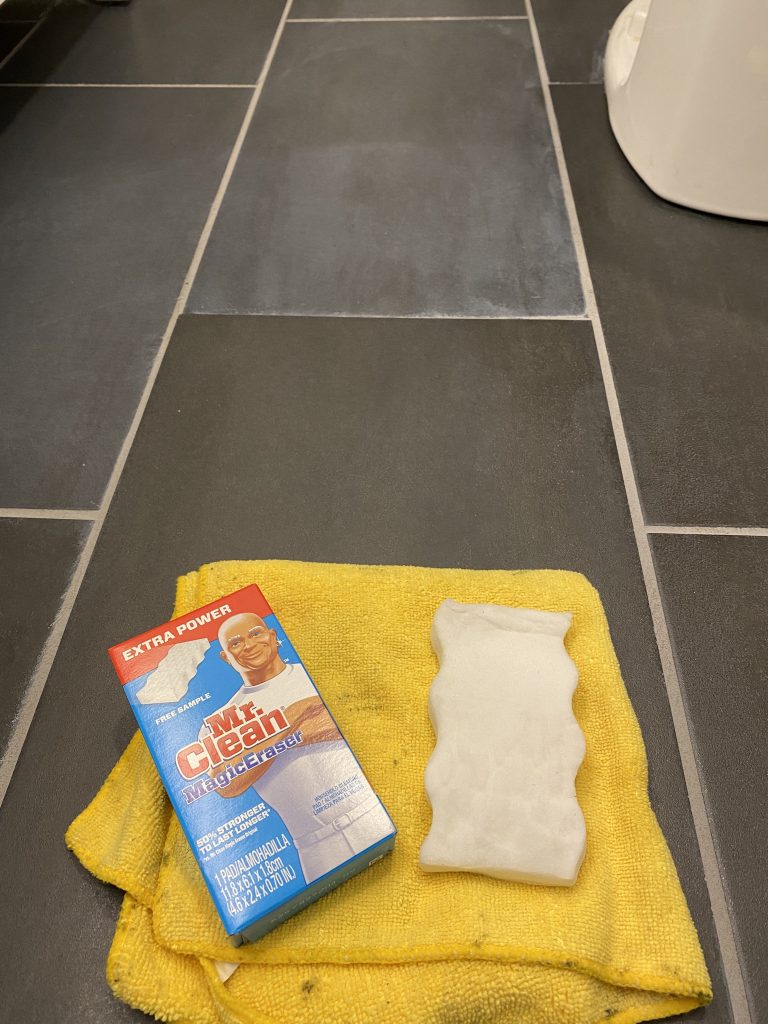 Magic Erasers are great at removing grout haze!
Tips for installing luxury vinyl tile flooring:
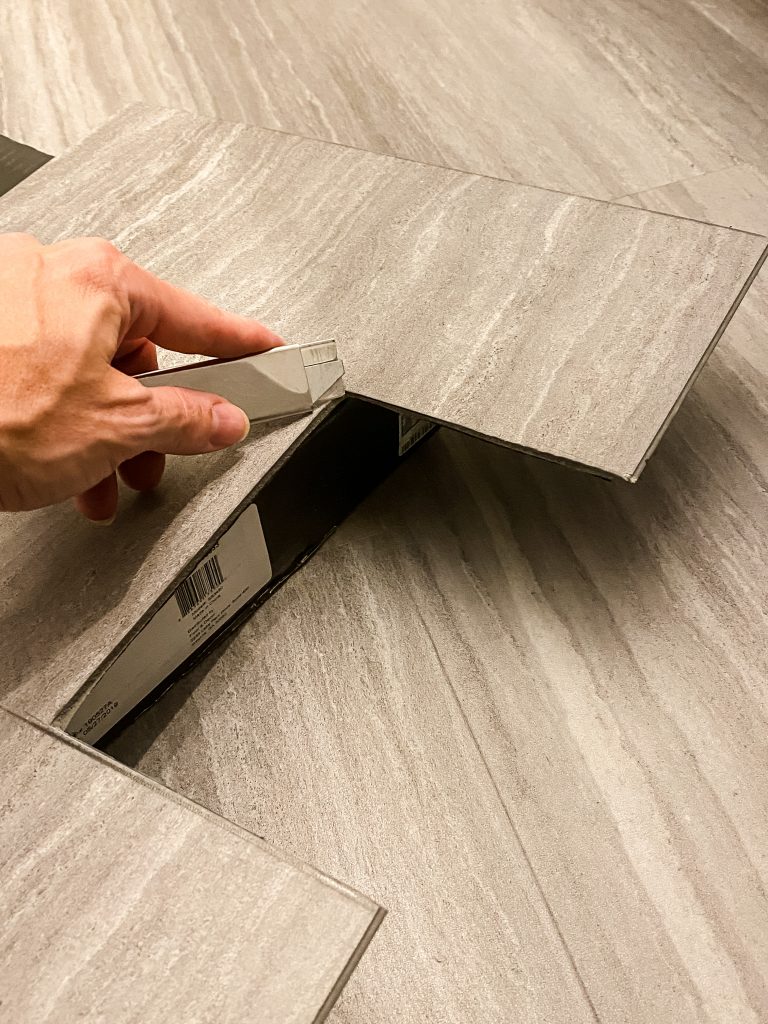
- Do read the instructions and installation videos before attempting the tile install.
- Do clean the floor very well prior to placing any tile. Mop and sweep, then vacuum. Make sure it’s clean and dry.
- Do get the recommended wall spacers to ensure some room for expanding an contracting.
- Do remove the baseboards before installing the tile, it will look so much better than a quarter round.
- Do get a utility knife and extra razorblades. This is what worked for us in cutting the planks, but our razorblades kept getting dull.
- Do be careful around the toilet and make sure you cut the planks properly to allow enough space for the toilet pipe.
- Do make sure your doors can still close, or you may need to saw or sand the door to make it shorter.
- Do get a small saw to cut the doorjambs, if needed.
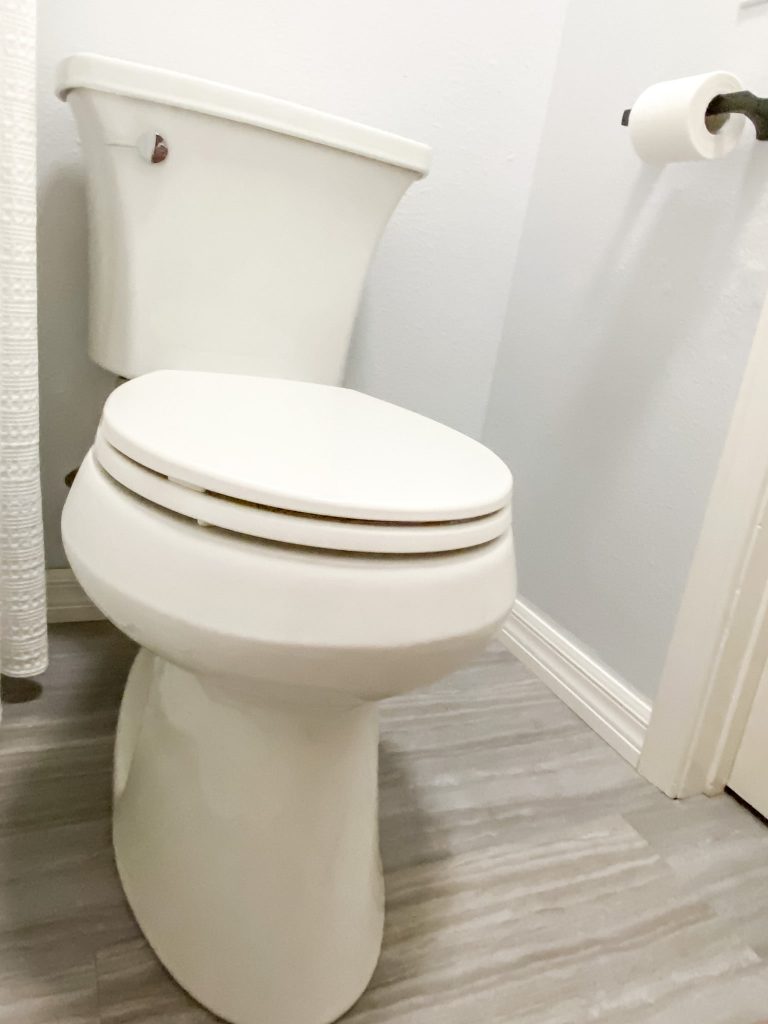
13. Toilet Talk
Toilet buying tips – I know it seems silly but there is important information you need to know when choosing a toilet.
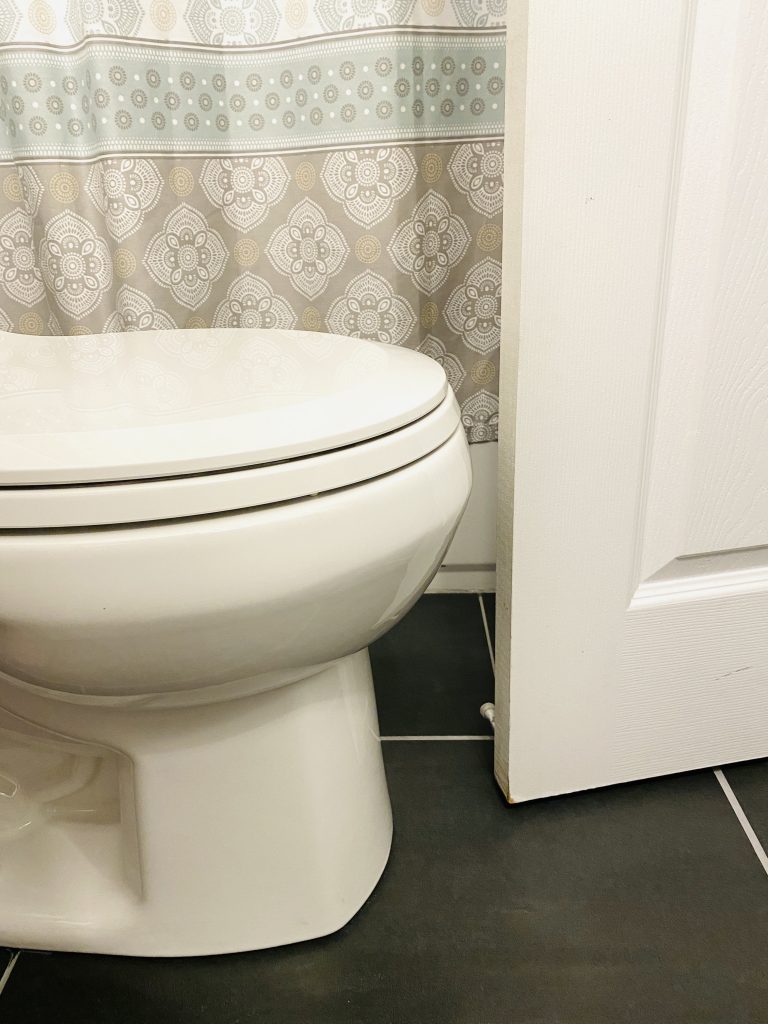 Measure toilet vs door clearance
- Measure your space. A lot of small bathrooms don’t have much room between the front of the toilet and the door. Getting an elongated bowl toilet might mean you can’t open your door all the way. A round bowl will be better if your space is smaller. Measure!
- Toilet height matters. A lot of toilets have the top of the bowl very high, 16″ or more, which is not good for toddlers/kids. If you have small children, I recommend the standard height toilet (15″) for a kids’ bathroom just to keep your own sanity.
- Some higher end toilets have a “clog free” claim. If you have had this issue a lot in the past, you may want to upgrade to a clog free variety.
- There is also something called “rough in” which is how far your sewer pipe is from the wall. The standard is 12″ but you should measure your pipe to make sure it’s standard.
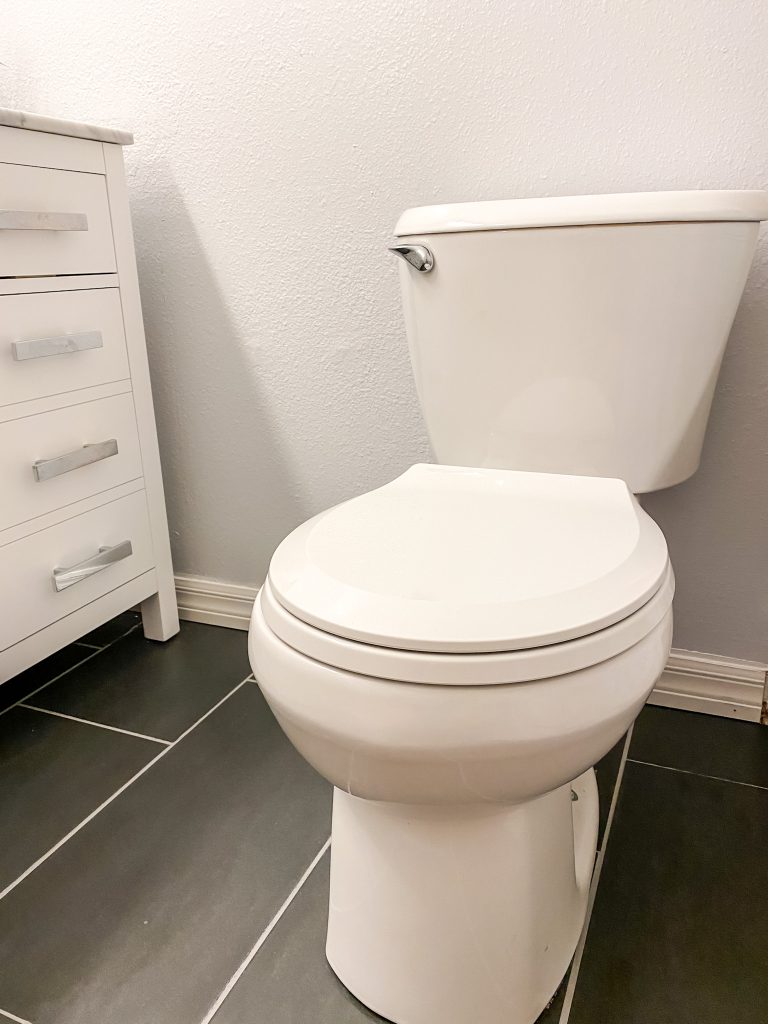
Here were the toilets we chose, both from Home Depot & they pretty much include everything you need (even the seat):
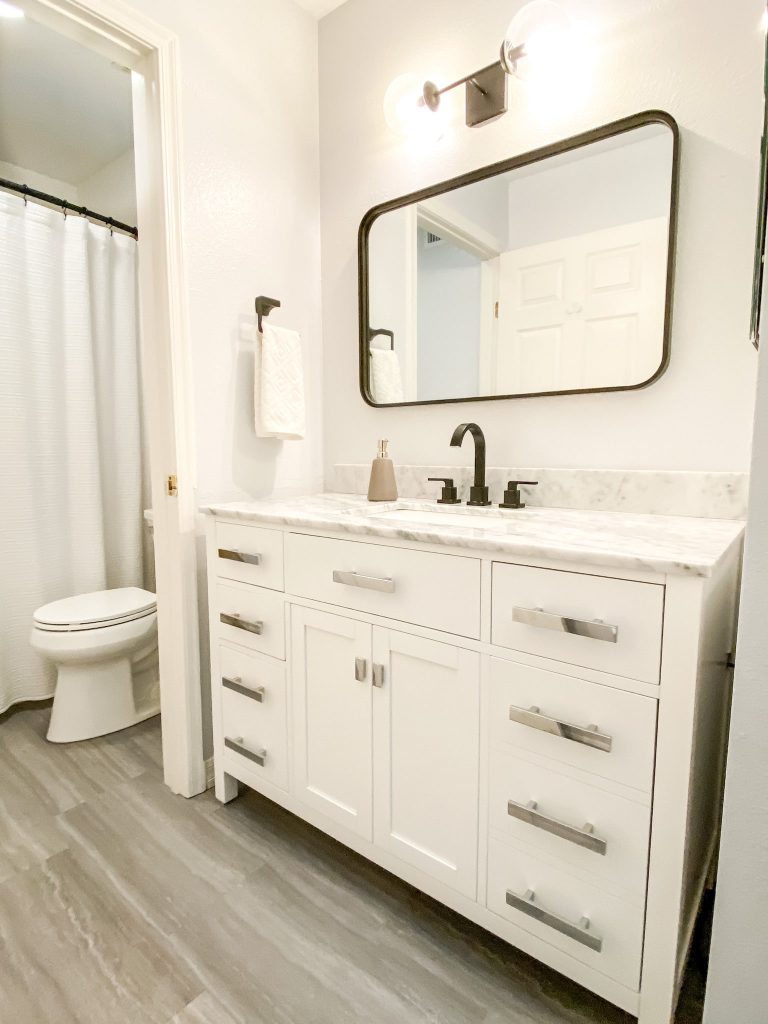
14. Vanity and faucets

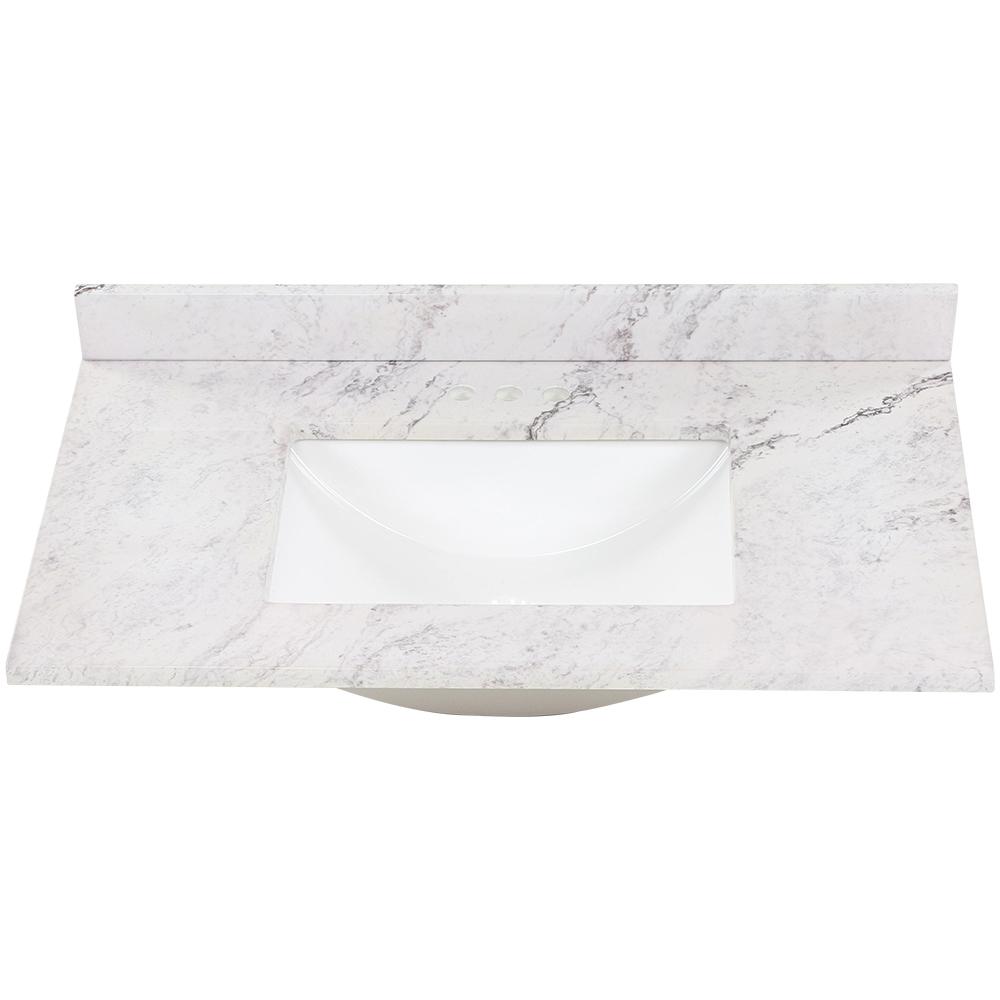
We chose the Valentino from Design Elements as our vanity for our DIY bathroom remodel, from Home Depot. It comes with a marble countertop, chrome handles, rectangle sink, and is a great value at around $1000 for a 48″ vanity. There are also dovetail drawers and soft close drawers and doors. Available in white or blue, in multiple sizes. We love it!
Vanity Tips
- Measure your space first and pick the right size vanity. Slightly smaller is ok as you will need to wiggle it in there if it’s an exact fit.
- Having a small gap or large gap on each side of the vanity is not the end of the world and will actually make it easier to install yourself.
- A fully pre-assembled vanity is a LOT cheaper and easier if you are going the DIY route. The one we picked, the Valentino from Design Elements, included the countertop, sink, pre-drilled faucet holes, and also soft close doors and drawers, along with handles/pulls. It was half the cost of getting semi-custom cabinets + custom countertops.
- Look for dovetail drawer construction as that is a general mark of higher quality.
Faucet Tips
- Make sure the holes on your vanity match your faucet type, before you buy the faucet.
- There are four main styles of faucet mountings: Centerset,single hole, widespread, and wall mounted.
- It’s ok to mix 2 different metals. I have chrome handles with a black faucet in one of our bathrooms, and it looks great. Centsational Style has a great blog post on mixing metals for more info.
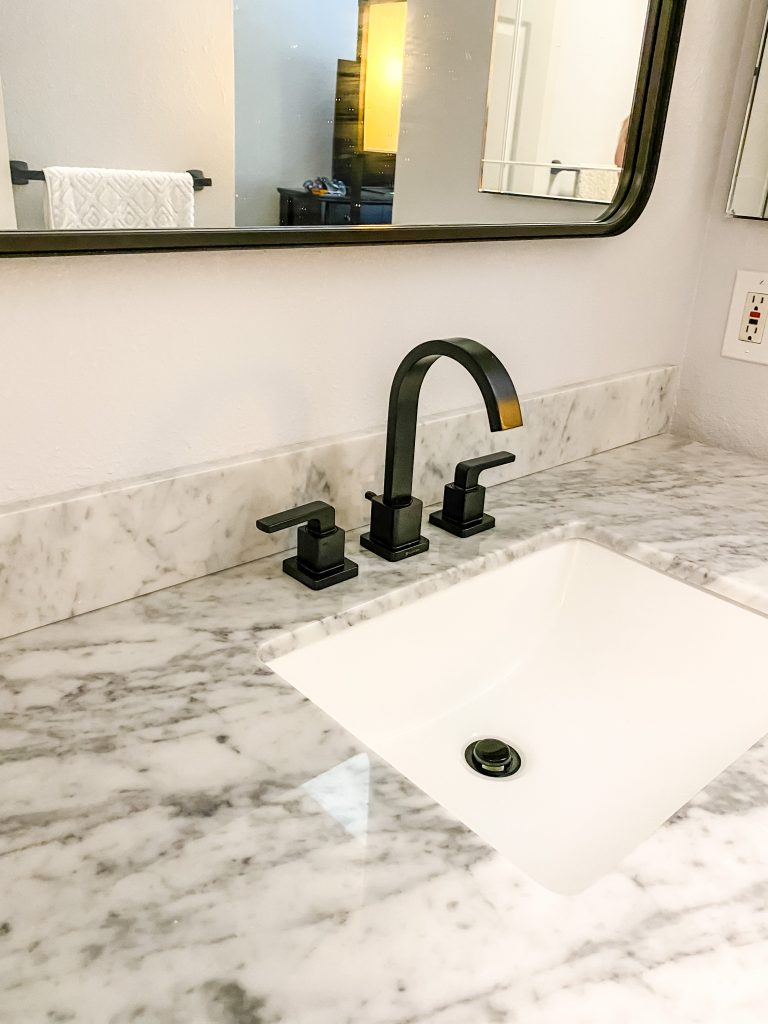
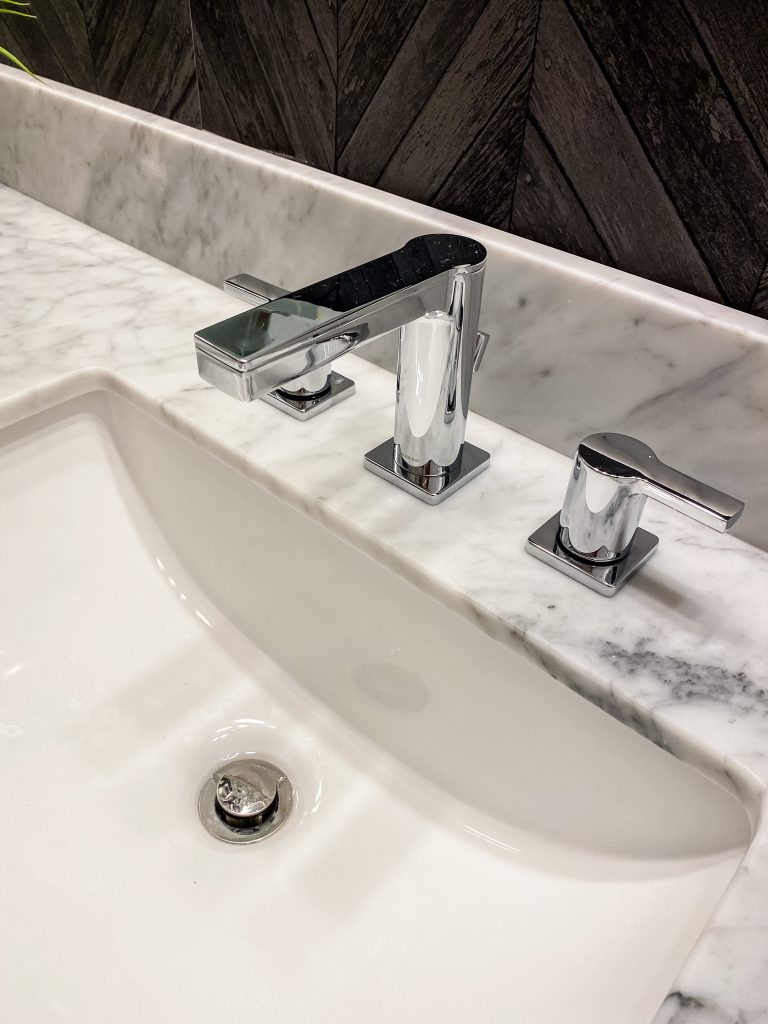
- Faucets come in high arc or low arc. I’m a fan of high arc if you have kids, as it shoots the water more towards the center of the sink to make it easier for kid-sized arms to wash their hands.
The black faucet is an example of high arc, and the chrome faucet is low arc. Both are by Glacier Bay from Home Depot.
15. Lighting and bathroom fan
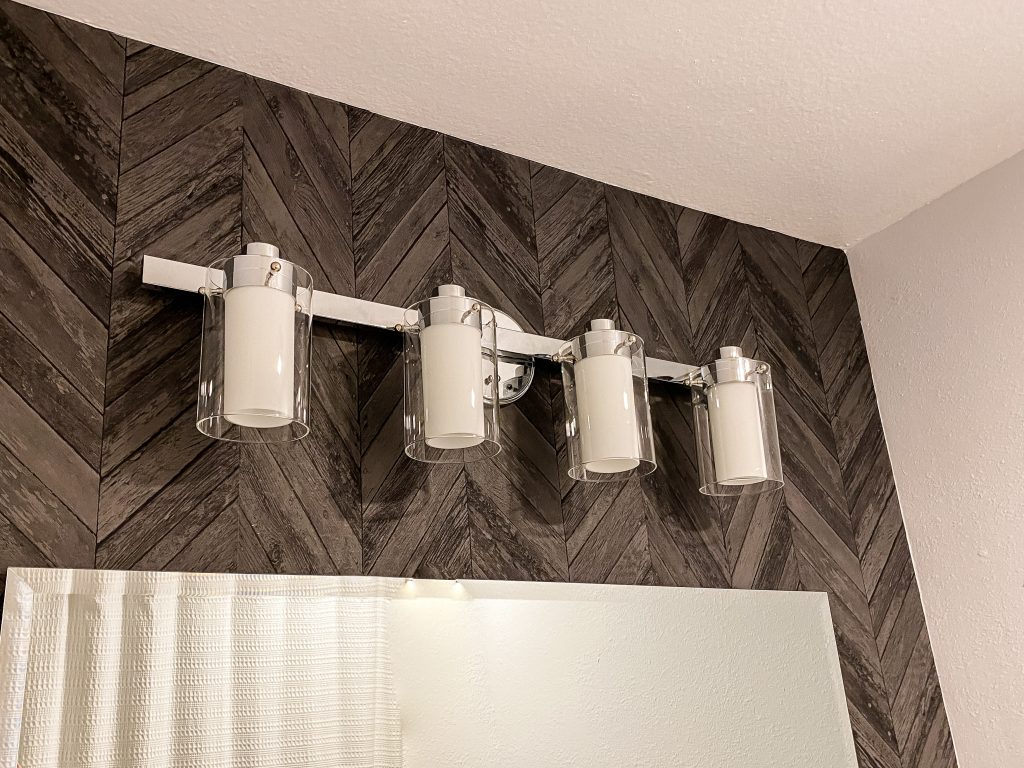
- Lighting is easiest to do yourself if you replace the existing light in the same spot with the same style. For example we were replacing a standard builder vanity light with a round base. We bought the same basic type (round base with 4 lights) and installed it in about 30 minutes.
- Keep in mind the length of your mirror when you buy your light. The light should not be longer than the length of the mirror. Shorter is ok.
- Mixing and matching metals/finishes is becoming ok – just try to repeat the finishes a couple of times. If you have a brass light, get a brass framed mirror, and and maybe some brass accents. Other fixtures can by black or even chrome.
- If you get one of the modern/industrial lights with an exposed bulb and clear glass, just remember it’s a LOT brighter than the frosted glass shades. You may want to get the lowest brightness light bulbs to go in that baby or you’ll be blinded.
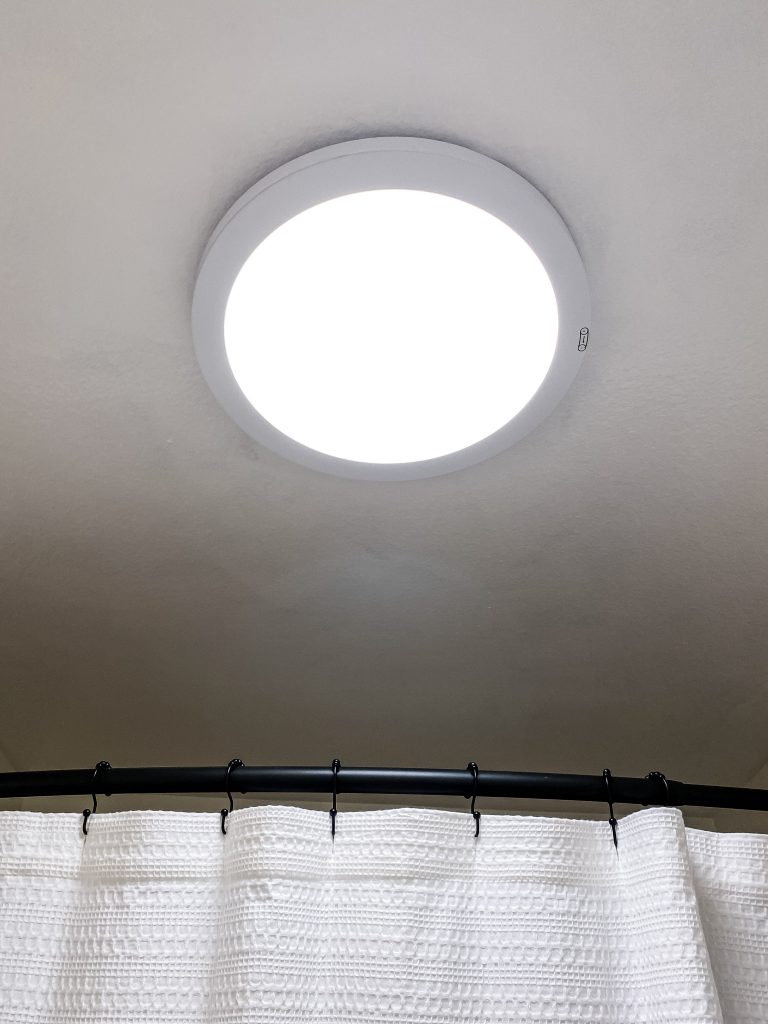
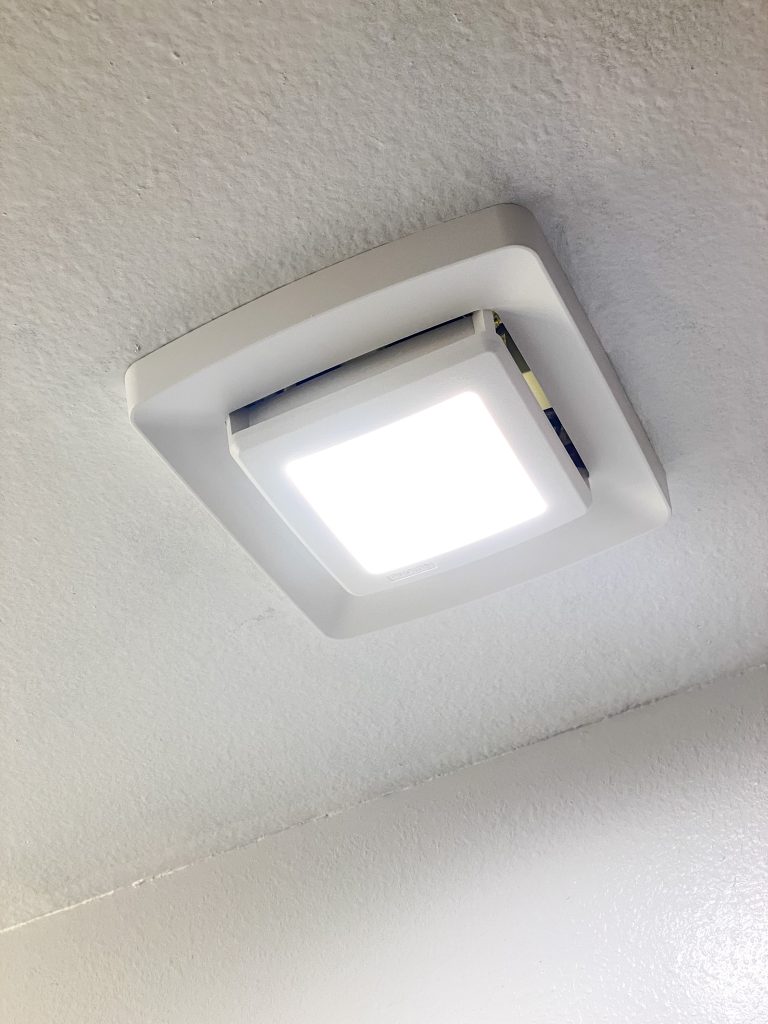
- Bathroom fans can be a pain to replace if you have a builder basic. It could require cutting a new size hole depending on what you buy. We found this awesome “fan upgrade” at Home Depot which works with a LOT of bathroom fans to give you a light without having to replace the whole box/motor. I love this thing and it’s under $30!
16. Mirror and hardware

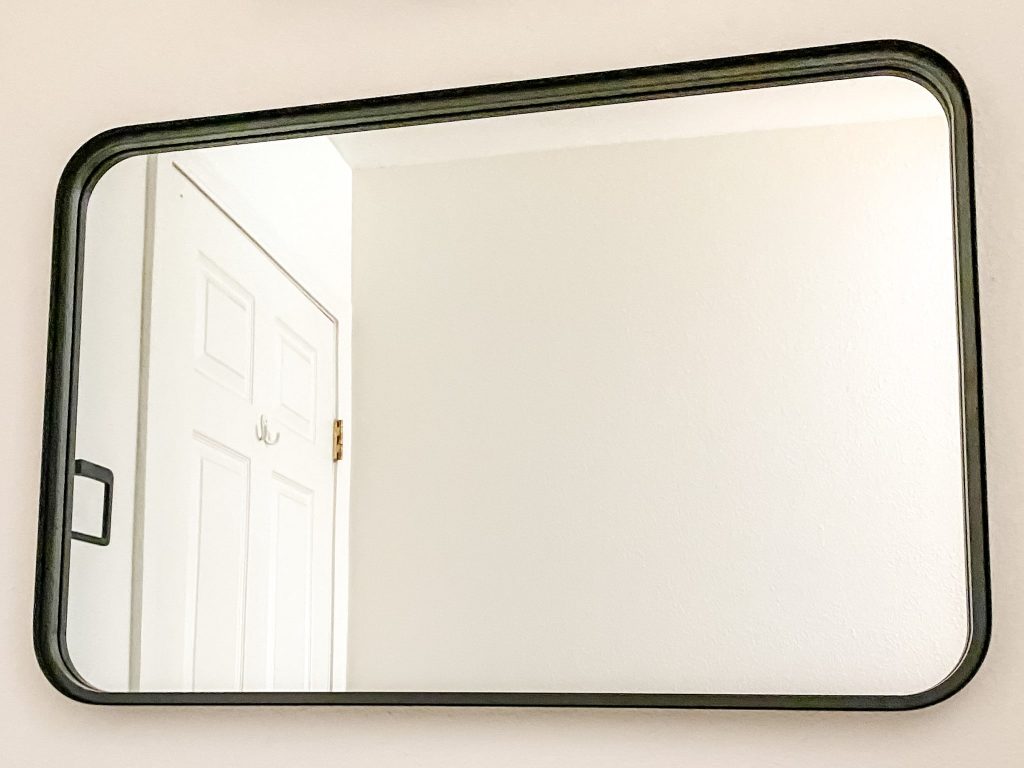
- Some mirrors are rated for being in damp location or bathroom, and buying one of those will help prevent some fogging. Most mirrors are going to fog up though, so just deal.
- Take a look at the spec sheet to understand how the mirror needs to be mounted, and if you need to buy any special mounting hardware.
- Mirror should be centered over the vanity, and shorter than the vanity.
- If you are mounting two mirrors over a double vanity, get out your level and measuring tape to ensure they are level and spaced correctly.
- Hardware can be different finish than other things in the bathroom, just make sure it matches something else. For example, black hardware along with a black mirror and light, would look fine with brass faucet and brass shower/tub fixtures.
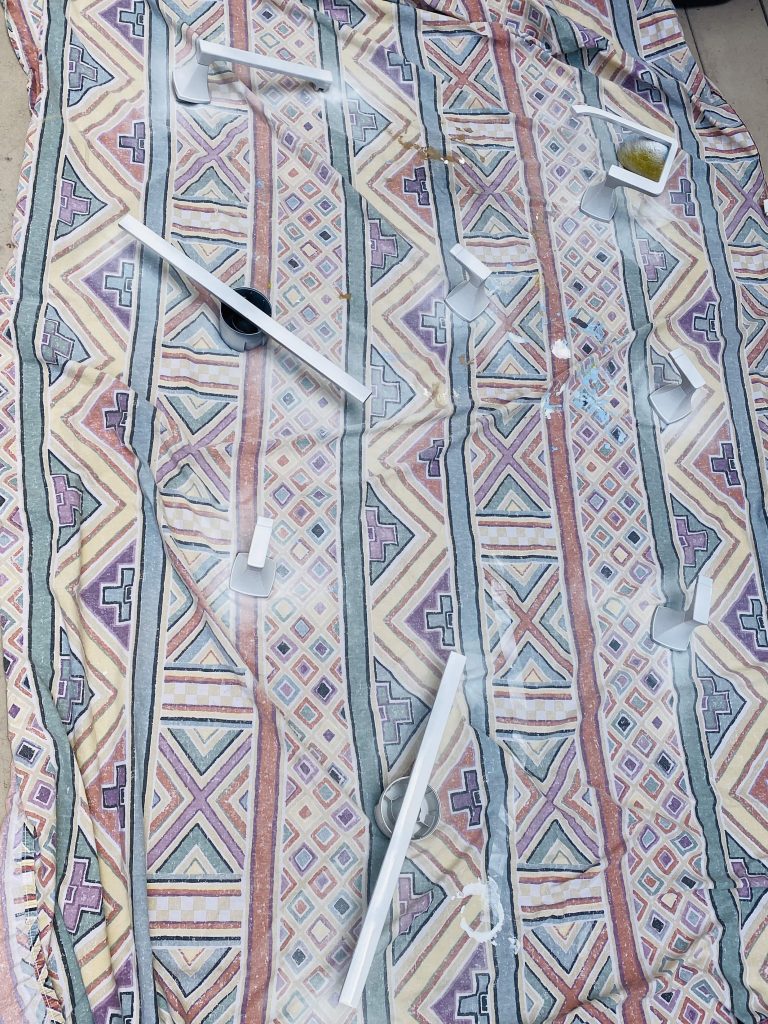
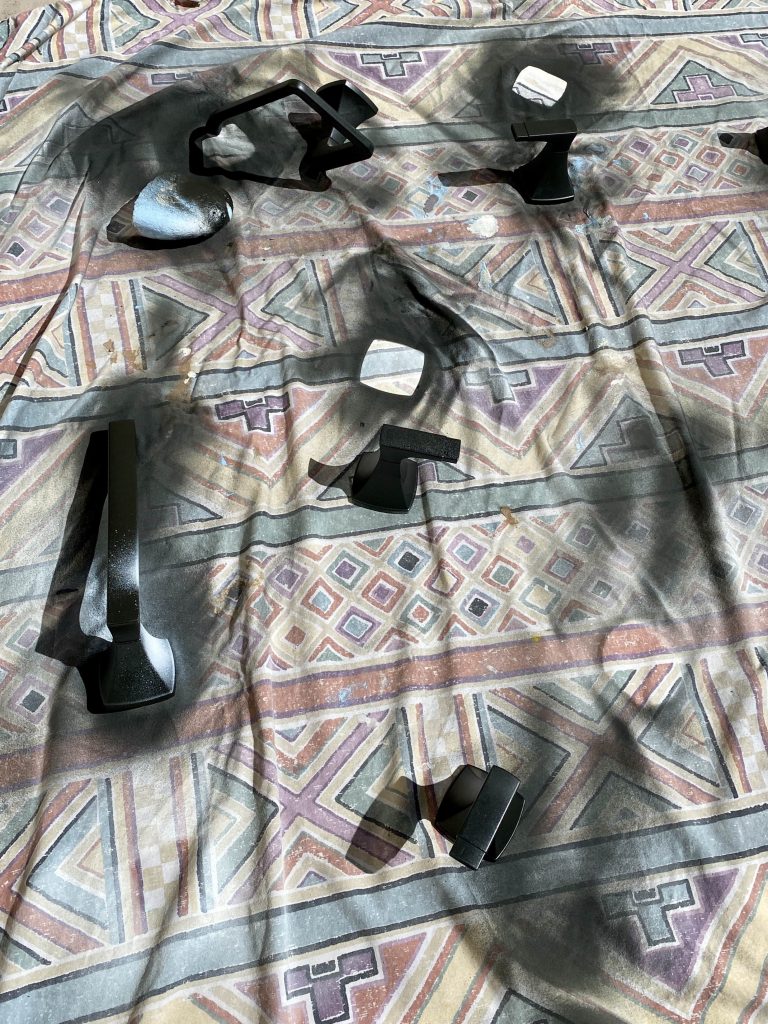
- Consider spray painting your existing hardware if you like the style, but want to change the finish. I did this with a lot of success, it just takes a little patience and time (lots of thin coats of spray paint). See my budget bathroom remodel post for how to paint your hardware.
Conclusion
 Sharing is caring, if you like this post, please pin to Pinterest or the social media of your choice!
Holy cow! That was a long post, but tackling a DIY bathroom remodel is a huge undertaking! I wanted you to have ALL the tips and tools to make sure you know what you are getting into, and to give you the confidence you need to succeed.
We covered everything from the planning and budgeting phase, to demo, then tiling and installing everything from toilets to lighting. I hope you got a ton of useful info, plus links to a lot of the products I use myself to save you time (and money).
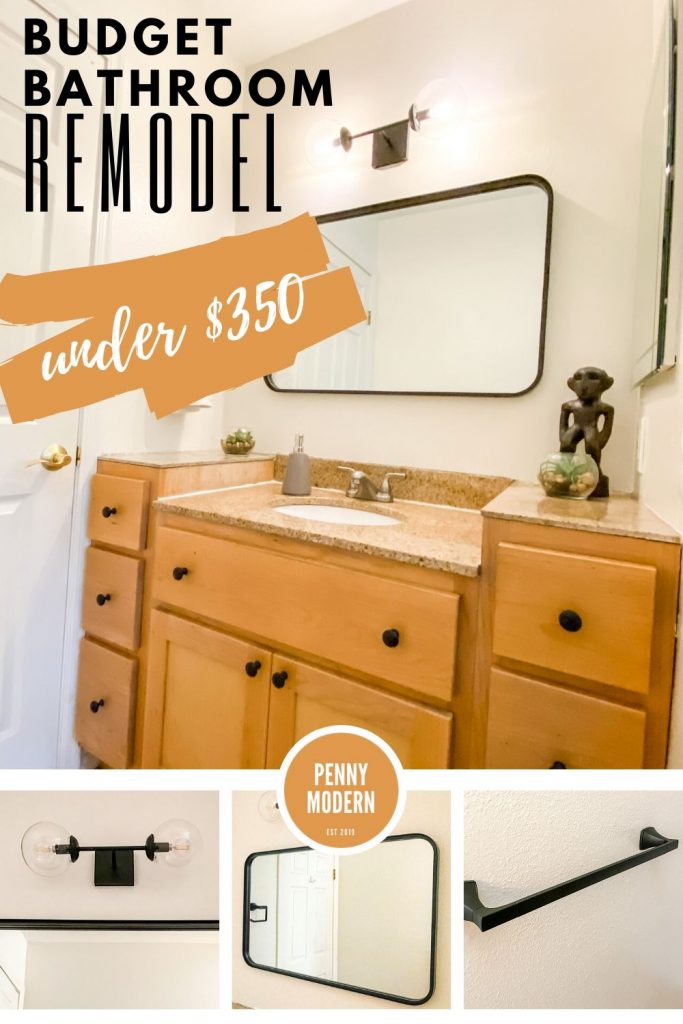
What part of a DIY bathroom remodel seems the most daunting to you? Let me know in the comments below. Hopefully I didn’t scare you off, but if you want more of any easy refacing bathroom project, check out my post: Budget Bathroom Remodel (DIY under $350).
Until next time!