Is your laundry room more utilitarian than bohemian, and in desperate need of a makeover?
Do you want to freshen up your laundry room to make it a “destination” spot versus a depressing place you have to go every weekend?
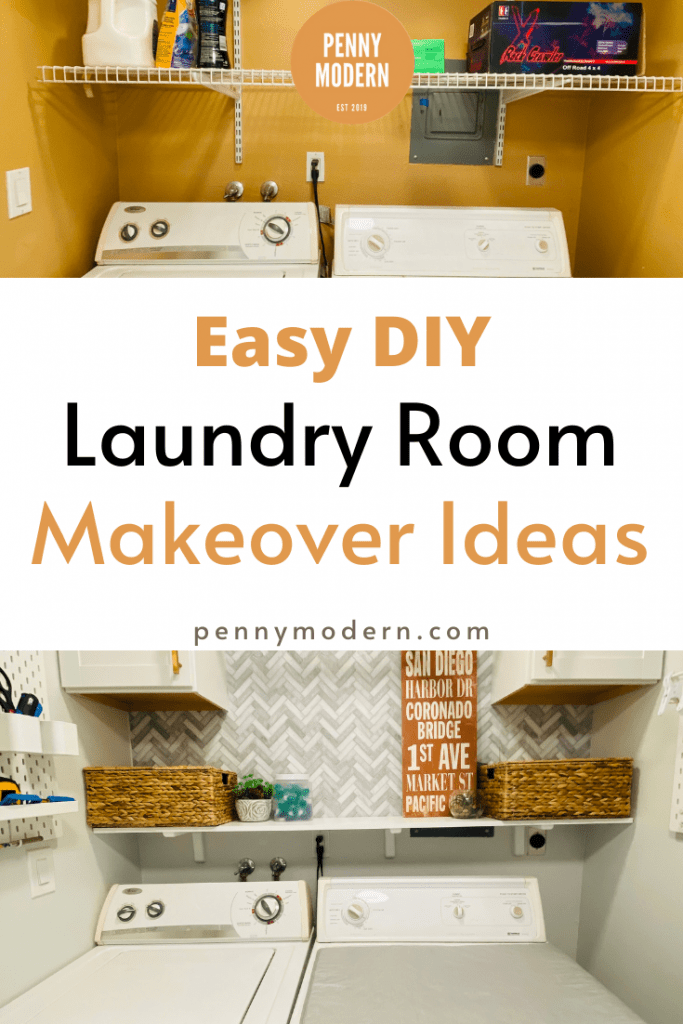
Then look no further, this blog post will have 5 affordable and easy laundry room makeover ideas to try out this weekend. I’ll take you through my own laundry room makeover and give you the best ideas that I learned from my own laundry room transformation.
If you’d rather watch the video version of this post, check it out here:
The laundry room ideas I’ll be covering are:
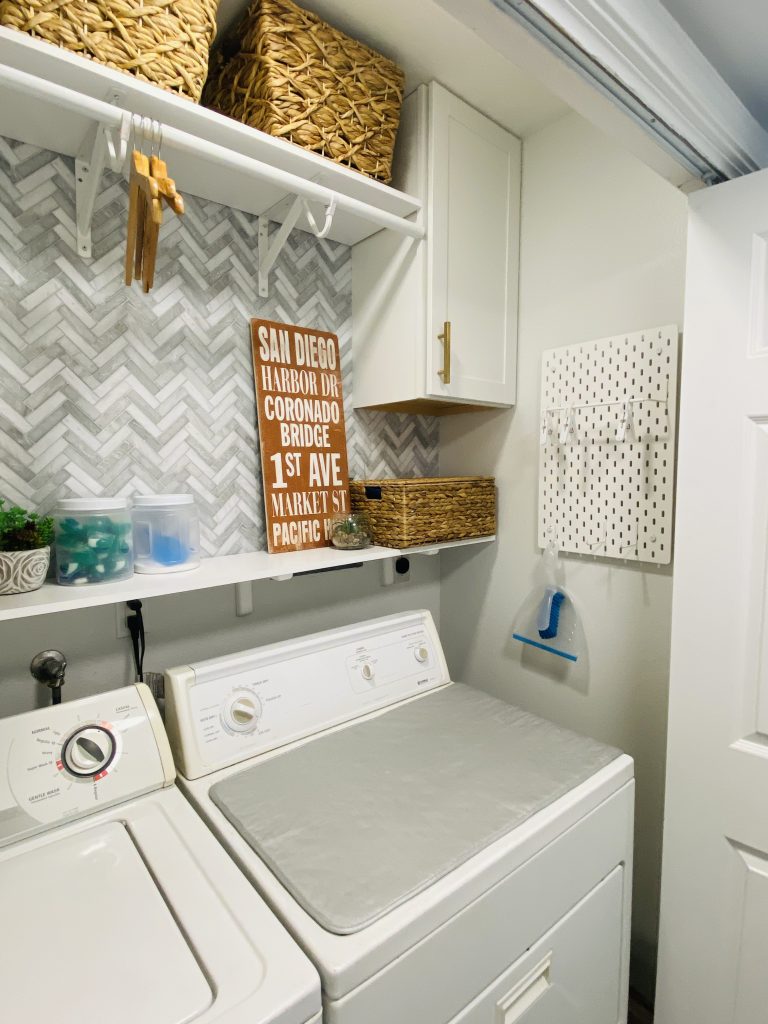
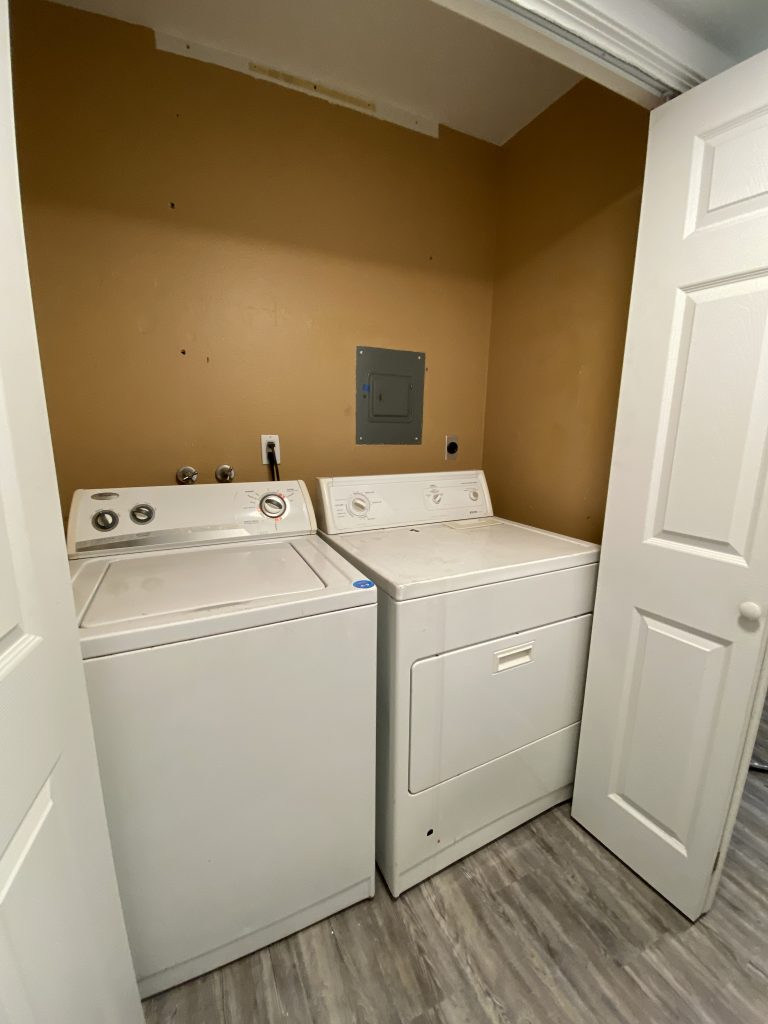
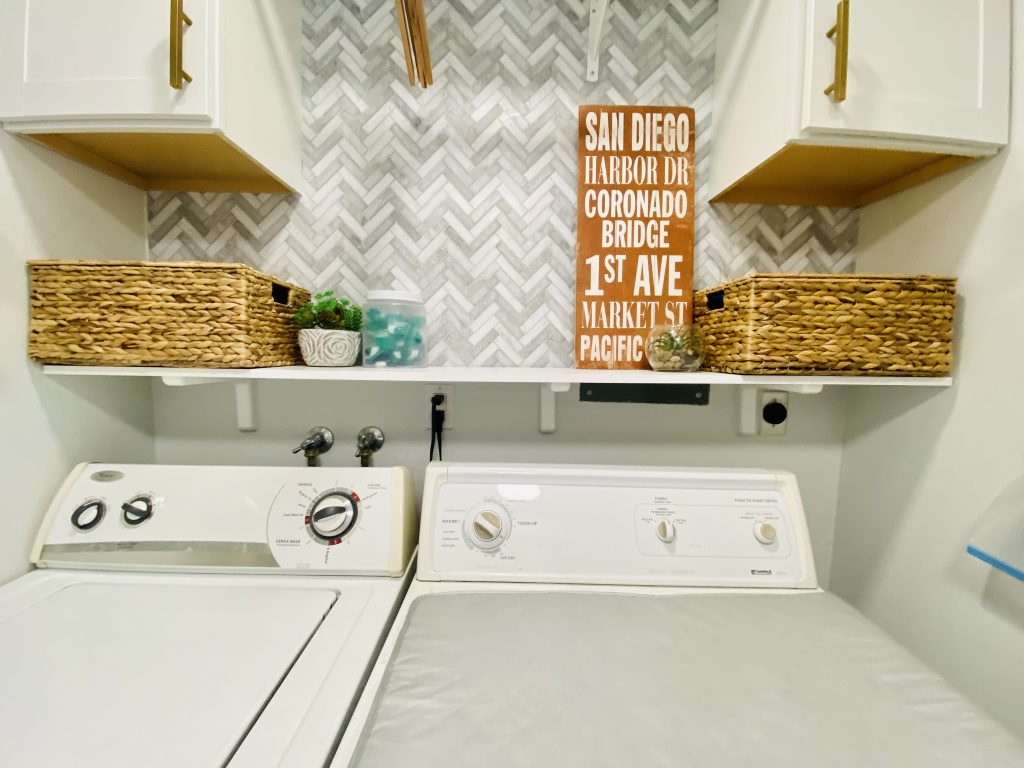
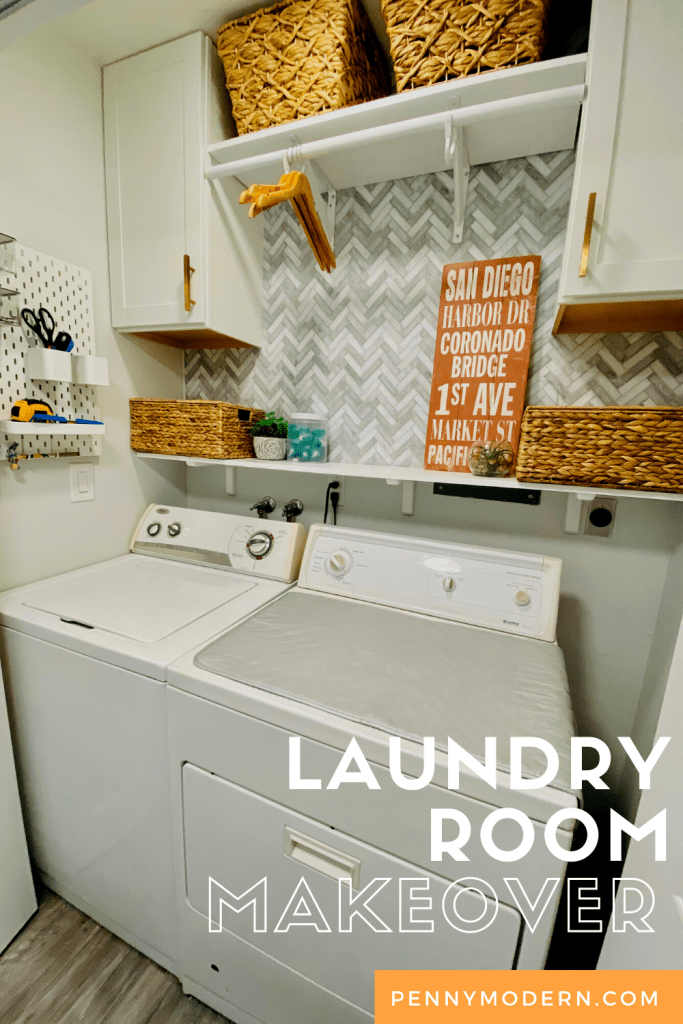
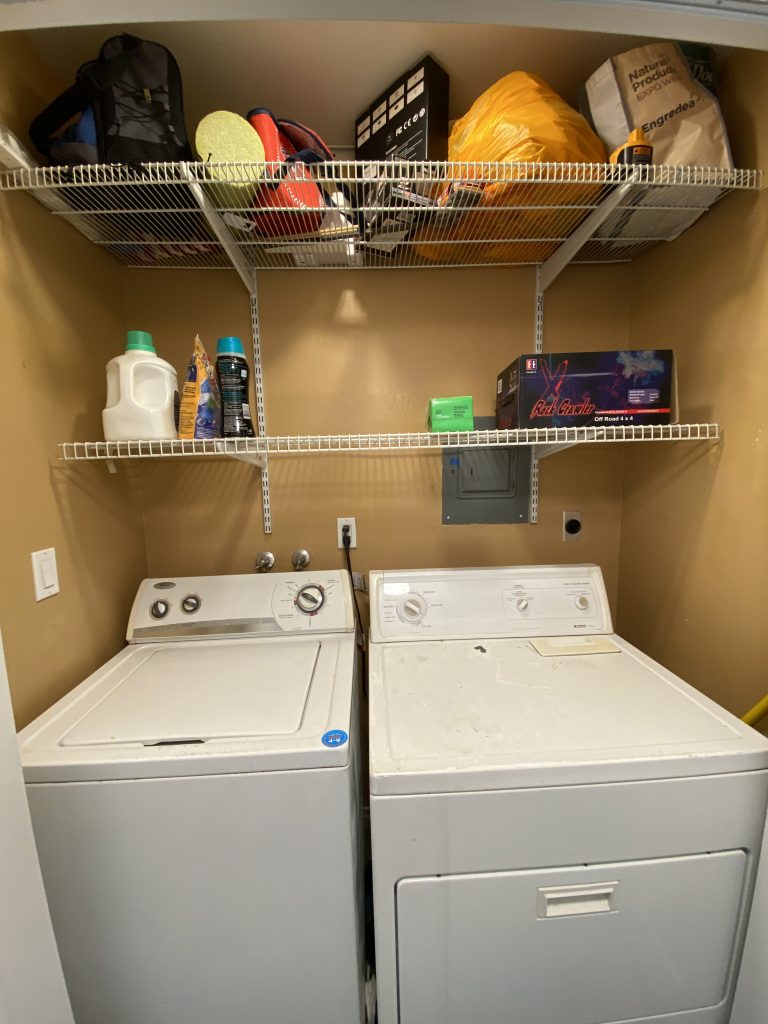
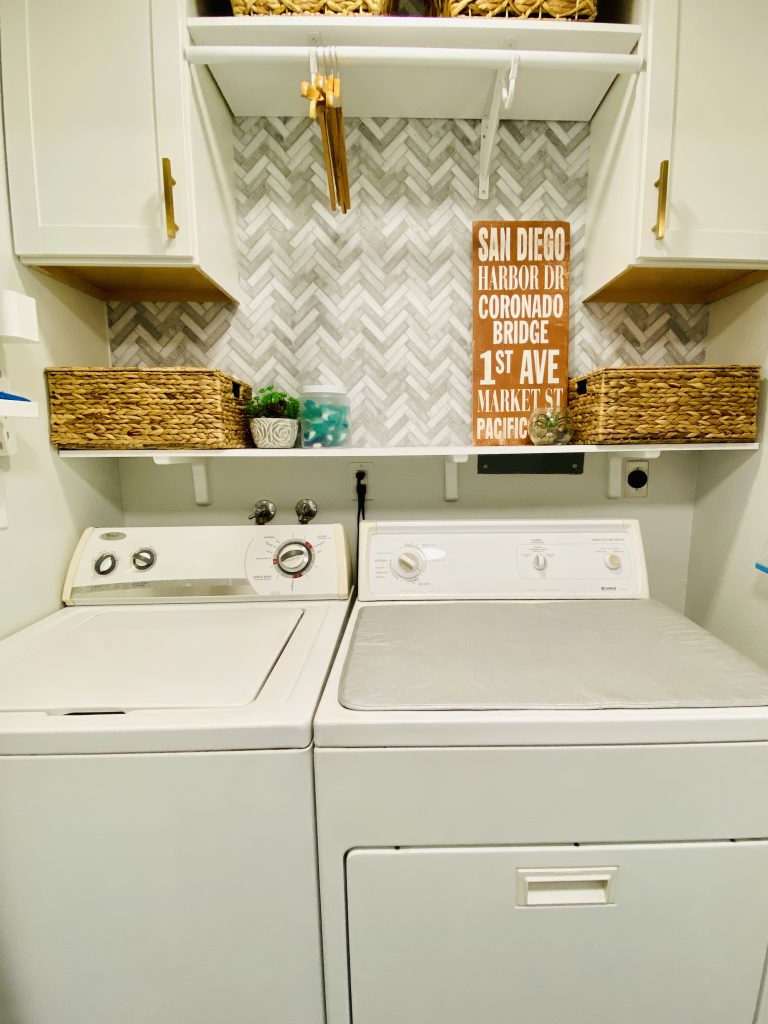
Before we get started, here’s a sneak peek at the before and after of my recent laundry room makeover, full reveal down at the conclusion.
No time to read now? Pin to Pinterest for later!
Disclosure: This post contains affiliate links. As an Amazon Associate I earn from qualifying purchases, at NO extra cost to you.
Shelving
Shelving is a must-have for your laundry room
Ok, so in my humble opinion, shelving is one of the most important features in a laundry room makeover. You need a place to put detergent, stain sticks, dryer sheets, whatever.
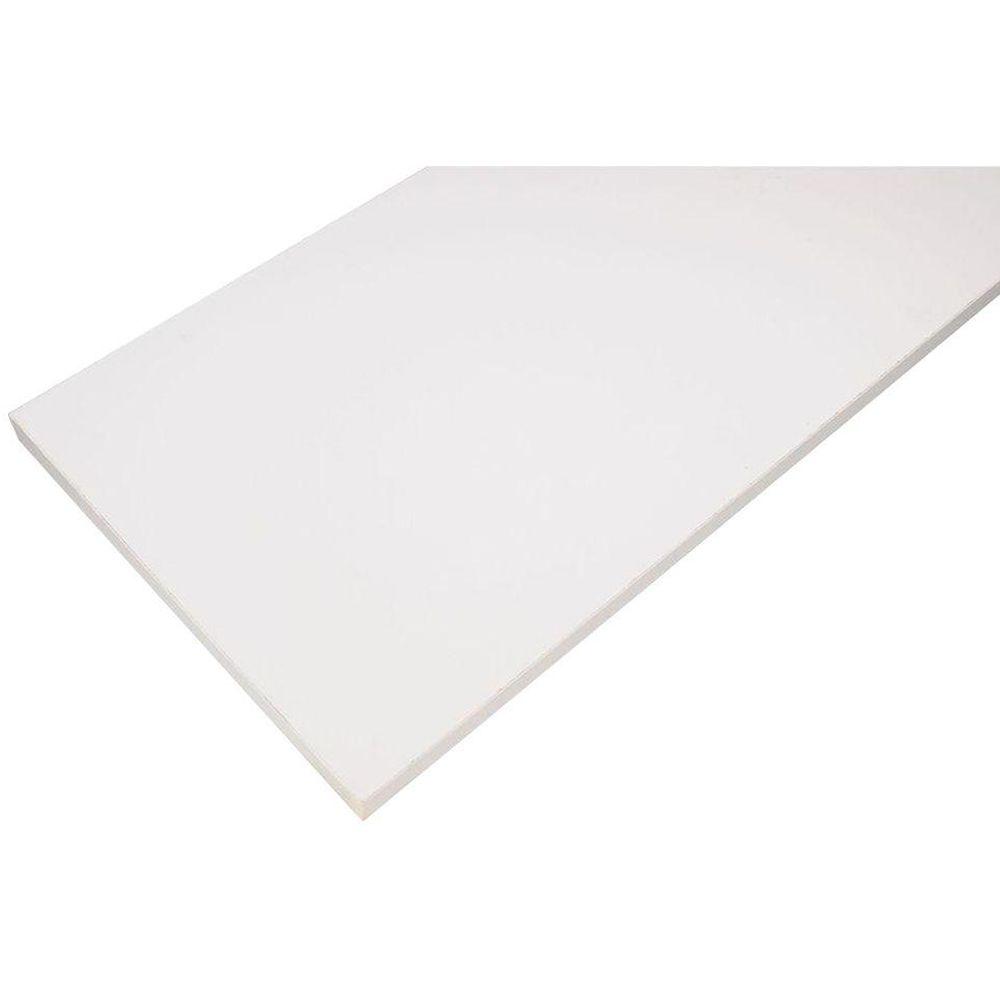
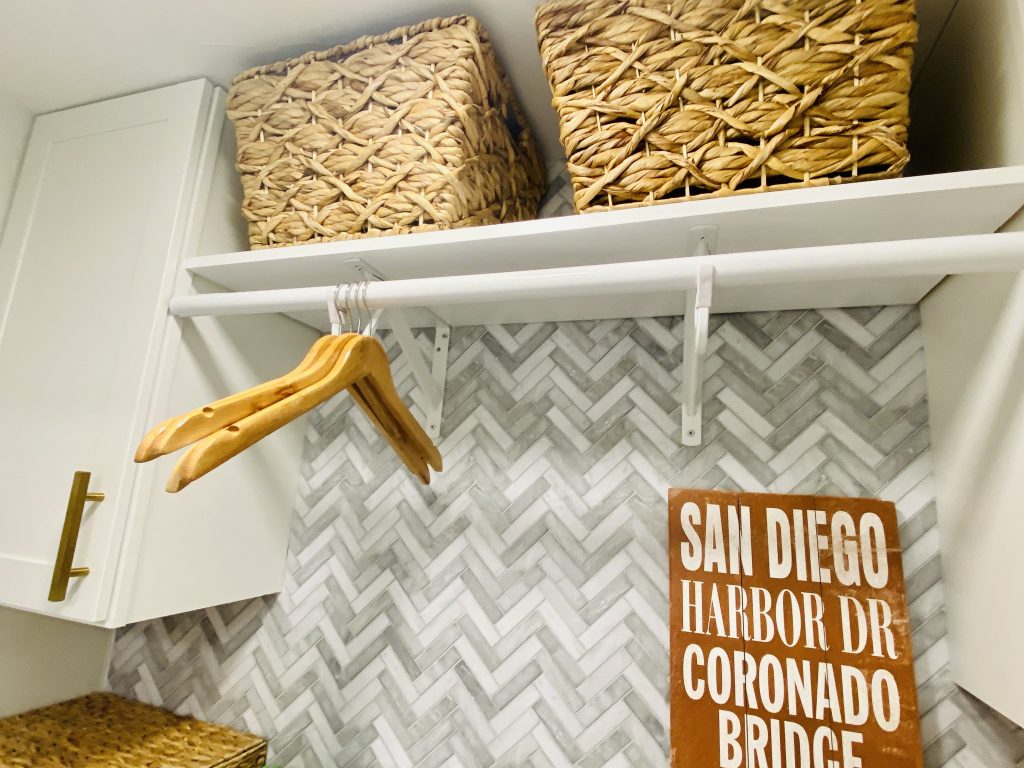
I chose the Rubbermaid white closet shelves from Home Depot, that I cut to size. They are super cheap (ranging from $6 – $15 depending on the size) and come in a ton of sizes and colors. I paired it with these inexpensive white brackets to make a very affordable and cute shelf for my stuff.
For the top shelf I used a wider 12″ shelf from Rubbermaid, but chose shelf brackets that also hold a closet rod. I wanted a place to hang my drip-dry stuff and this was perfect!
Closet rod was essential to hang delicates
Cabinets
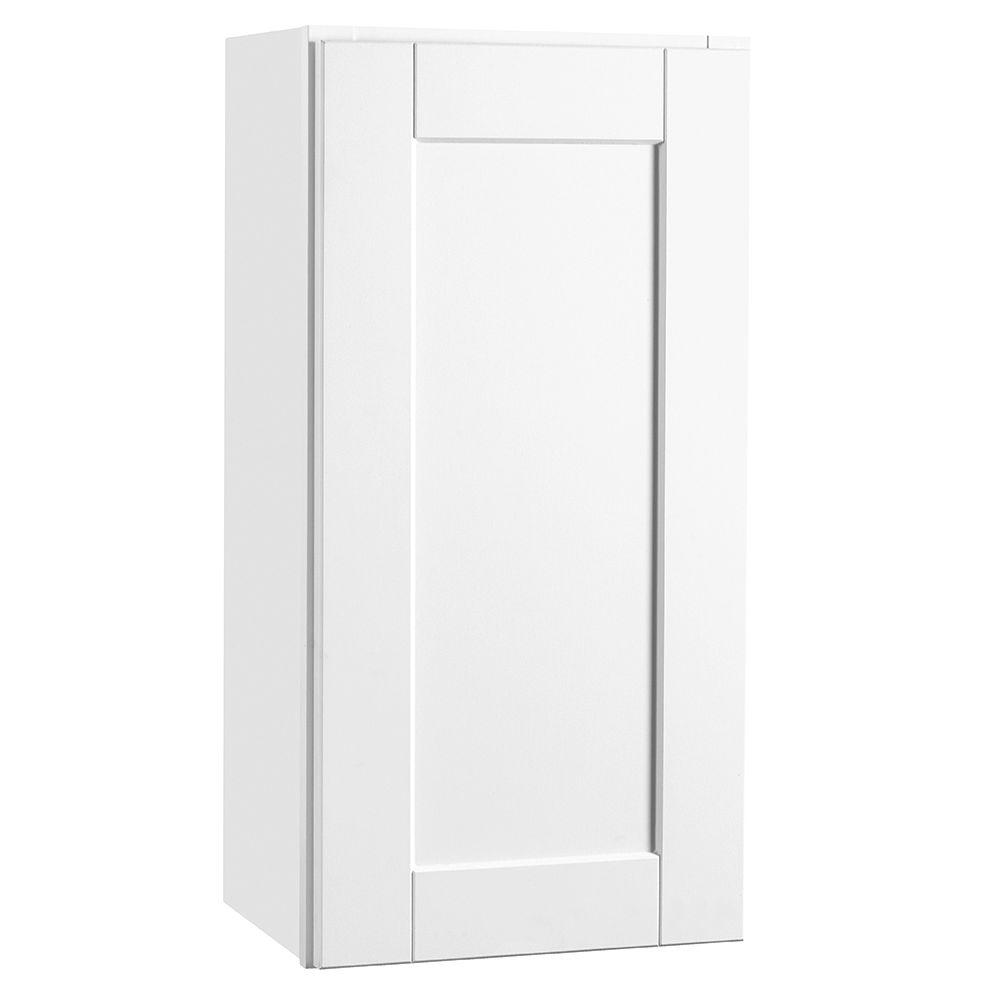
Cabinets are a great way to hide bottles and stain sticks
Cabinets are a great laundry room makeover idea because they add storage for all your bottles and junk, but hide it so it still looks nice and organized.
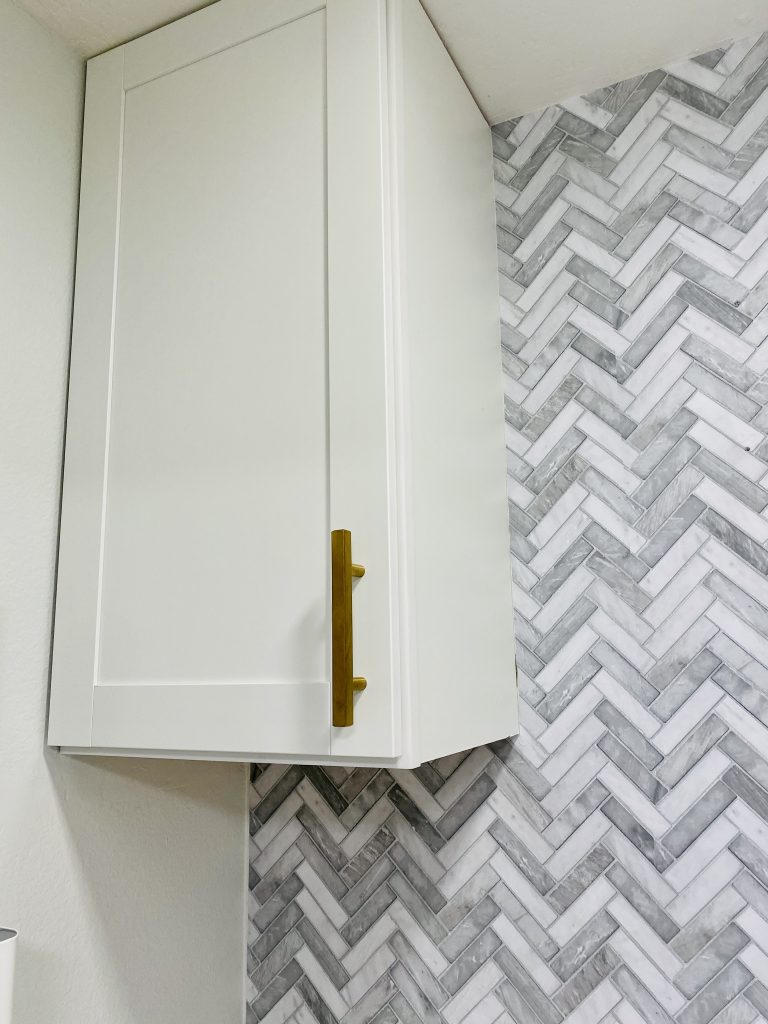
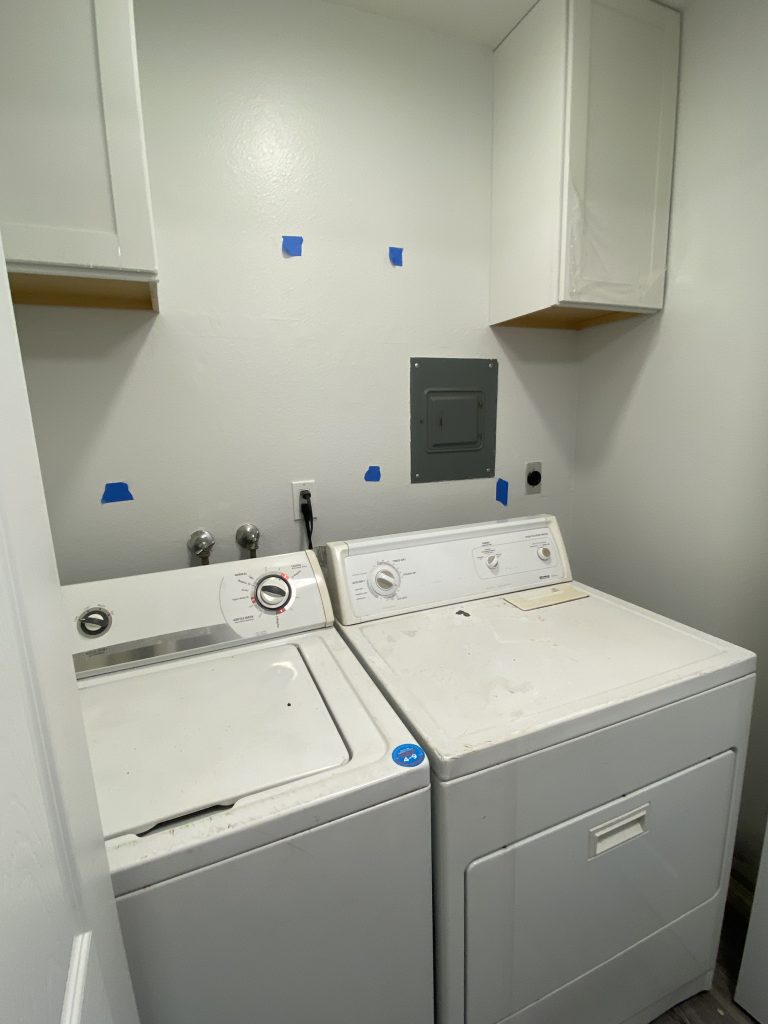
The laundry room cabinets I chose are in stock, pre-assembled pre-painted 15″ Hampton Bay white shaker cabinets from Home Depot. Super easy for my hubby to install, you just screw them into studs.
We added cute brass handles from Amazon, which are a great value and match the brass ones in my kitchen. They are only around $16 for 5 handles, so a great deal.
Utility Features
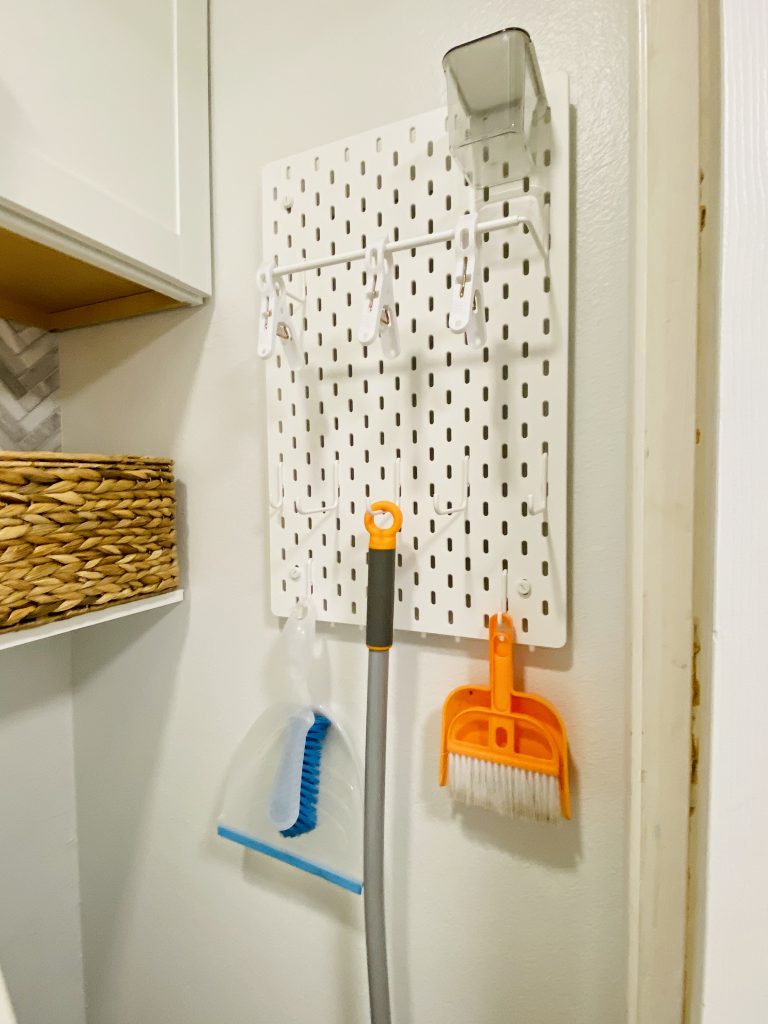
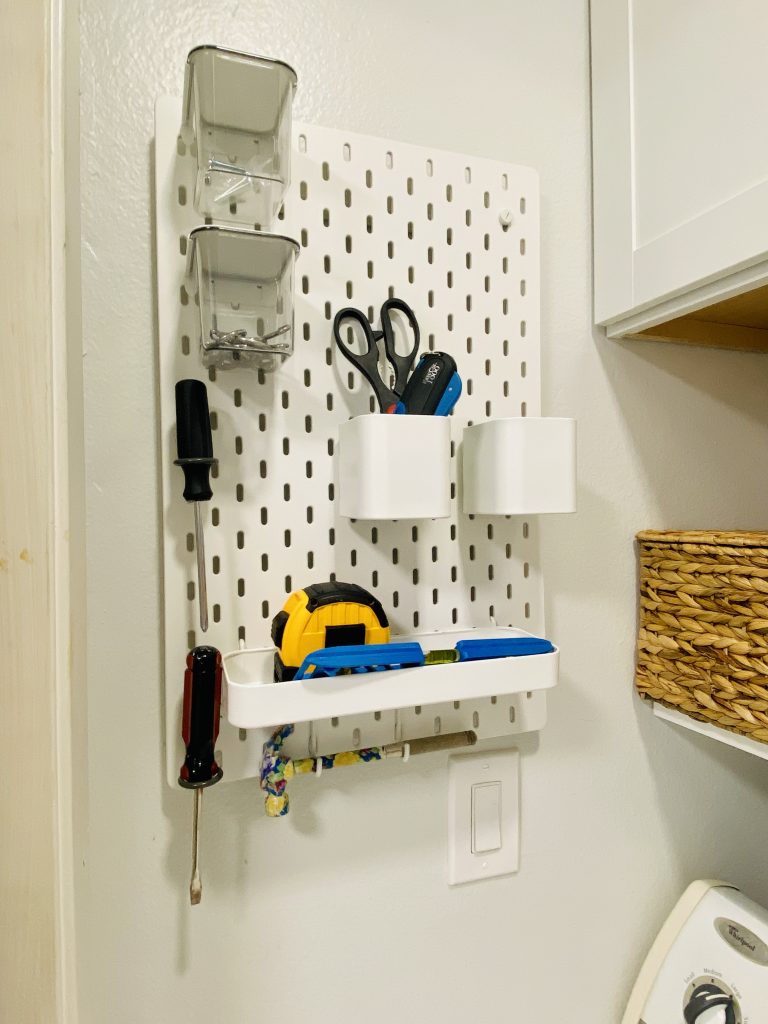
Hooks, Rods, and Racks
Ok so I knew I needed plenty of hooks, rods, and racks for drying my drip-dry clothes. I installed an adjustable closet rod under my top shelf, then added two peg boards from IKEA.
I love the IKEA Skadis peg boards because they have a ton of useful accessories – everything from hooks, to shelves, to clear plastic containers. I wanted to be able to put a few useful tools, as well as hooks for brooms, dustpans, or even clothes. IKEA came to the rescue.
Ironing Area
The other super basic thing I did was gave my washer/dryer a good cleaning. I used a magic eraser to get off all kinds of mark, drips, and rust. It wasn’t in the budget to get new ones, so I made my existing machines look nice.
I bought this magnetic ironing pad for the top of my dryer to hide a bunch of scratches and dings.
Storage Ideas
Laundry room storage ideas
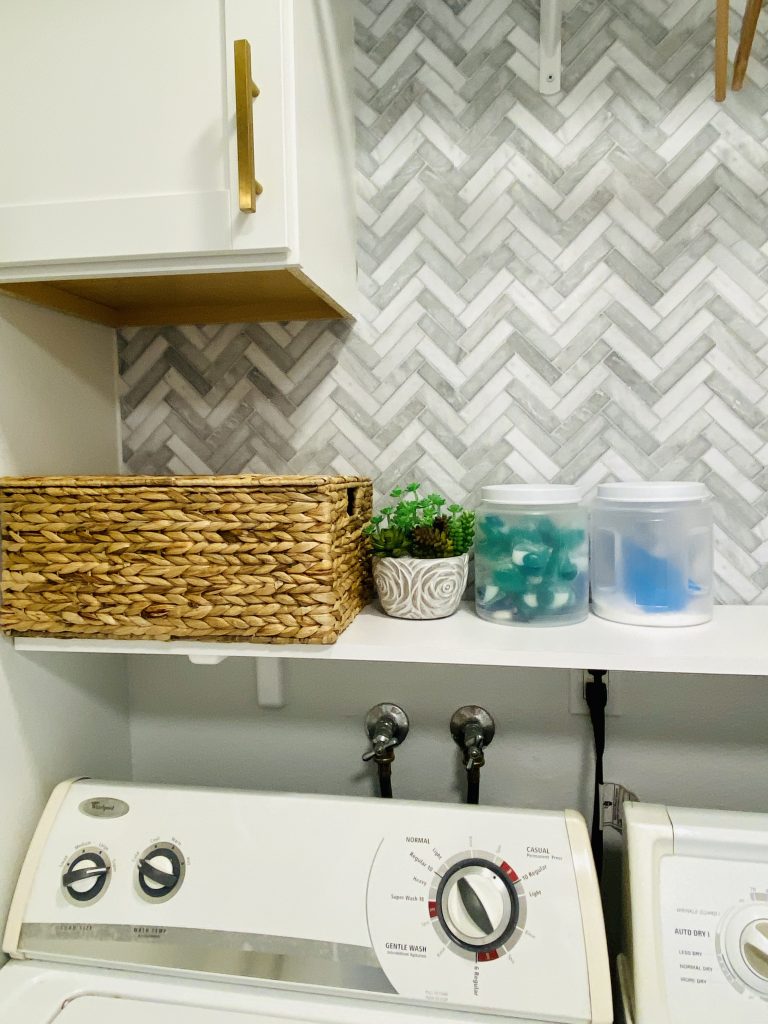
Ok so cute storage is essential in a laundry room makeover since you want this to be your zen place. I chose some beautiful hyacinth woven baskets to store random stuff so I didn’t have to look at it all day.
Here are a few similar style woven baskets:
Decor
Now we are at the fun part! Making your laundry room a zen place requires a little pizazz.
Paint
Before and After painting our laundry room
First things first I had to paint my laundry room, and chose the same color paint, stone white, as the rest of my first level (the previous owners had never painted it, so mine was an ugly brown color). You could go wild here but I recommend a color the same or similar to other rooms in your home for harmony.
Create a focal point
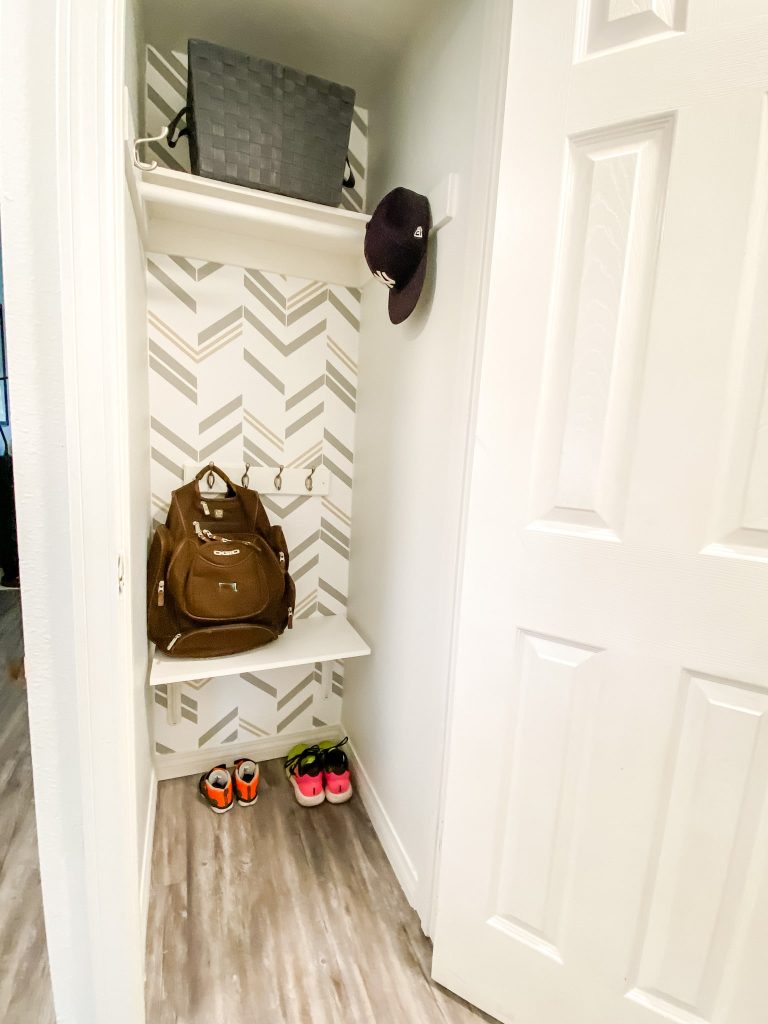
To create a focal point on the wall with my washer/dryer, I chose this beautiful marble look herringbone peel and stick wallpaper by Threshold from Target. It actually almost matches my real backsplash in my kitchen and is a fraction of the cost.
You can pick literally any peel and stick wallpaper or peel and stick backsplash for your own laundry room makeover, feel free to do something whimsical – this is for you after all! Check out my post, Peel and Stick Wallpaper Pros and Cons for more options.
Decor elements
Natural decor elements like woven baskets and signage help make your space unique.
I also added the hyacinth baskets to add a more natural element, along with some fake plants, and a little sign I had. Some cute plants and laundry signs from Amazon are below to help you add some fun elements to your laundry room.
Just click on each image if you would like to check it out on Amazon.
Conclusion
Like this post? Pin it to Pinterest as a thank you!
Wow that was a lot but I hope that helped inspire you to create the laundry room of your dreams! We covered shelving, cabinets, utility features, storage, and of course, decor.
Here’s my full before and after laundry room makeover reveal:
What do you think? These are all really easy ideas to execute, and most options are very affordable. Plus, I did the whole project in 1 weekend.
What do you want to try this weekend to spruce up your space? Leave a comment below and let me know.
If you are looking for more easy and affordable home makeover ideas, check these posts out:
Interested in making your home a smart home, but not sure where to begin when it comes to home automation?
Do you love gadgets and technology, but not sure which smart home gadgets are really “worth it”?
If you answered yes to either question, then this post will be perfect for you.
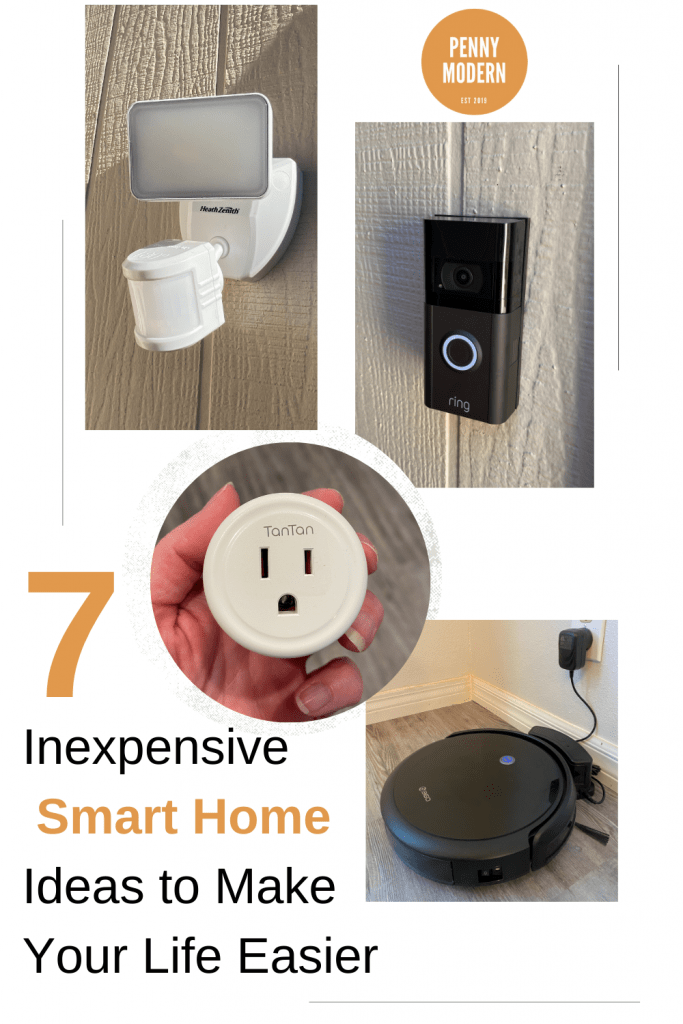
No time to read now? Pin to Pinterest for later…
I’ll review seven of the best, most affordable smart home ideas to make your nest smarter and your life easier. I’ll give you the benefits of each smart home gadget, an honest review based on my personal experience, along with shoppable links to the best smart home automation devices in 2021.
Here’s what I’ll cover:
Let’s go-go gadget arms and get started creating the smart home of your dreams – in true Penny Modern style – on a modest budget.
If you prefer a video format for this post, check out my YouTube Video:
Disclosure: This post contains affiliate links. As an Amazon Associate I earn from qualifying purchases, at NO extra cost to you. I did not receive any compensation for reviewing any of these items, all these opinions are my own.
Voice Assistant or Smart Hub
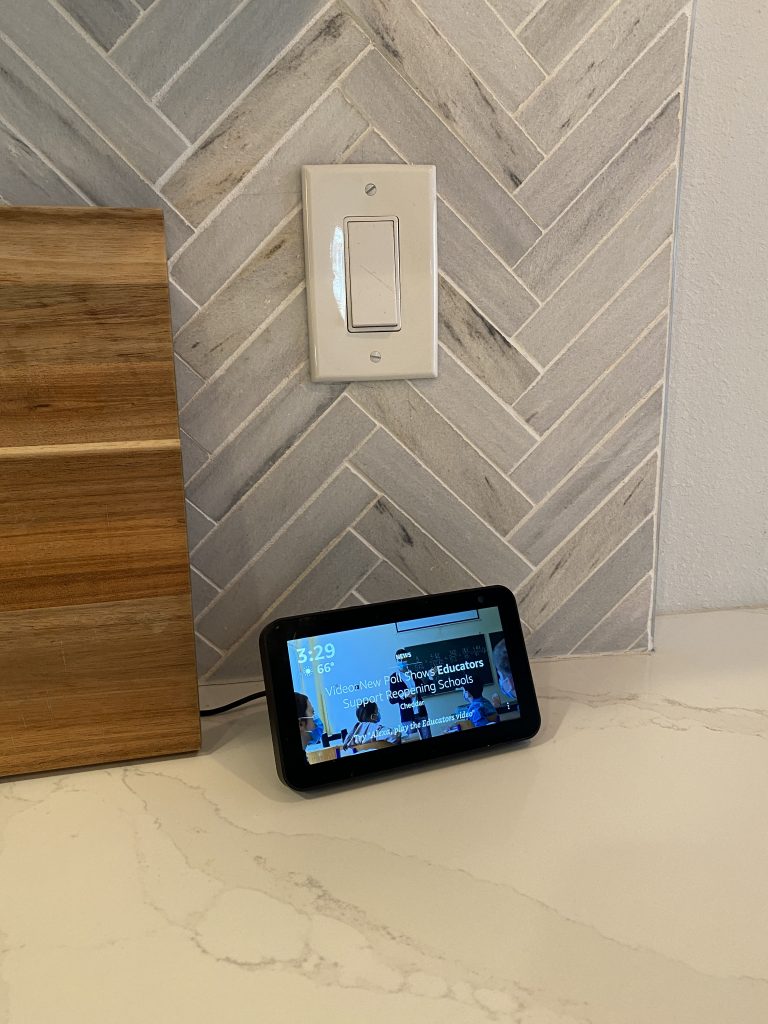
Our voice assistant, Alexa.
To enable your smart home, it will be key to FIRST get a Voice Assistant or Smart Home Hub. This will allow you to control some or all of your smart devices with your voice.
We have a couple of different Amazon Echo devices and I really like the ones with the screen, especially when paired with a video doorbell (you can see who’s outside, which is cool).
Amazon Echo 8 – around $129.99 from Amazon. I picked up an Echo Show 8 to give to my mom and dad to make video calls with us, then picked up an Echo Show 5 myself. The Echo Show 8 is a little bigger than the 5, so I actually like it better.
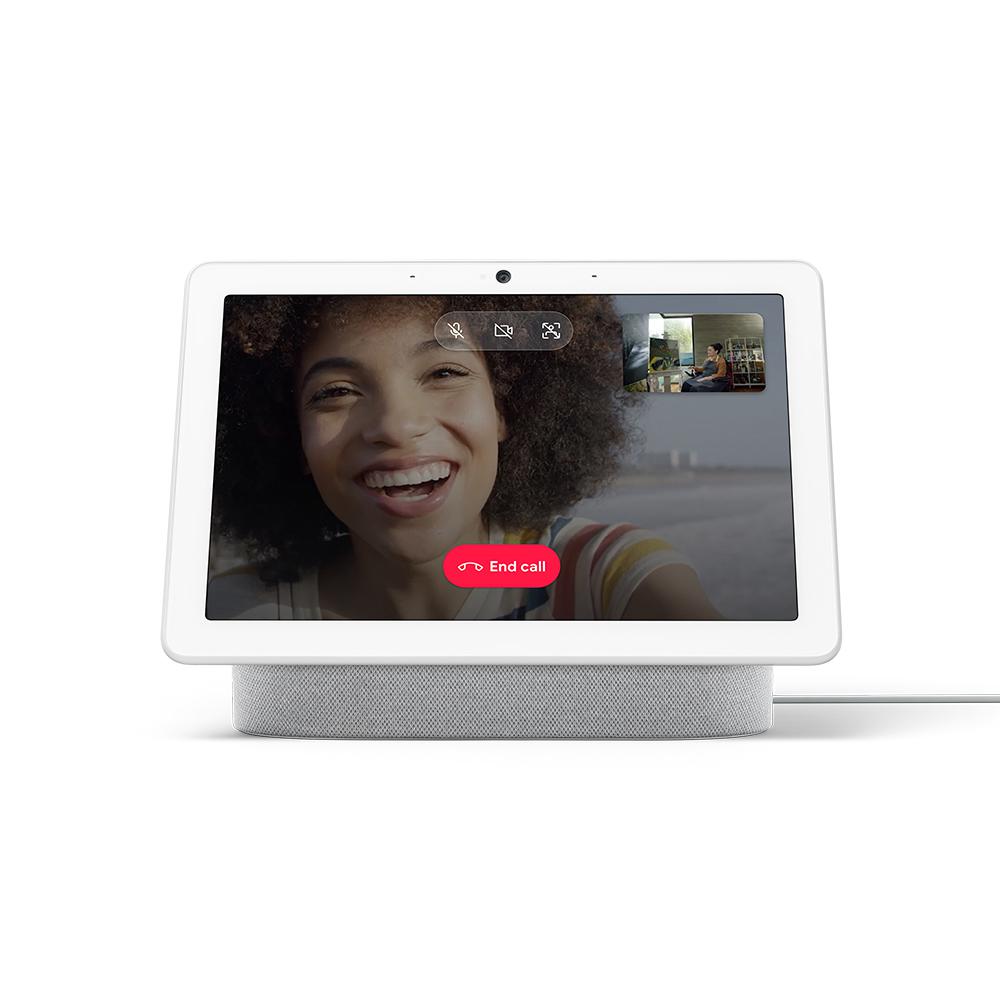
Google Nest Hub Max – around $229 from Home Depot. This device connects with a variety of smart devices (including Google Nest devices) and also allows you to make video calls. This is a good option if you prefer Google devices such as the Pixel phone, Google Chromecast, etc.
Video Doorbell
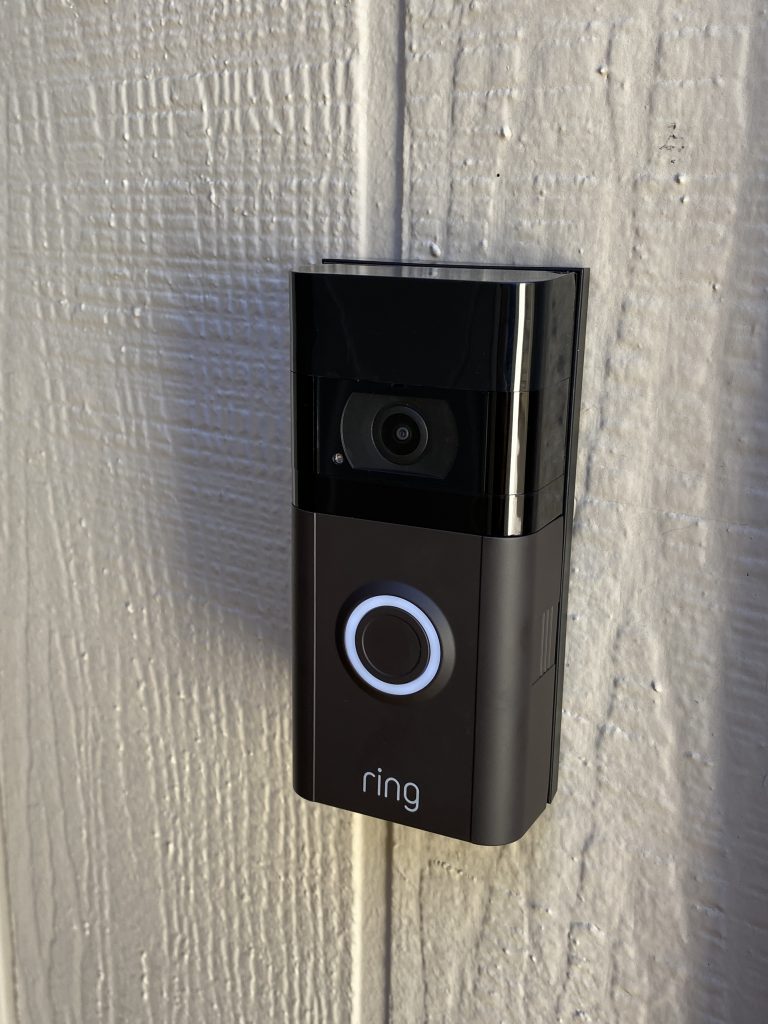
Ring Video Doorbell guarding our front door.
Video doorbells are essential smart home devices because they help serve as a doorbell, as well a provide some security to a certain extent (especially if you get a lot of packages). You will get notified (via the app or voice assistant) if anyone approaches your home.
Ring 3 has 1080p HD Video Quality, which means better visibility if you need a recording due to a security issue.
It had very good reviews on Amazon – 4.5 stars
Has options for both no monthly fees, or very low fees for added services ($30 per year for the basic “Ring protect” plan, or $100 per year for an enhanced plan)
It comes with these little wedges so you can position your doorbell in optimal ways to see a larger area.
If you pay a a small fee (only $30/year), you can access recordings if someone were to steal a package or try to break into your home. For a slightly larger fee ($100/year), you can opt in to professional monitoring. This is still way less than ADT or something like that.
Google Nest Hello Video Doorbell – from Home Depot – around $229. This is a great option if you have the Google Nest voice assistant. It’s very similar to the Ring doorbell but has some extras. It has 24/7 streaming, and can identify when packages are delivered to alert you. Their subscription service starts at $6 per month.
Smart Lighting
Ok so why get smart lights? Well there are two main factors: one is convenience, the other is security. Smart lights can be set to automatically turn off or on via an app or by your voice assistant. That way if you go out of town, it will look like someone is home.
The convenience factor is that you can control smart lights with your voice and turn on your lights by simply saying “Alexa, turn on the living room light.” If you have an older home without much overhead lighting, this is very convenient.
Smart Light Switch
There are so many options for smart lighting for your smart home. We tried to install a smart light switch, the Kasa 3 Way Smart Switch Kit but our home is older (1974) and the wiring would not support it (no neutral wire was the issue). It’s a great option if you have all the wiring already there, just check the specs first. No hub is required so it just hooks up to your wifi.
Smart Light Bulbs
Another great option is to use Smart Light Bulbs. I am getting these Treatlife Smart Bulbs when some of our existing LED bulbs die. At 4 smart bulbs for around $28 it’s almost the same price as getting LED Bulbs. They don’t have full color but offer a variety of shades of white – from cool to warm white.
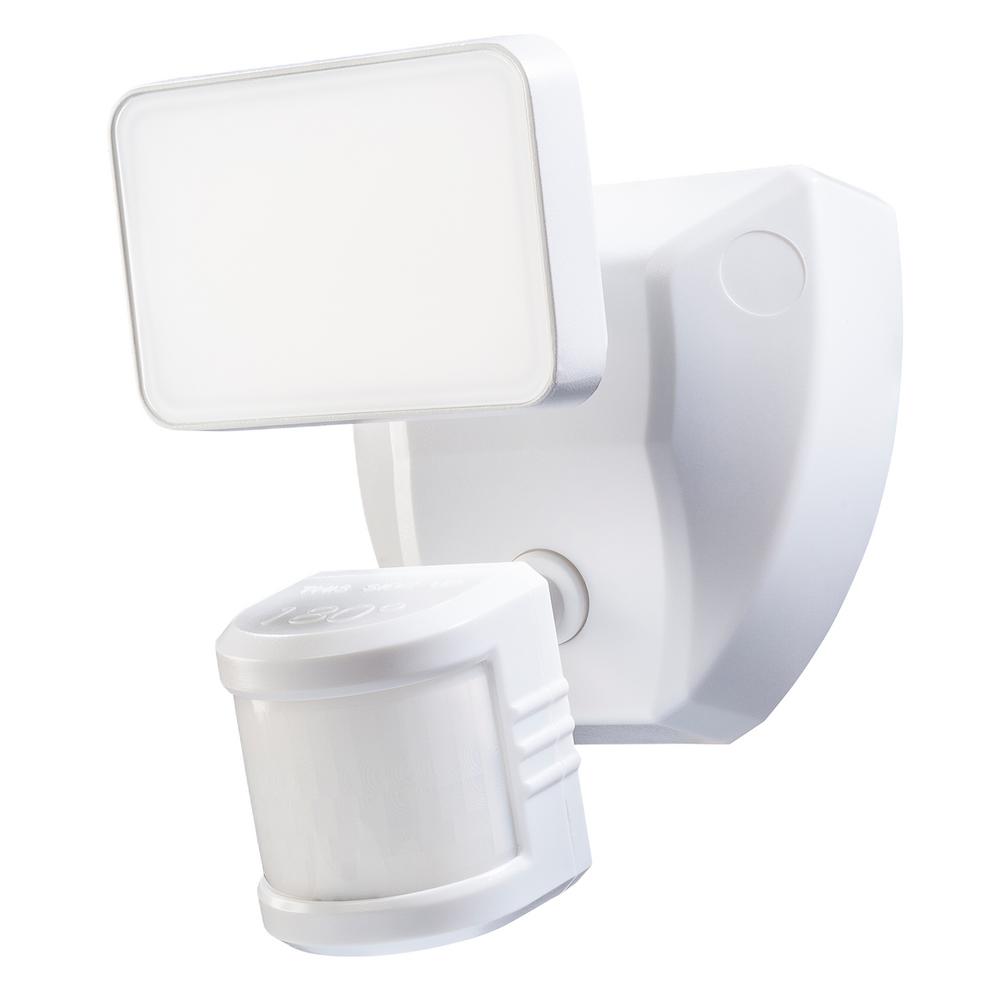
Smart Flood Light
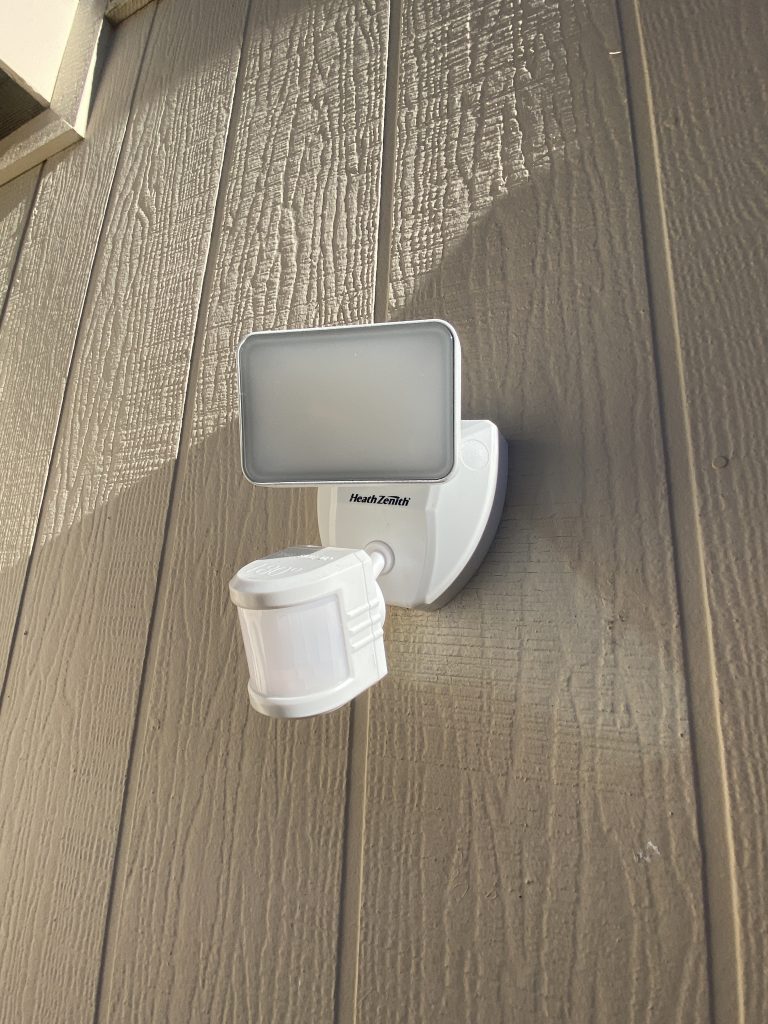
Smart Flood Light for Outdoors
To enable smart lighting in our older home, we opted for a smart outlet (which is next), and the above Secur360 smart flood light, for out patio.
We bought the SECUR360 Wi-Fi Connected flood light last year from Home Depot, for less than $60. I love it because it has a motion sensor and is very bright, plus it can be controlled via the app or a voice assistant.
If this flood light senses motion, it turns on the light and I also get an alert on my phone, through the Secur360 app, which helps me feel more secure. You can use the app to control the light, put it on a timer, apply dusk to dawn settings, or use Alexa to control it.
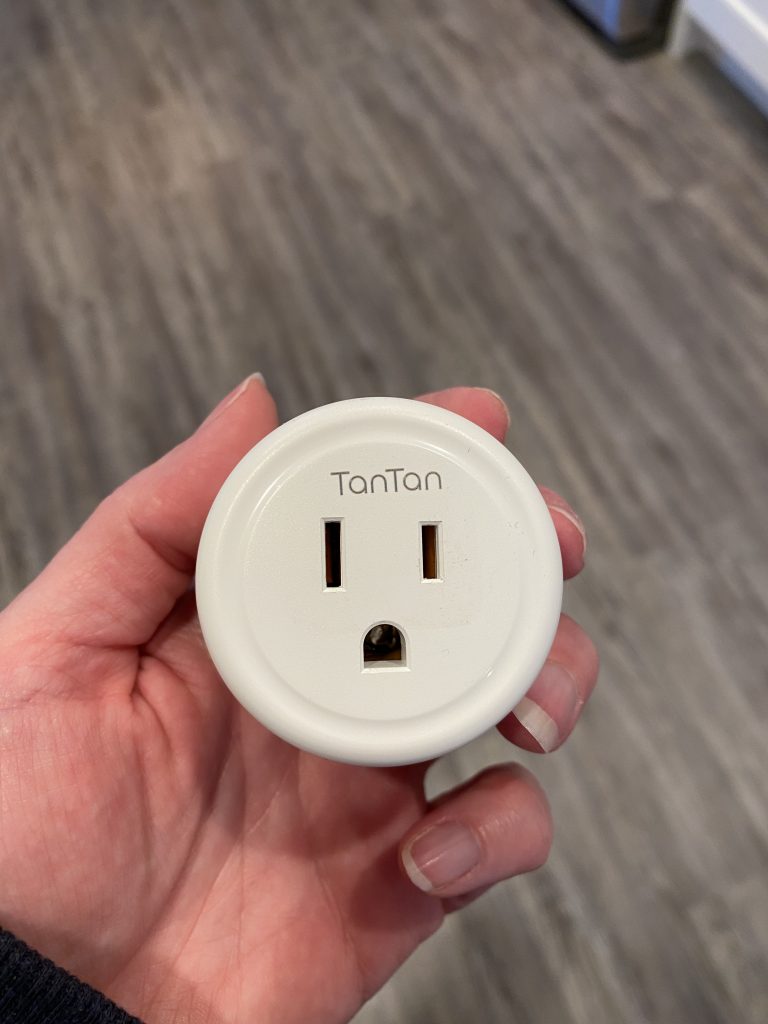
Smart Outlets
We purchased these inexpensive TanTan smart plugs from Amazon in February 2019 and they are still working very well. We paired them with our wifi and our Amazon Echo, and simply plugged in our floor lamp to the outlet. Now we can control our floor lamps with our voice, or even set them on a timer.
TanTan smart plugs from Amazon – $16.99 for a two pack. I also used one of these smart plugs for my Christmas lights and it worked well as a timer to only turn on at night. I plugged it into our garage as these are not rated to be used outdoors.
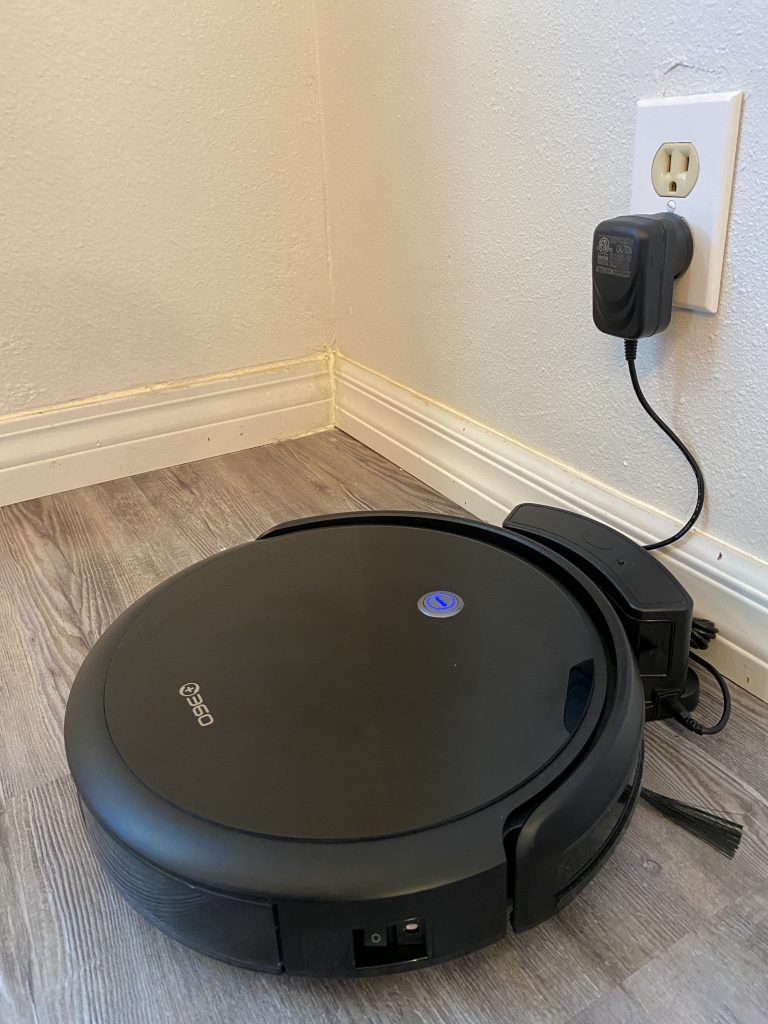
Robot Vacuum
I have owned 2 different robot vacuums so have a lot of experience with these awesome helpers for your smart home. The main benefit is you can let this baby clean for you, while you do other things. Here’s the scoop.
Most recently I purchased the 360 C50 Vacuum and Mop. I recommend getting the Vacuum and Mop combo as it’s just more convenient to have something that can do both household chores. This thing is smart because it’s controlled by a remote, a phone app, or your voice assistant (like Alexa).
360 C50 Robot Vacuum and Mop ready to do my bidding!
The 360 C50 won’t completely do all your cleaning for you, but it will help keep your floors clean in between “deep cleaning” day. Check out my full review here: Product Review: 360 C50 Robot Vacuum Mop
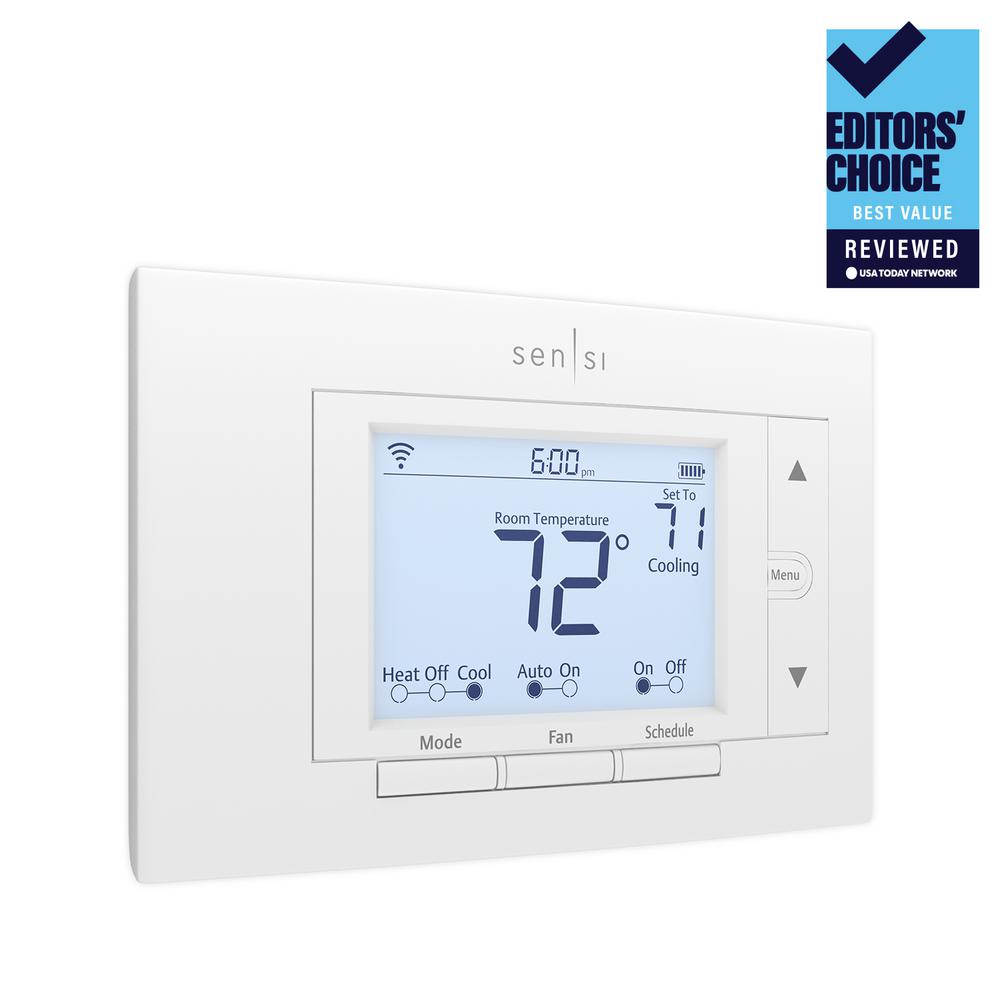
Smart Thermostat
OK, so why do you need a smart thermostat for your smart home? Well the biggest reason is to save money.
A smart thermostat will help you save by allowing you to put your HVAC on different timers, or allow you to turn it off remotely if you leave, and forget to turn it off.
The Emerson Sensi from Home Depot is one of the best value smart thermostats on the market at around $129. A lot of other smart thermostats are over $150, with many in the $200 range, so the Sensi is a great deal.
I had the Emerson Sensi in my previous home and loved it. I love how you can control it from your phone with the app, so you can turn off your heat or A/C if you have left the house and forgot.
It’s also able to connect to Alexa, Google Home, or Apple HomeKit which is great to be able to control the thermostat with your voice.
Smart Locks
Smart locks make your life easier because you don’t have to fumble around with keys, and you can make sure your doors are locked from your phone or with your voice.
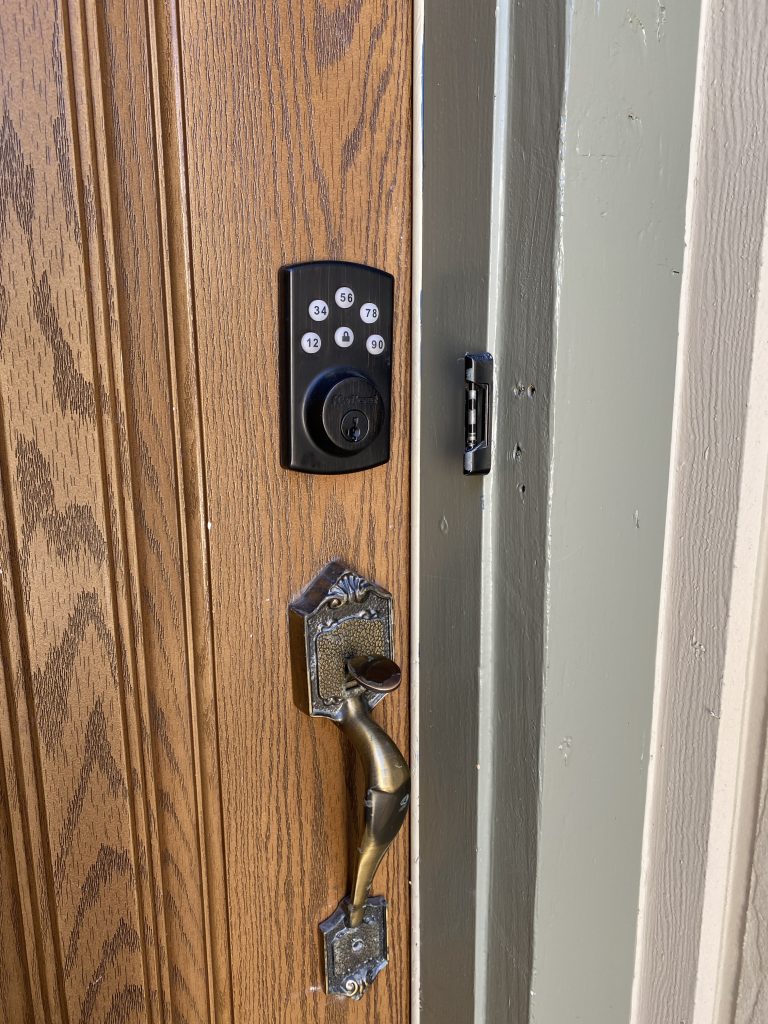
Our front door with the Kwikset Powerbolt
We have keyless locks that are not true smart locks. But I think keyless locks are super smart since you don’t need to pull keys out of your pocket to get in and out of your home. Plus they are way cheaper than actual wifi smart locks.
Keyless Locks
I’ve used several different brands of keyless locks and Kwikset Powerbolt Keyless Entry Deadbolts are the best by far. They are the most durable, reliable, and don’t get jammed. Plus they are cheap – less than $70! I love these locks and have bought them for multiple homes.
Smart Locks
If I wanted to spend a little more money, I’d definitely get true wifi smart locks. The one I want, when I’m ready to upgrade, is the Simplisafe Smartlock for around $100 from Amazon.
The Simplisafe Smartlock is sleek, and sophisticated. I love that you can use the keypad or the phone fob to unlock and lock it. Also you get notified if your door gets unlocked or locked, which is great to keep tabs on kids or whatnot. You can also pair the smartlock with the Simplisafe security system to help make your home even more secure.
Conclusion
Well there you go, I hope you feel smarter, armed with all these super affordable smart home ideas. We covered everything from voice assistants, to video doorbells, to smart lighting, and smart locks.
Like this post? Pin it to Pinterest to share the love!
My favorite smart device is actually the robot vacuum and mop. It really helps free up my time and I can avoid breaking my back from vacuuming and mopping all the time. My second favorite are probably the power locks/smart locks – who wants to fumble with keys anymore?
Which smart gadget do you want to try first, to make your home a smart home? Leave a comment below, I would love to know.
Check out some of my other popular posts, while you are here:
Disclosure: This post contains affiliate links. As an Amazon Associate I earn from qualifying purchases, at NO extra cost to you.I did not receive any compensation for doing this review, all these opinions are my own.
Are you sick of vacuum and mopping your hard floors all. the. freaking. time to keep up with your kids/pets/husband’s mess?
Do you not have $800 lying around to buy a name brand robot vacuum, along with a separate robot mop?
If you agreed, then look no further! I’ve got the best product review for you today.
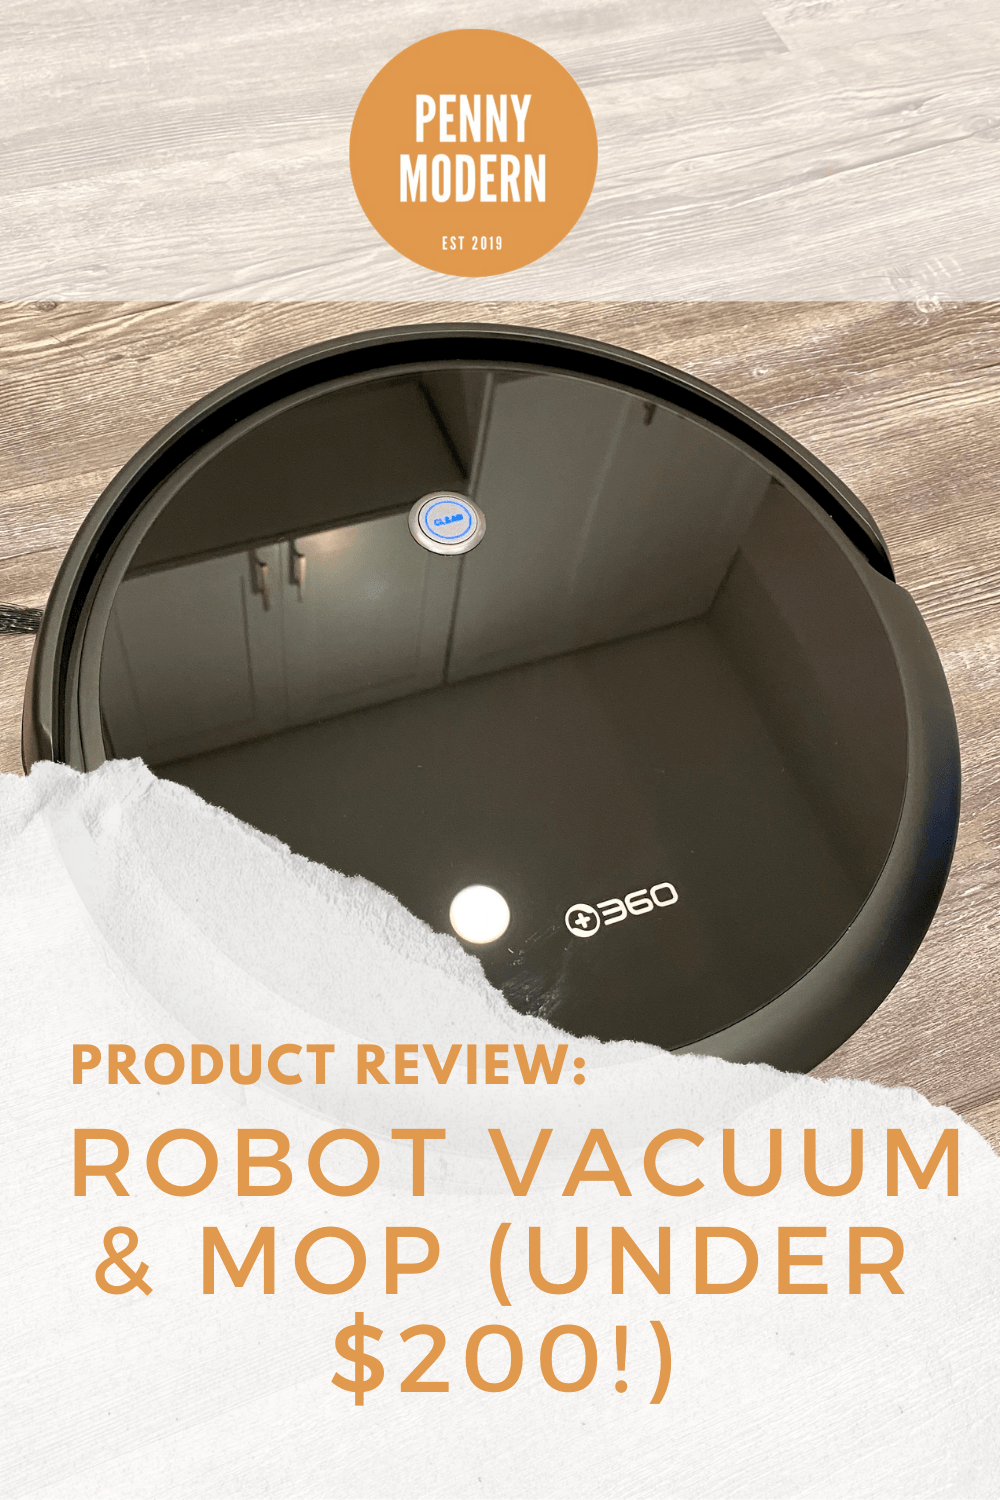
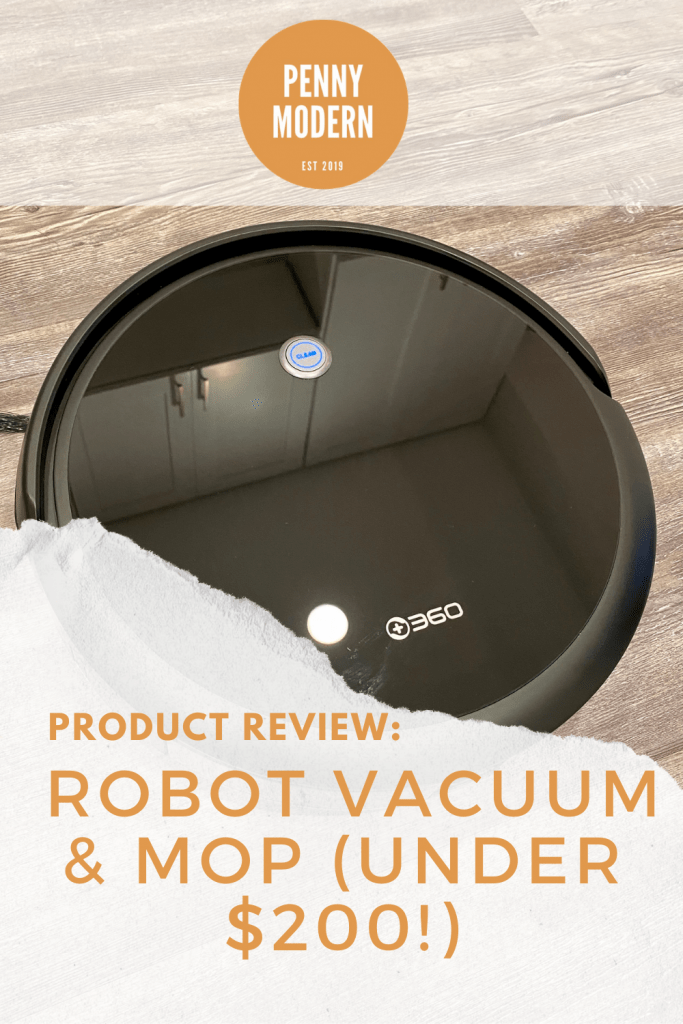
Today I’m reviewing the 360 C50 Robot Vacuum and Mop. I’ll be providing the basic stats, pros and cons, and my assessment of this little robot’s performance after using it for about a week.
Pin to Pinterest if you don’t have time to read now…
My full video product review of the 360 C50 Robot Vacuum and Mop is right here on YouTube, if you want to jump straight to that.
In the video, I give you a full review, plus show you how the vacuum performs on both hard floors and carpet, along with a demo of the mopping feature.
Now, let’s get to all the dirty details about this little cleaning robot…
Basic Stats of the 360 C50 Robot Vacuum Mop
The 360 C50 is priced at around $159 on Amazon as of February 2020.
It’s a 2 in 1 robot – both a vacuum and a mop. You change out the dust bin for the water tank and voila!
Suction Power: 2600 Pa. The suction has 4 different settings: quiet mode, standard mode, powerful mode, and MAX.
The default cleaning pattern is a methodical zig zag route.
Other cleaning modes include spot clean, deep clean, and edges.
Can be controlled with the included remote, the app, or via voice assistant (or just press the “clean” button on it’s top).
You can schedule cleanings for different times with the app (360 Robot).
You can connect the robot to Alexa and Google Assistant to use your voice to control the vacuum/mop.
3.1″ tall so it can get under furniture easily
510ml dust bin is very large so it can clean large spaces without the need to stop and clean it out.
300ml water tank for the mopping function and it’s an “intelligent” water tank so you can adjust the water flow for deeper/lighter cleaning.
Holds a charge to give you 90 minutes of vacuum/mopping action.
Pros and Cons of 360 C50 Robot Vacuum Mop
Pros
You don’t have to break your back vacuuming and mopping with the 360 C50 Robot Vacuum Mop doing the work for you.
It’s a great value for a robot vacuum/mop combo – a little over $150 on Amazon. A lot of similar items are $400 – $800.
It’s very effective at both vacuum and mopping, all in one small device.
It does a good job vacuuming low/medium pile carpets, and has a roller brush in addition to powerful suction and side brushes.
The quiet mode is very nice if you need to run it while someone is sleeping in the home. I love it has 4 different suction/noise settings.
The default pattern of a zig zag is very methodical and helps ensure your whole room gets cleaned.
Being able to adjust the water flow on the mop is great if you need a deeper clean.
The app and Alexa connectivity is a nice feature to help control and schedule cleanings.
Cons
The mop does not allow you to put cleaning solution inside the tank, only water (which is honestly pretty standard with all robot mops).
Does not vacuum and mop at the same time.
Needs more standard maintenance/cleaning than a standard upright vacuum.
Had a hard time getting over the edges of thick rugs so may need some “babysitting” if you have a lot of rugs.
Performance Assessment
After using the 360 C50 Robot Vacuum Mop for a week, I feel its performance is on par or better with more expensive robot vacuums. I owned a Deebot N79S prior to this machine, and the 360 C50 was just as good in the vacuuming department.
I did a few tests where I put some sand and rice on the floor, and the 360 C50 easily picked these items up. For the rice, some did get kicked around by the side brushes, but that is an issue in most robot vacuums.
I used the 360 C50 after dinner one night this week, and also on the weekend and it was able to both vacuum and mop my kitchen and dining room on a single charge. It took maybe 20 minutes for it to both vacuum AND mop these 2 rooms.
The mopping function did really well, and my floors dried quickly. It also was very quiet when mopping. The water tank and pad are very easy to clean afterwards, and it’s much easier than dealing with a bucket of dirty mop water.
Conclusion
All in all, I highly recommend the 360 C50 Robot Vacuum Mop. The pros definitely outweigh the cons, and the price ($159 on Amazon) is super low compared to $400 – $800 competitors.
If you would like to buy the 360 C50 right now here is the link to buy directly from Amazon:
I hope you enjoyed this review and would love to know if you have any questions about the 360 C50 Robot Vacuum Mop. Please put your questions in the comments below and I’ll get back to you as soon as I can.
If you want to check out my other product reviews then check out my Product Review page next.
Want a bathroom makeover but need ideas that are quick, easy, and will fit into a tight budget?
You are in luck because today I will share SEVEN of the easiest and least expensive ideas to makeover your bathroom into a modern spa-like retreat.
I’ll give you ideas, inspiration, and clickable links to affordable sources for everything from bathroom accessories and lighting, to faucets and mirrors.
Let’s get this party started!
Idea #1: Paint the walls
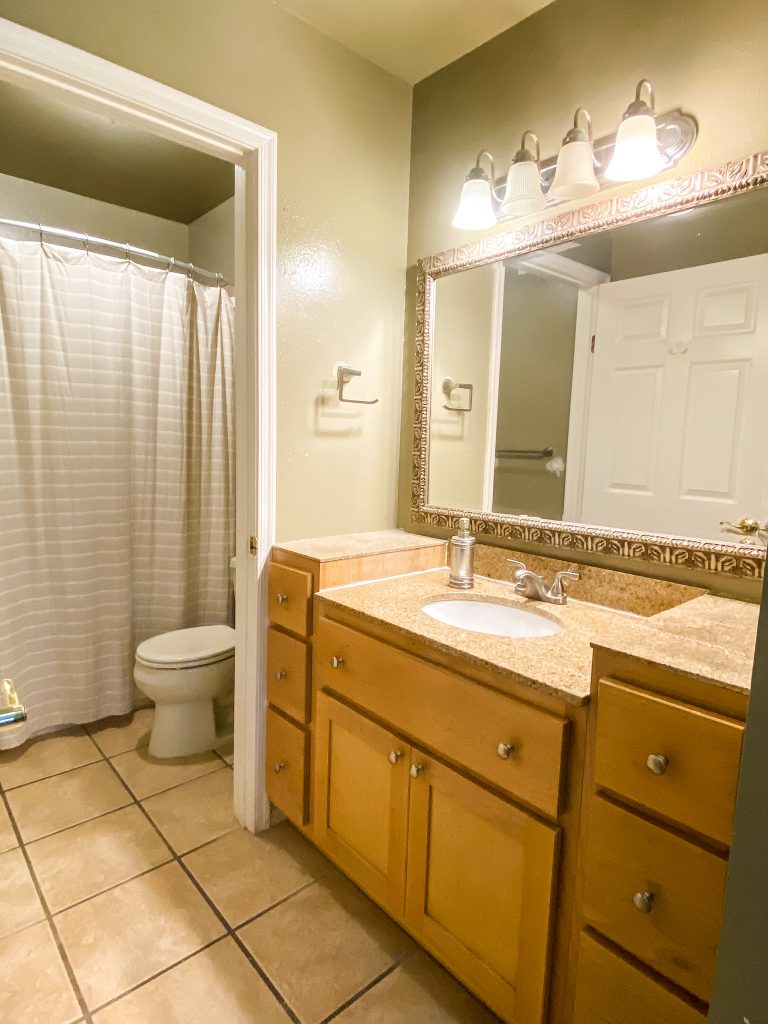
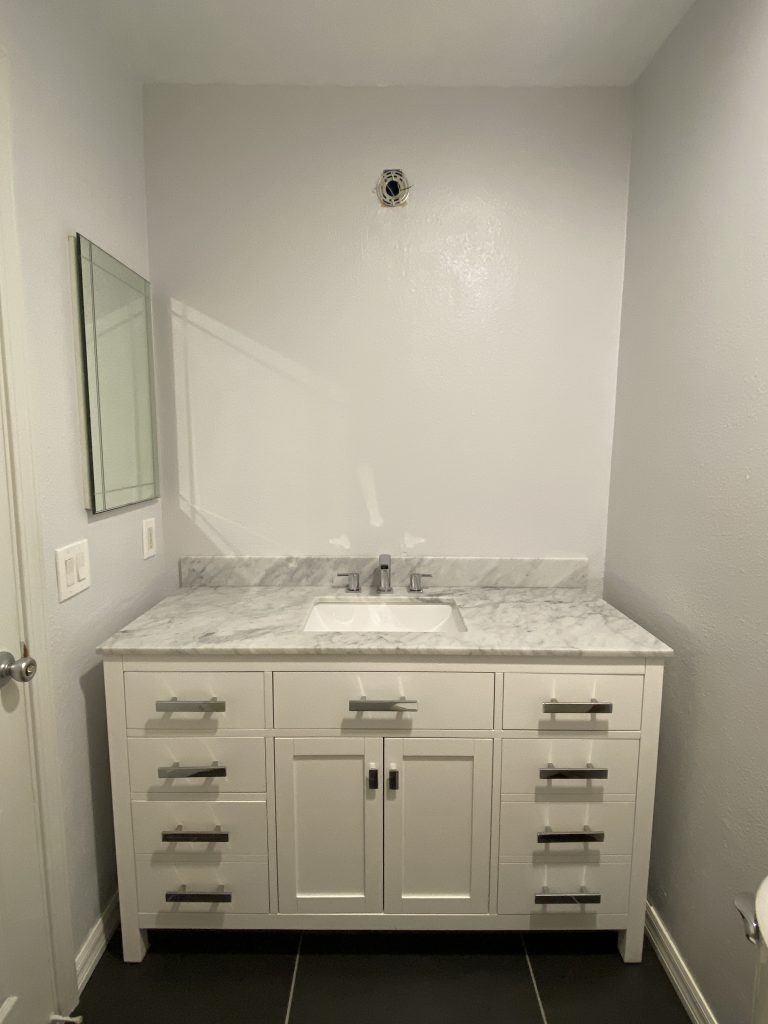
Before: Walls a Khaki Green
After: Walls Behr Swiss Coffee
Ok, so this seems like a no brainer but paint can be REALLY difficult to choose for a bathroom.
If you have a small bathroom, lighter colors will make it feel larger and more airy. You can see in the photos above, our bathroom was a khaki green on both walls AND ceiling (who paints their ceiling khaki green?).
When we painted the ceiling ultra white and the walls Behr Swiss Coffee it made the whole space feel bigger, lighter, and brighter.
Some great colors for bathroom walls are warm white, light grey, sea salt, and blue.
Disclosure: This post contains affiliate links. As an Amazon Associate I earn from qualifying purchases, at NO extra cost to you.
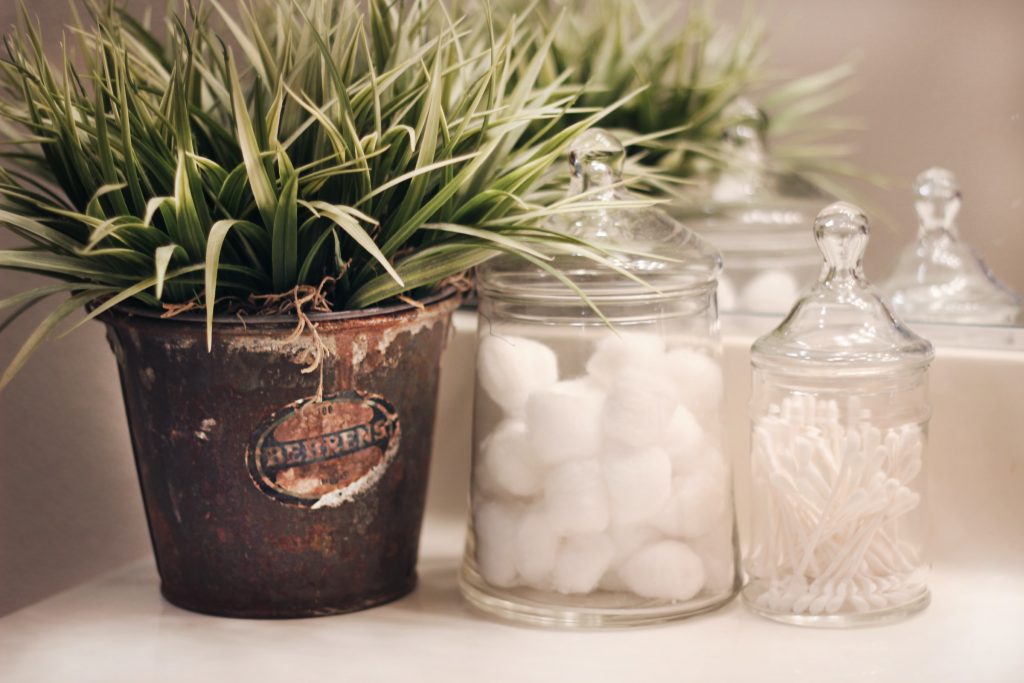
Upgrading your accessories such as a toothbrush holder and soap dispenser is a great way to change the look of your bathroom. Here are some modern accessories from Amazon that will help update your space.
If storage is an issue, you can kill two birds with one stone and display items in glass jars or apothecary style containers. Here’s a few links to ones I love from Amazon:
Soft Goods
In terms of soft goods, new towels are a great way to make a space feel fresh.
I love these Turkish Cotton Bath towels from Amazon – they look modern since they have a diamond pattern in the cotton. They also are thick and high quality feeling, even after a lot of washes.
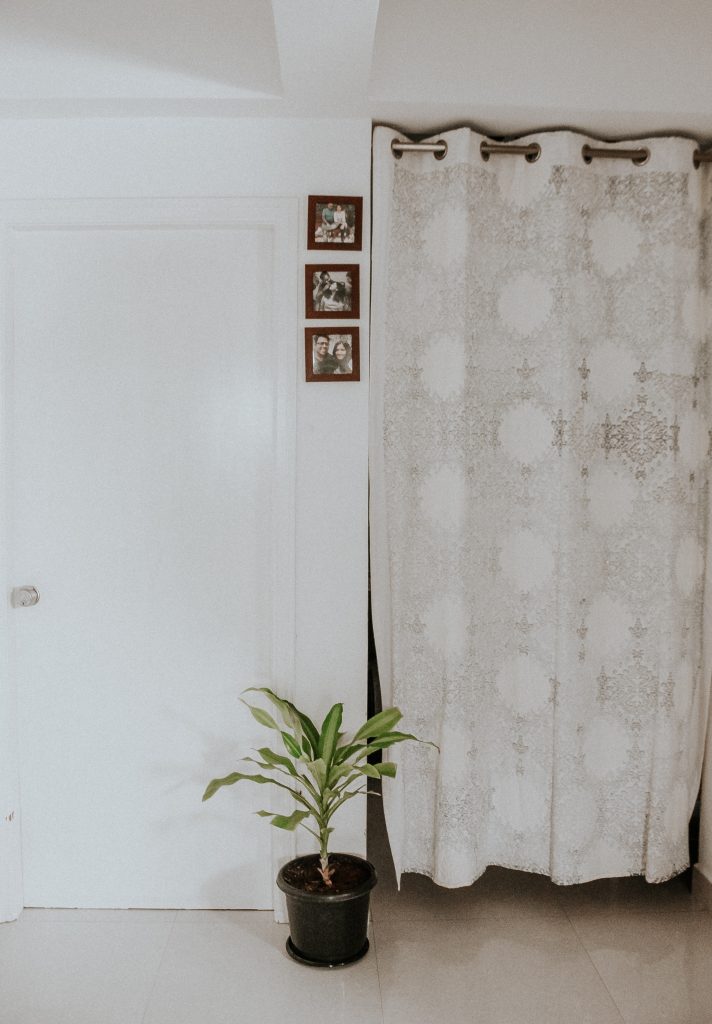
Going from dated glass bathtub doors to a pretty new shower curtain can make a huge difference. Removing old bathtub doors is pretty easy and we have done it on two different bathrooms.
The best thing about a shower curtain is you can change it out frequently at very little cost, to keep things interesting.
Photo: Meghna R via Unsplash
TIP: Hanging your shower curtain up high will help hide ugly, dated tile or an old shower enclosure.
Here are a couple of affordable classic neutral shower curtains from Amazon:
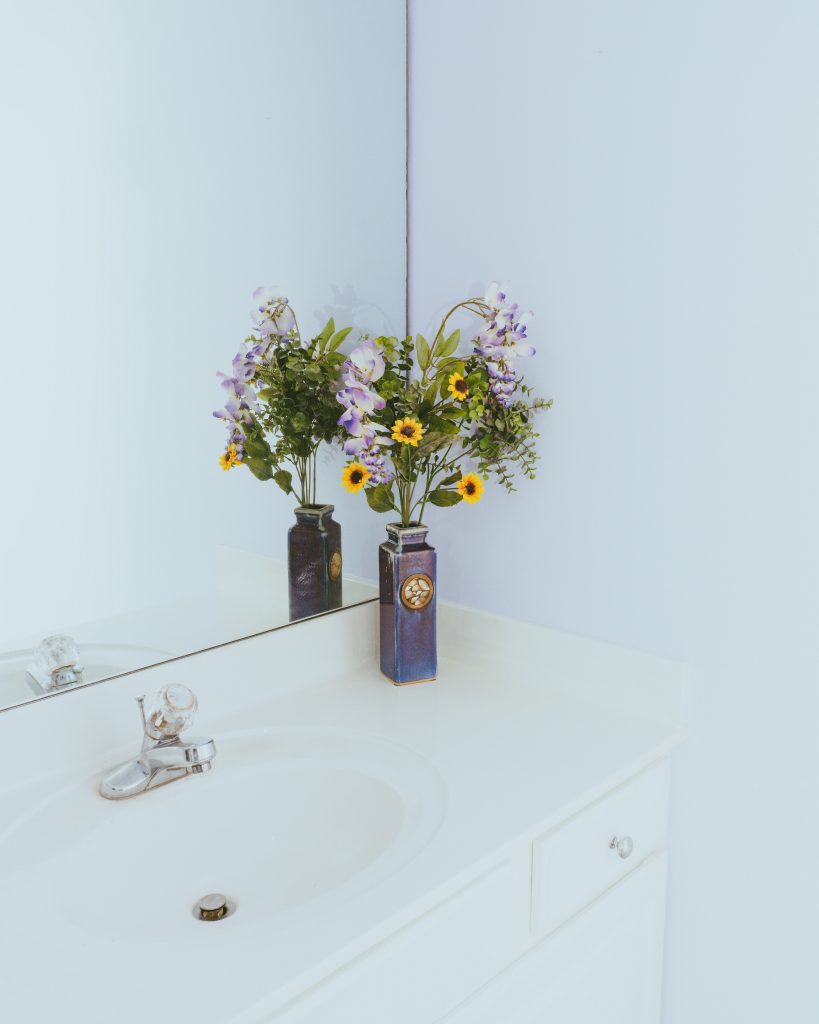
Idea #3: Refresh vanity
Photo: Chastity Cortijo via Unsplash
A vanity can be easily freshened up by a coat of paint (use cabinet paint specially designed for cabinets, like Rustoleum Cabinet Transformations).
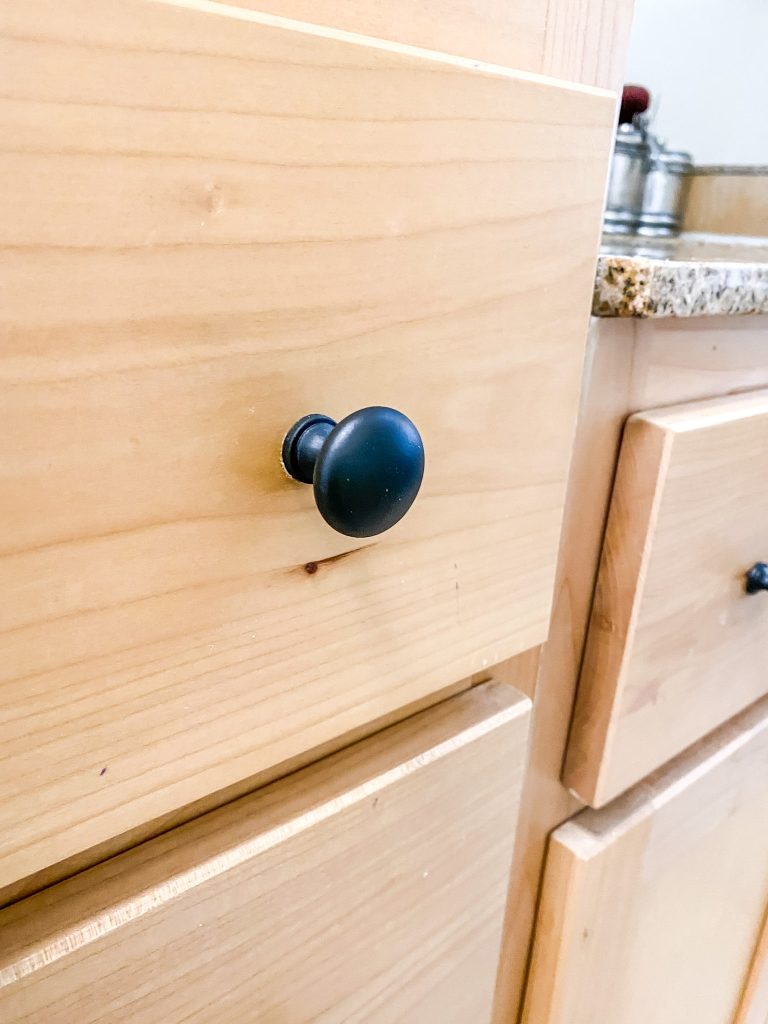
Even just changing out or spray painting the knobs and handles on your vanity can make a big difference.
In my post, DIY Budget Bathroom Remodel (for under $350), I spray painted all the knobs of my vanity to change them from brushed nickel to matte black. It was so easy and super cheap!
Vanity pulls spray painted black
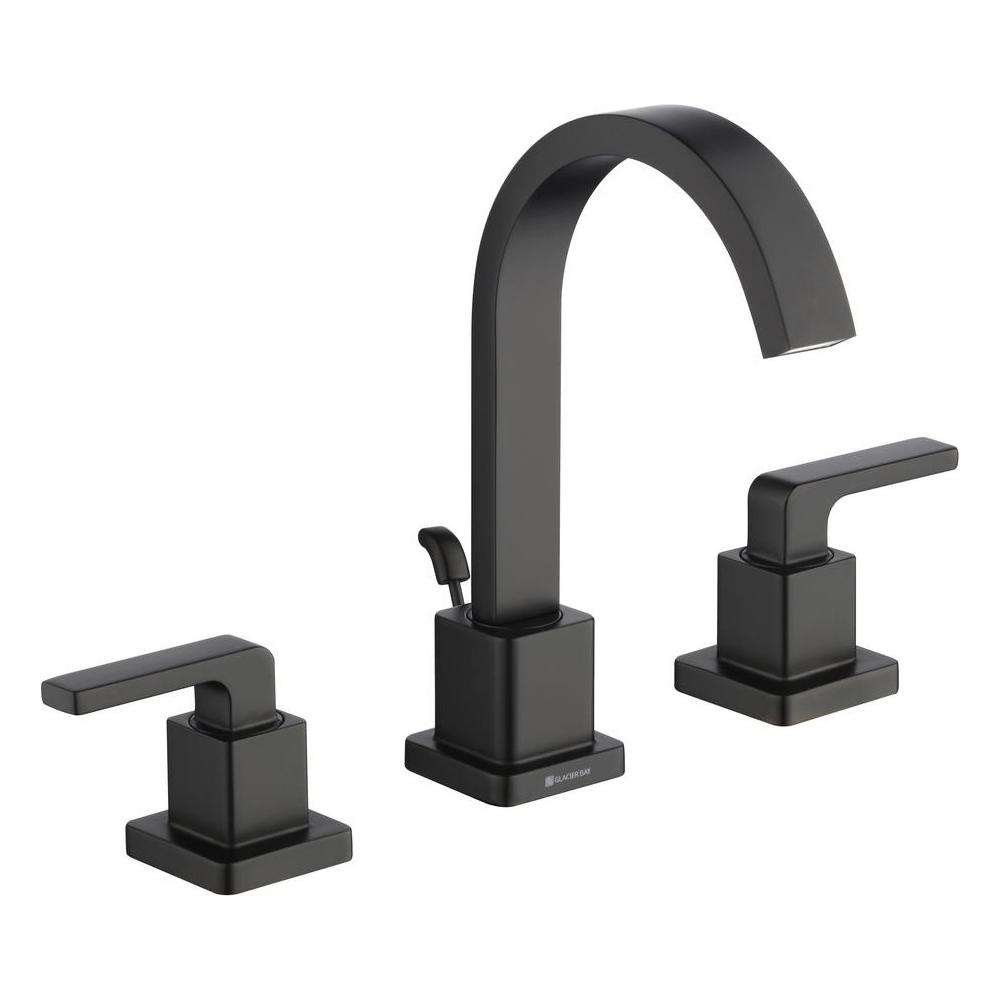
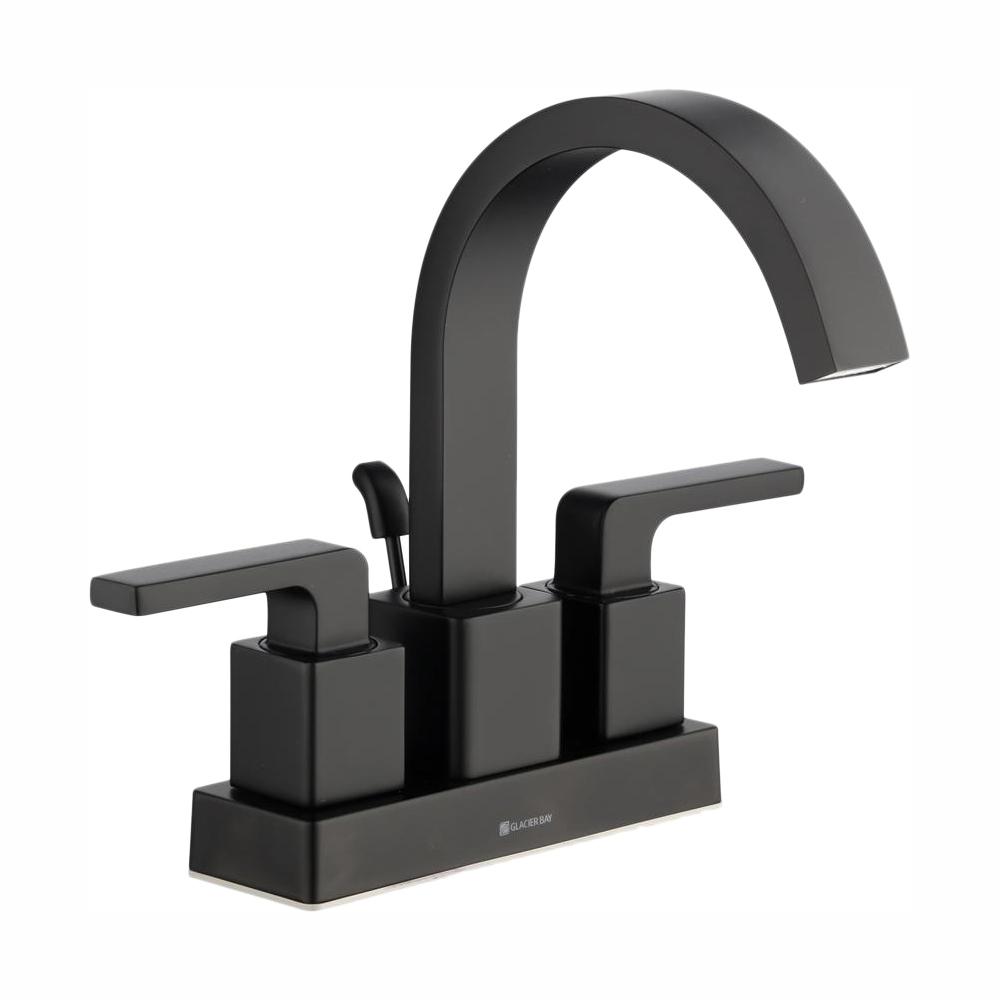
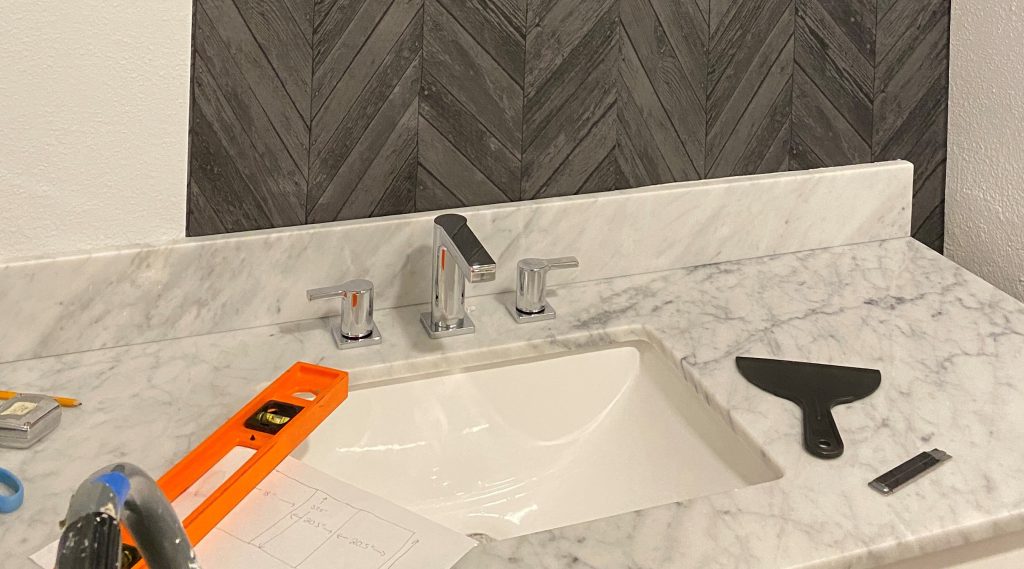
Another option is to upgrade the faucet to a more modern style.
Home Depot online and Amazon all have awesome options for affordable modern faucets. We have purchased below faucet from Home Depot and love it! I can personally attest to the quality (which is great).
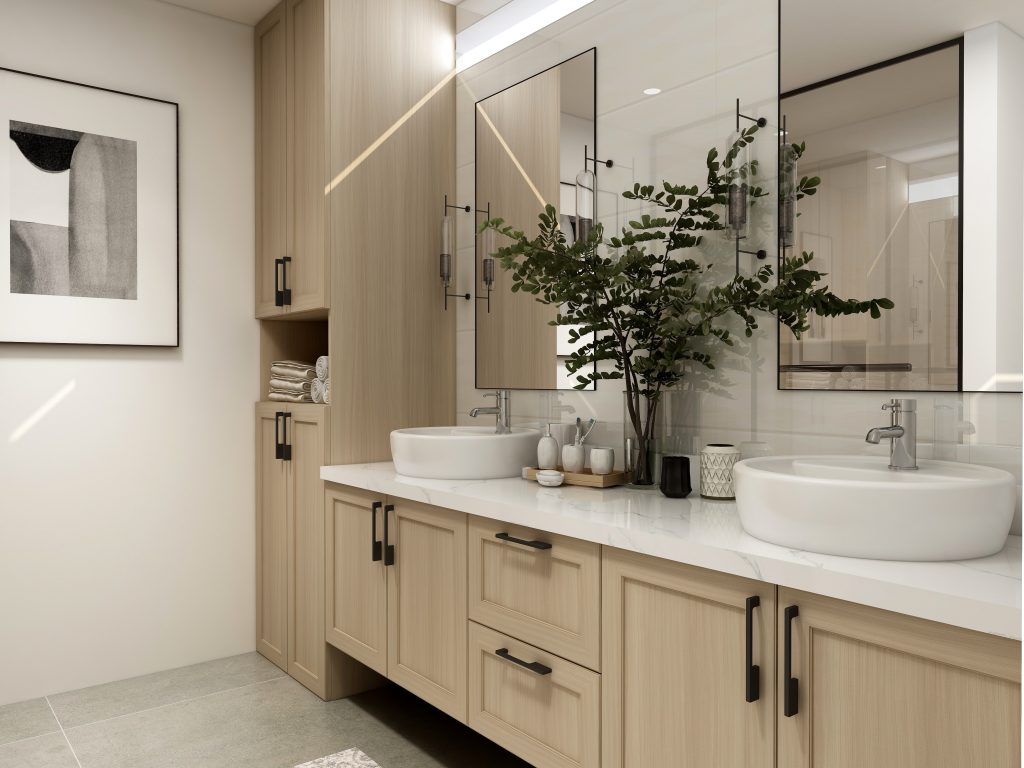
A great budget bathroom makeover idea is to add art and plants. Adding a clear vase with a few plant stems will help elevate your bathroom.
Below are some awesome artificial greenery stems from Amazon to help get this look. Or you can grab some greenery from outside by snipping a few stems off of a bush.
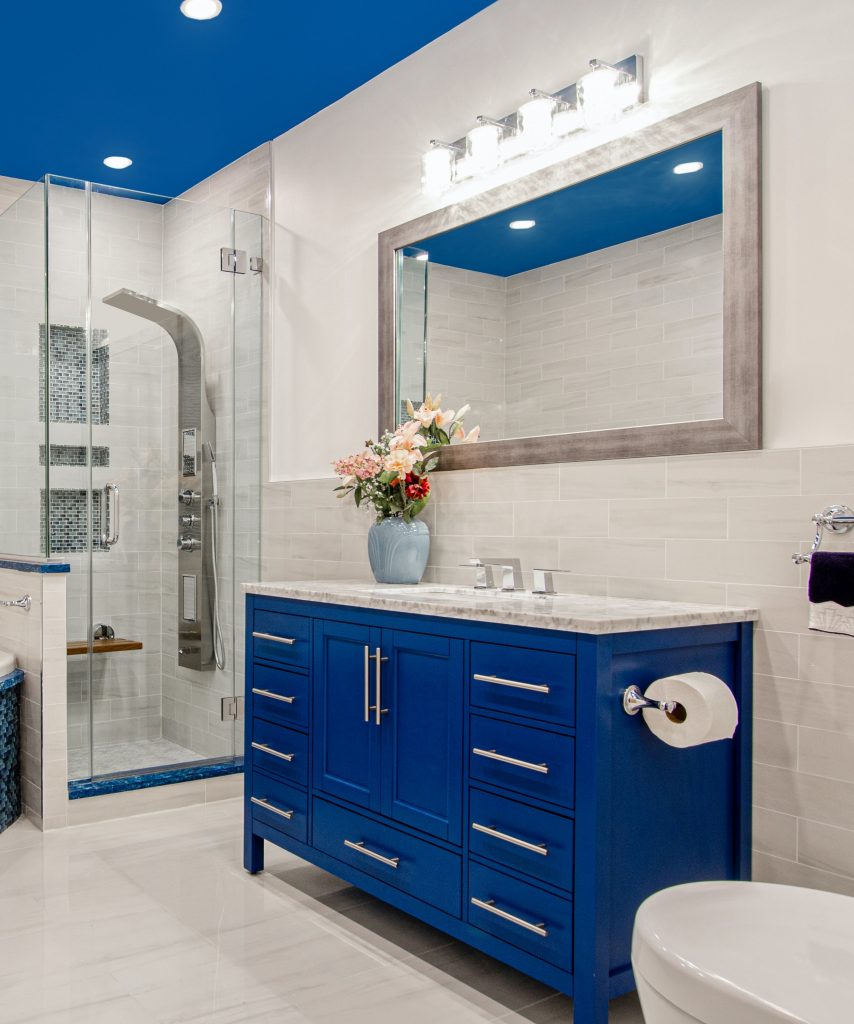
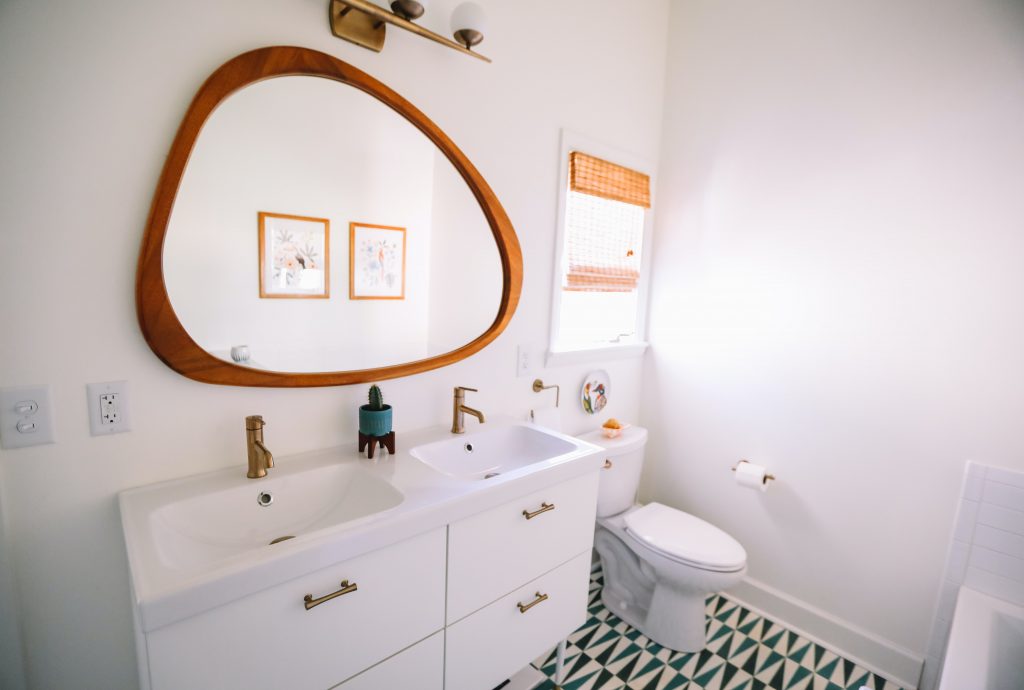
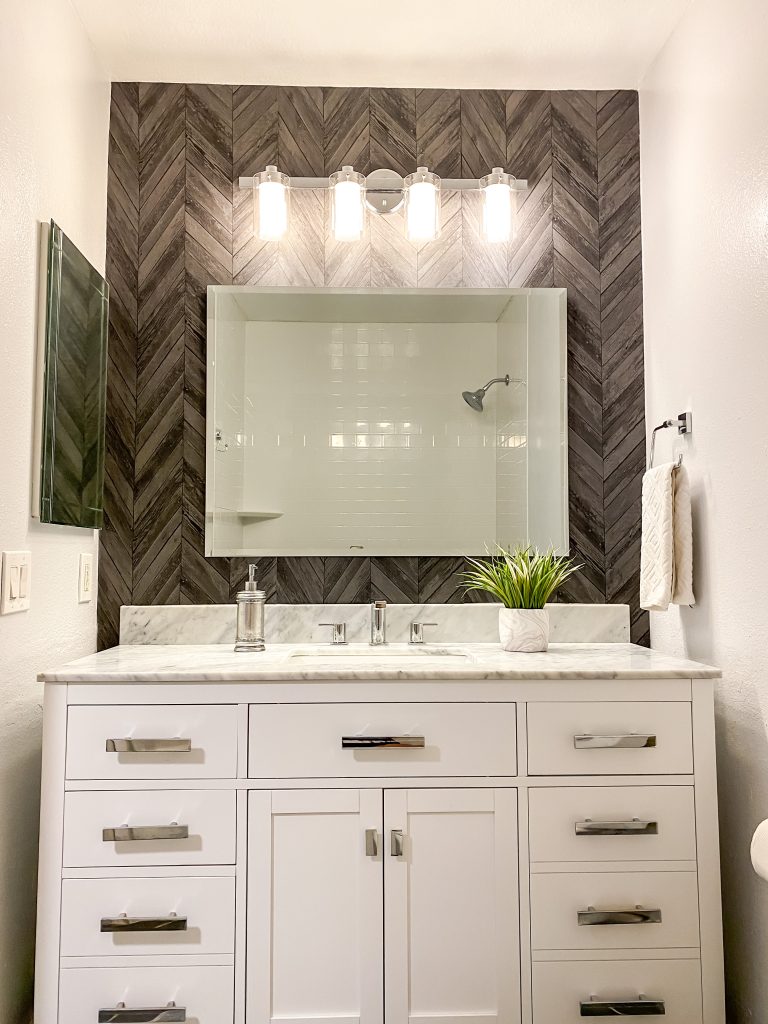
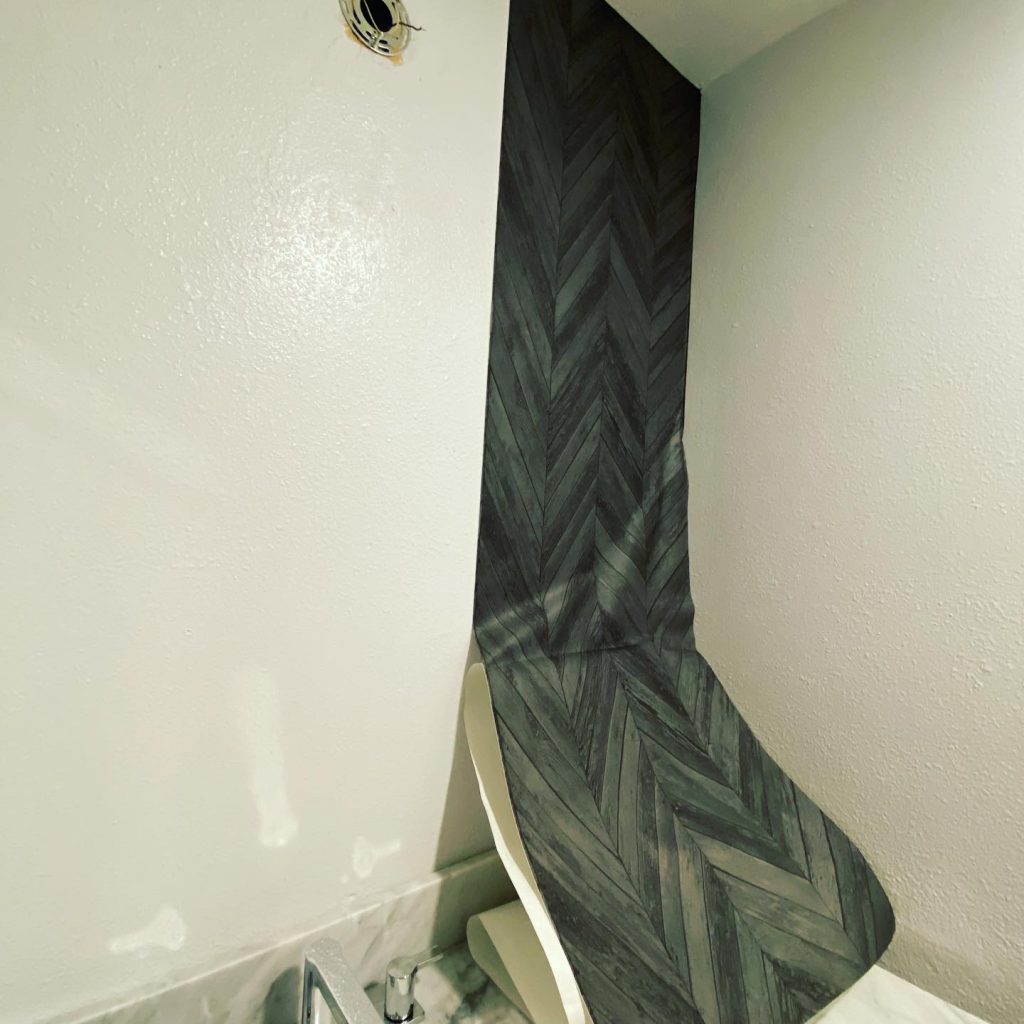
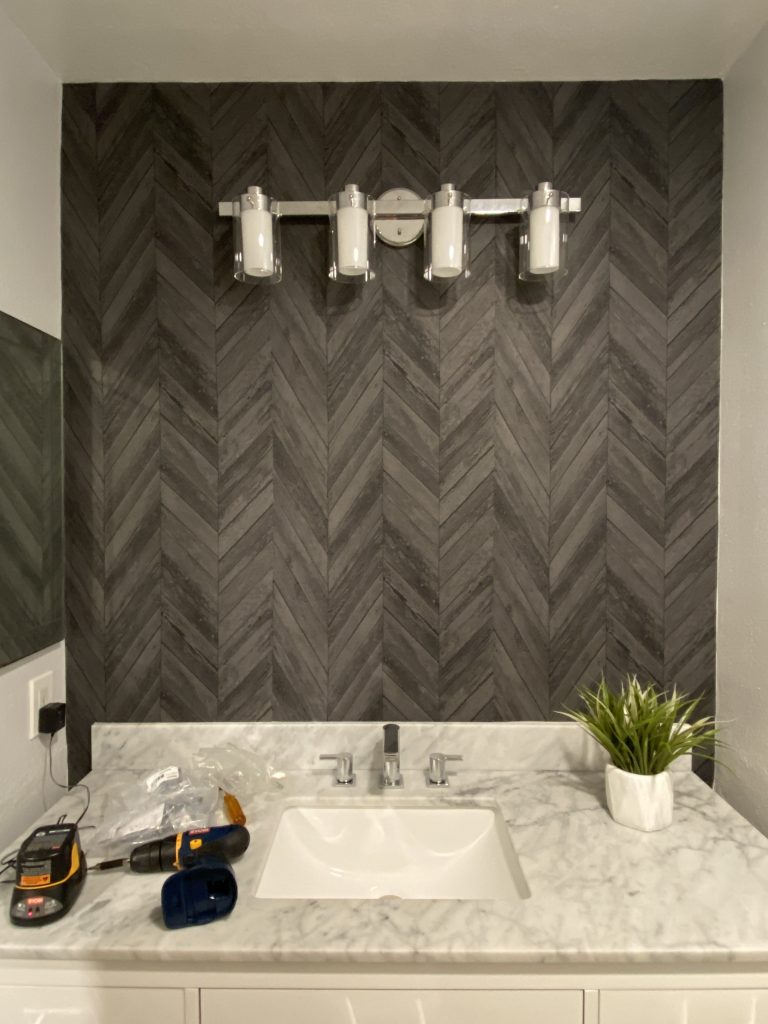
A focal point is something that draws the eye, like the wood framed statement mirror above. Creating a bold focal point in your bathroom is a great way to change the look, and also help distract from other areas (like ugly shower tile, for example).
A super easy and cheap way to add a focal point is to add wallpaper or a backsplash to the wall behind your vanity, or adding a statement mirror.
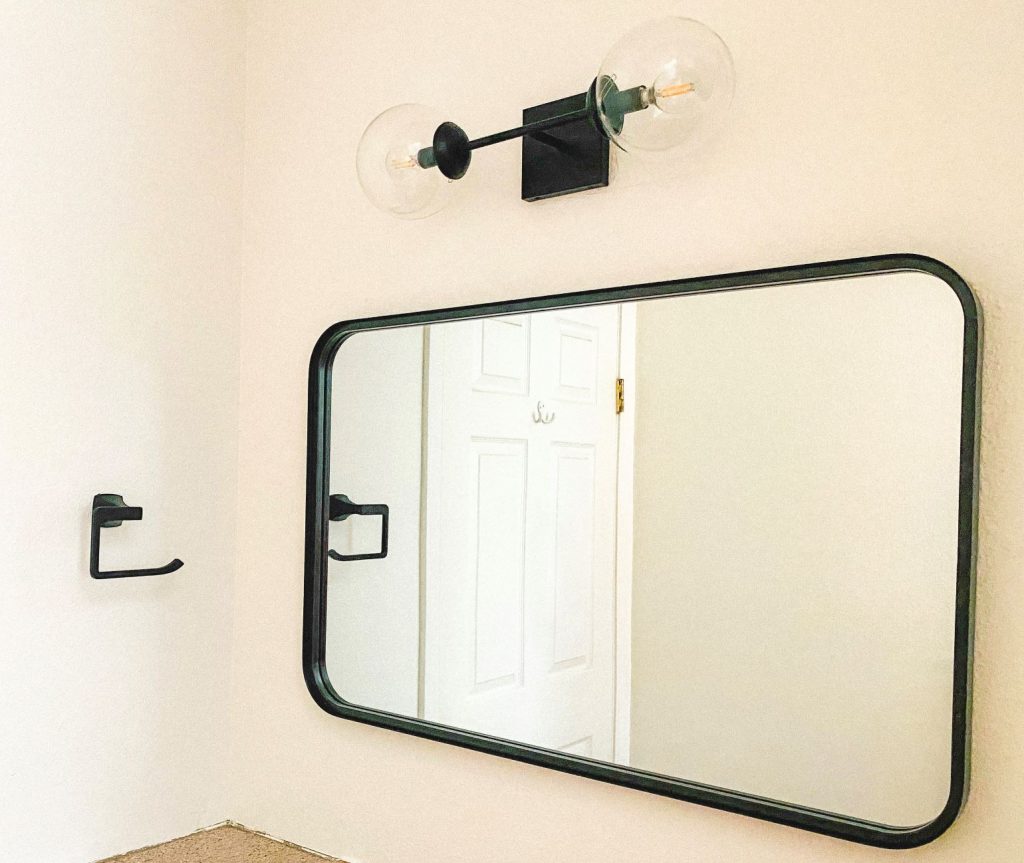
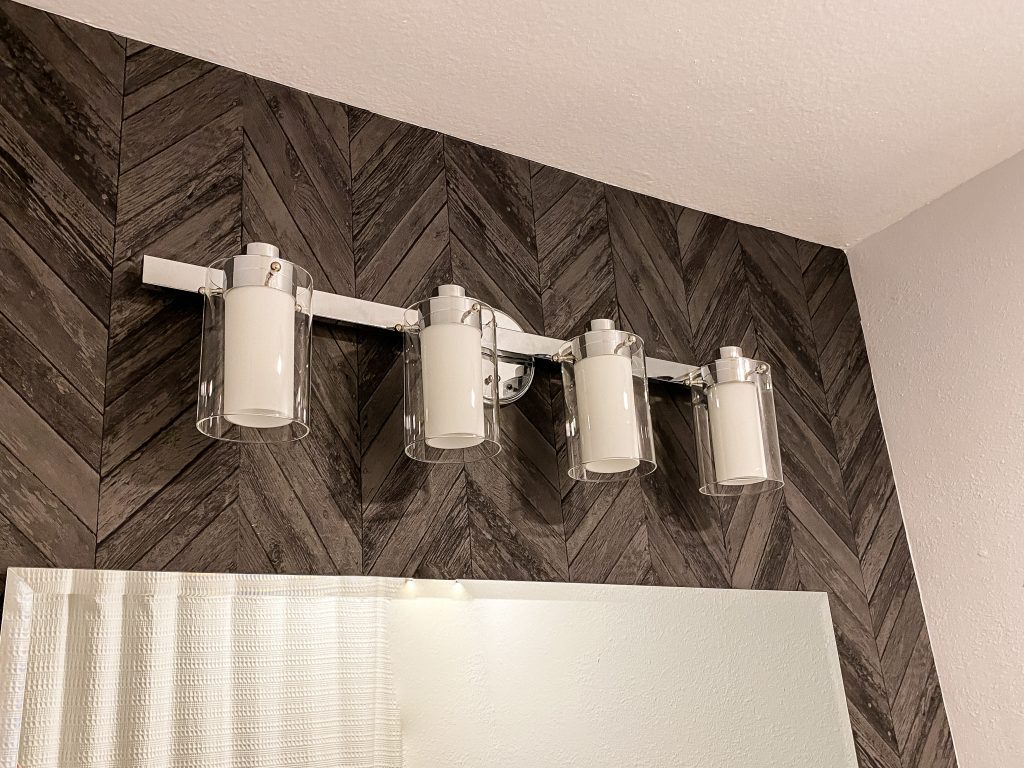
Lighting is key in a bathroom, since a lot of them don’t have any windows.
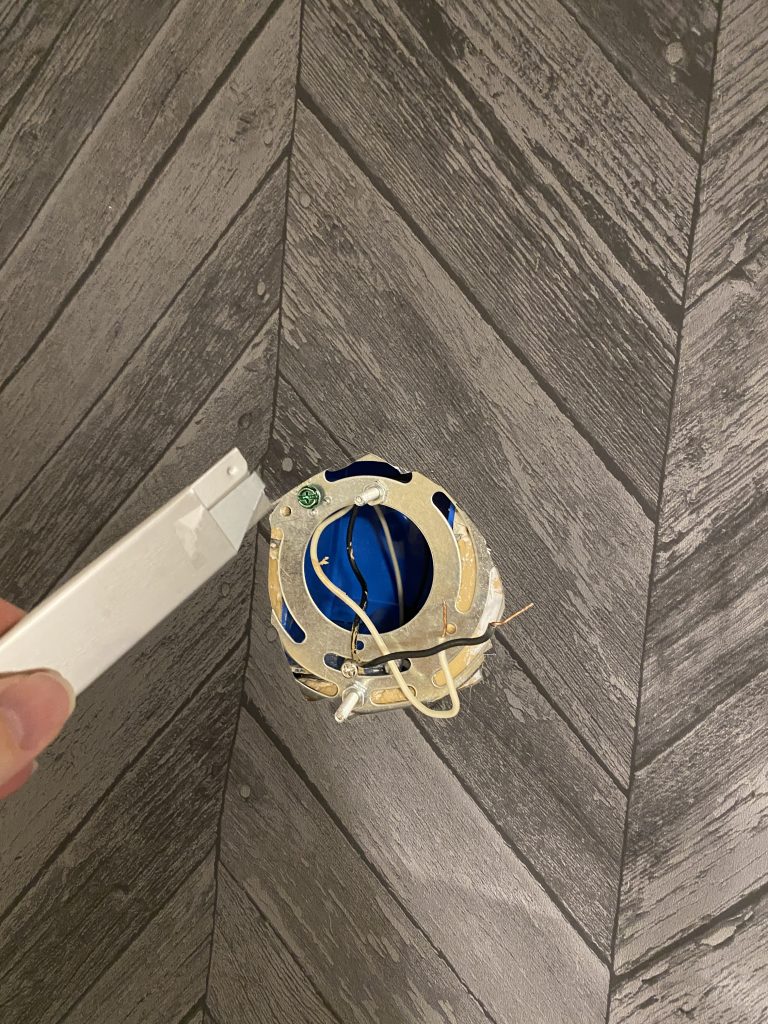
Replace your old light with a new one with the same type of base to save money and time.
Trying to go from a single vanity light to two sconces can be difficult and may need an electrician. To DIY it, get the same type of light, but with an updated style.
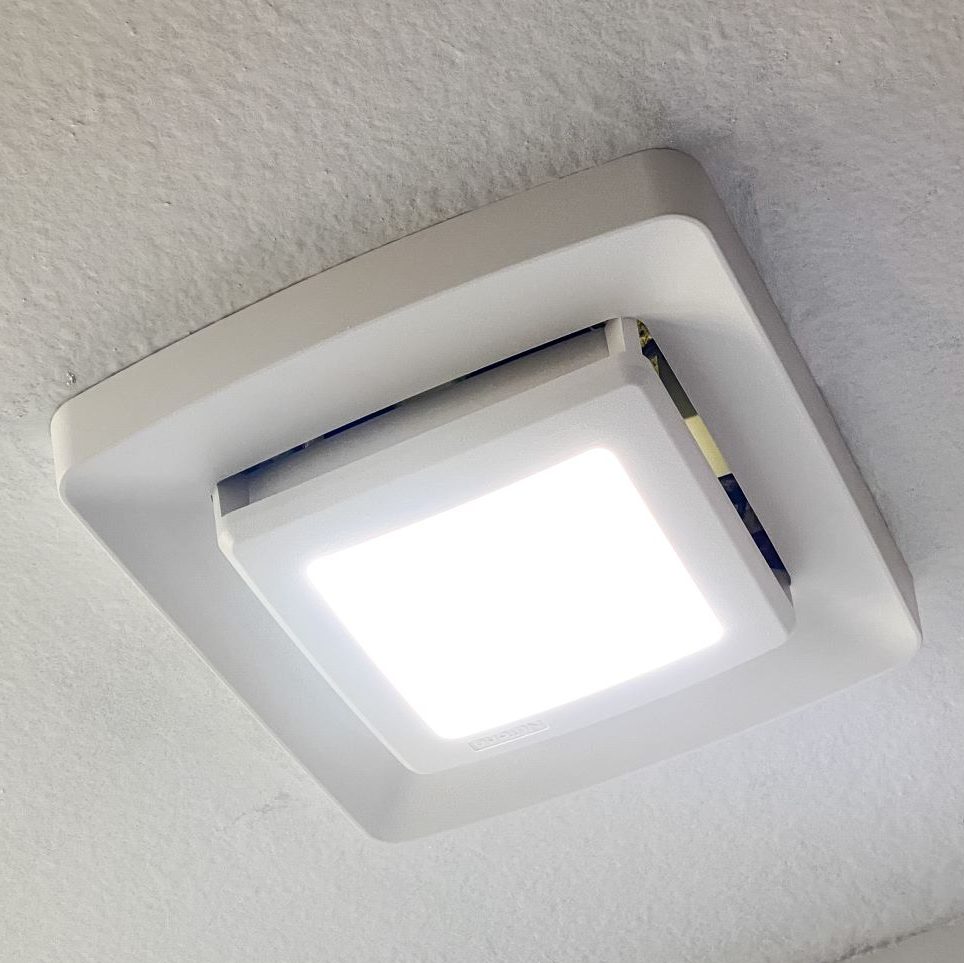
Another way to add more light to a dark bathroom is to add a light to your bathroom fan. I found this inexpensive bathroom fan upgrade at Home Depot that fits right into your old fan’s box and comes with an LED light.
Changing out a mirror is very easy, and can be fairly inexpensive depending on what you choose. We did our full bathroom makeover using a beveled edge mirror from Home Depot.
A builder grade mirror can be quickly updated by adding a new frame or painting the existing frame. Hello Hayley has a great tutorial on how to add a frame to a builder grade mirror for $10: DIY Bathroom Mirror Frame for Under $10
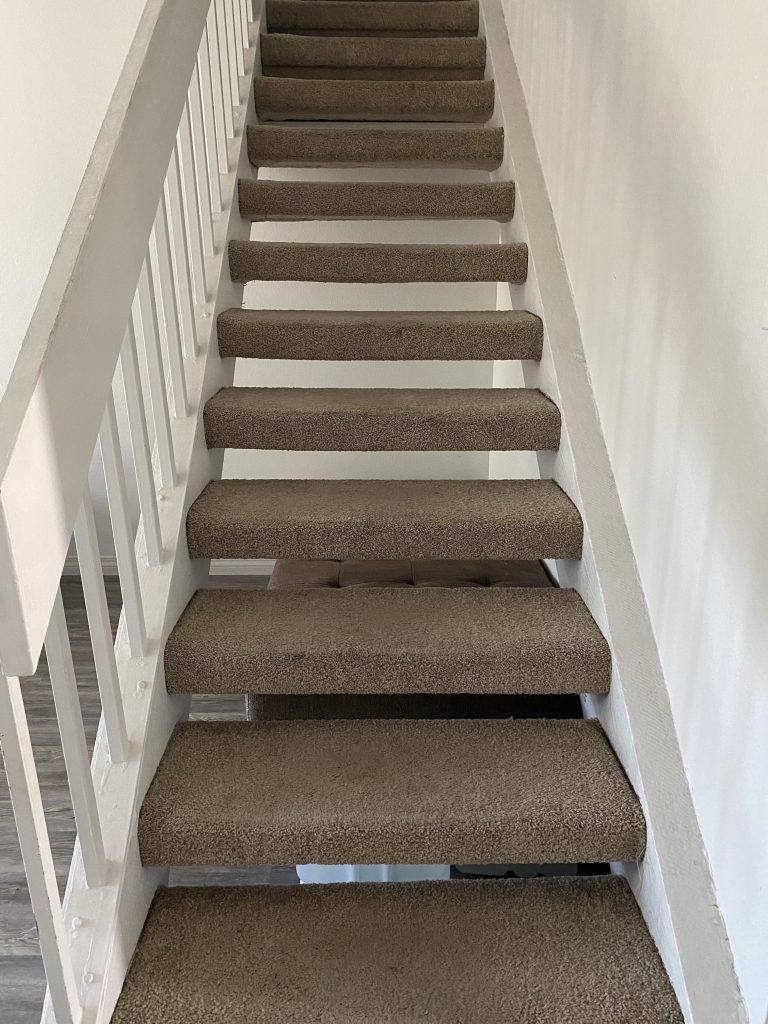
When you go up your staircase every day, does it annoy the heck out of you how old and dated they look? Not sure if you are ready to tackle a staircase makeover yourself?
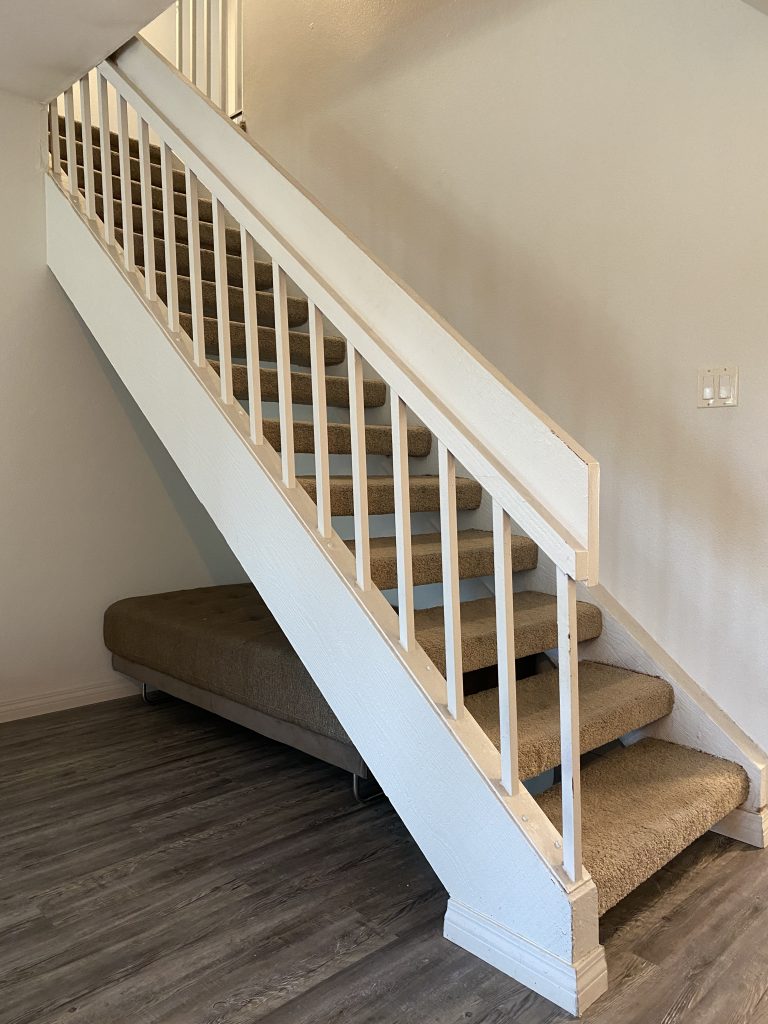
Do you have ugly carpeted stairs, and want something more modern and sleek?
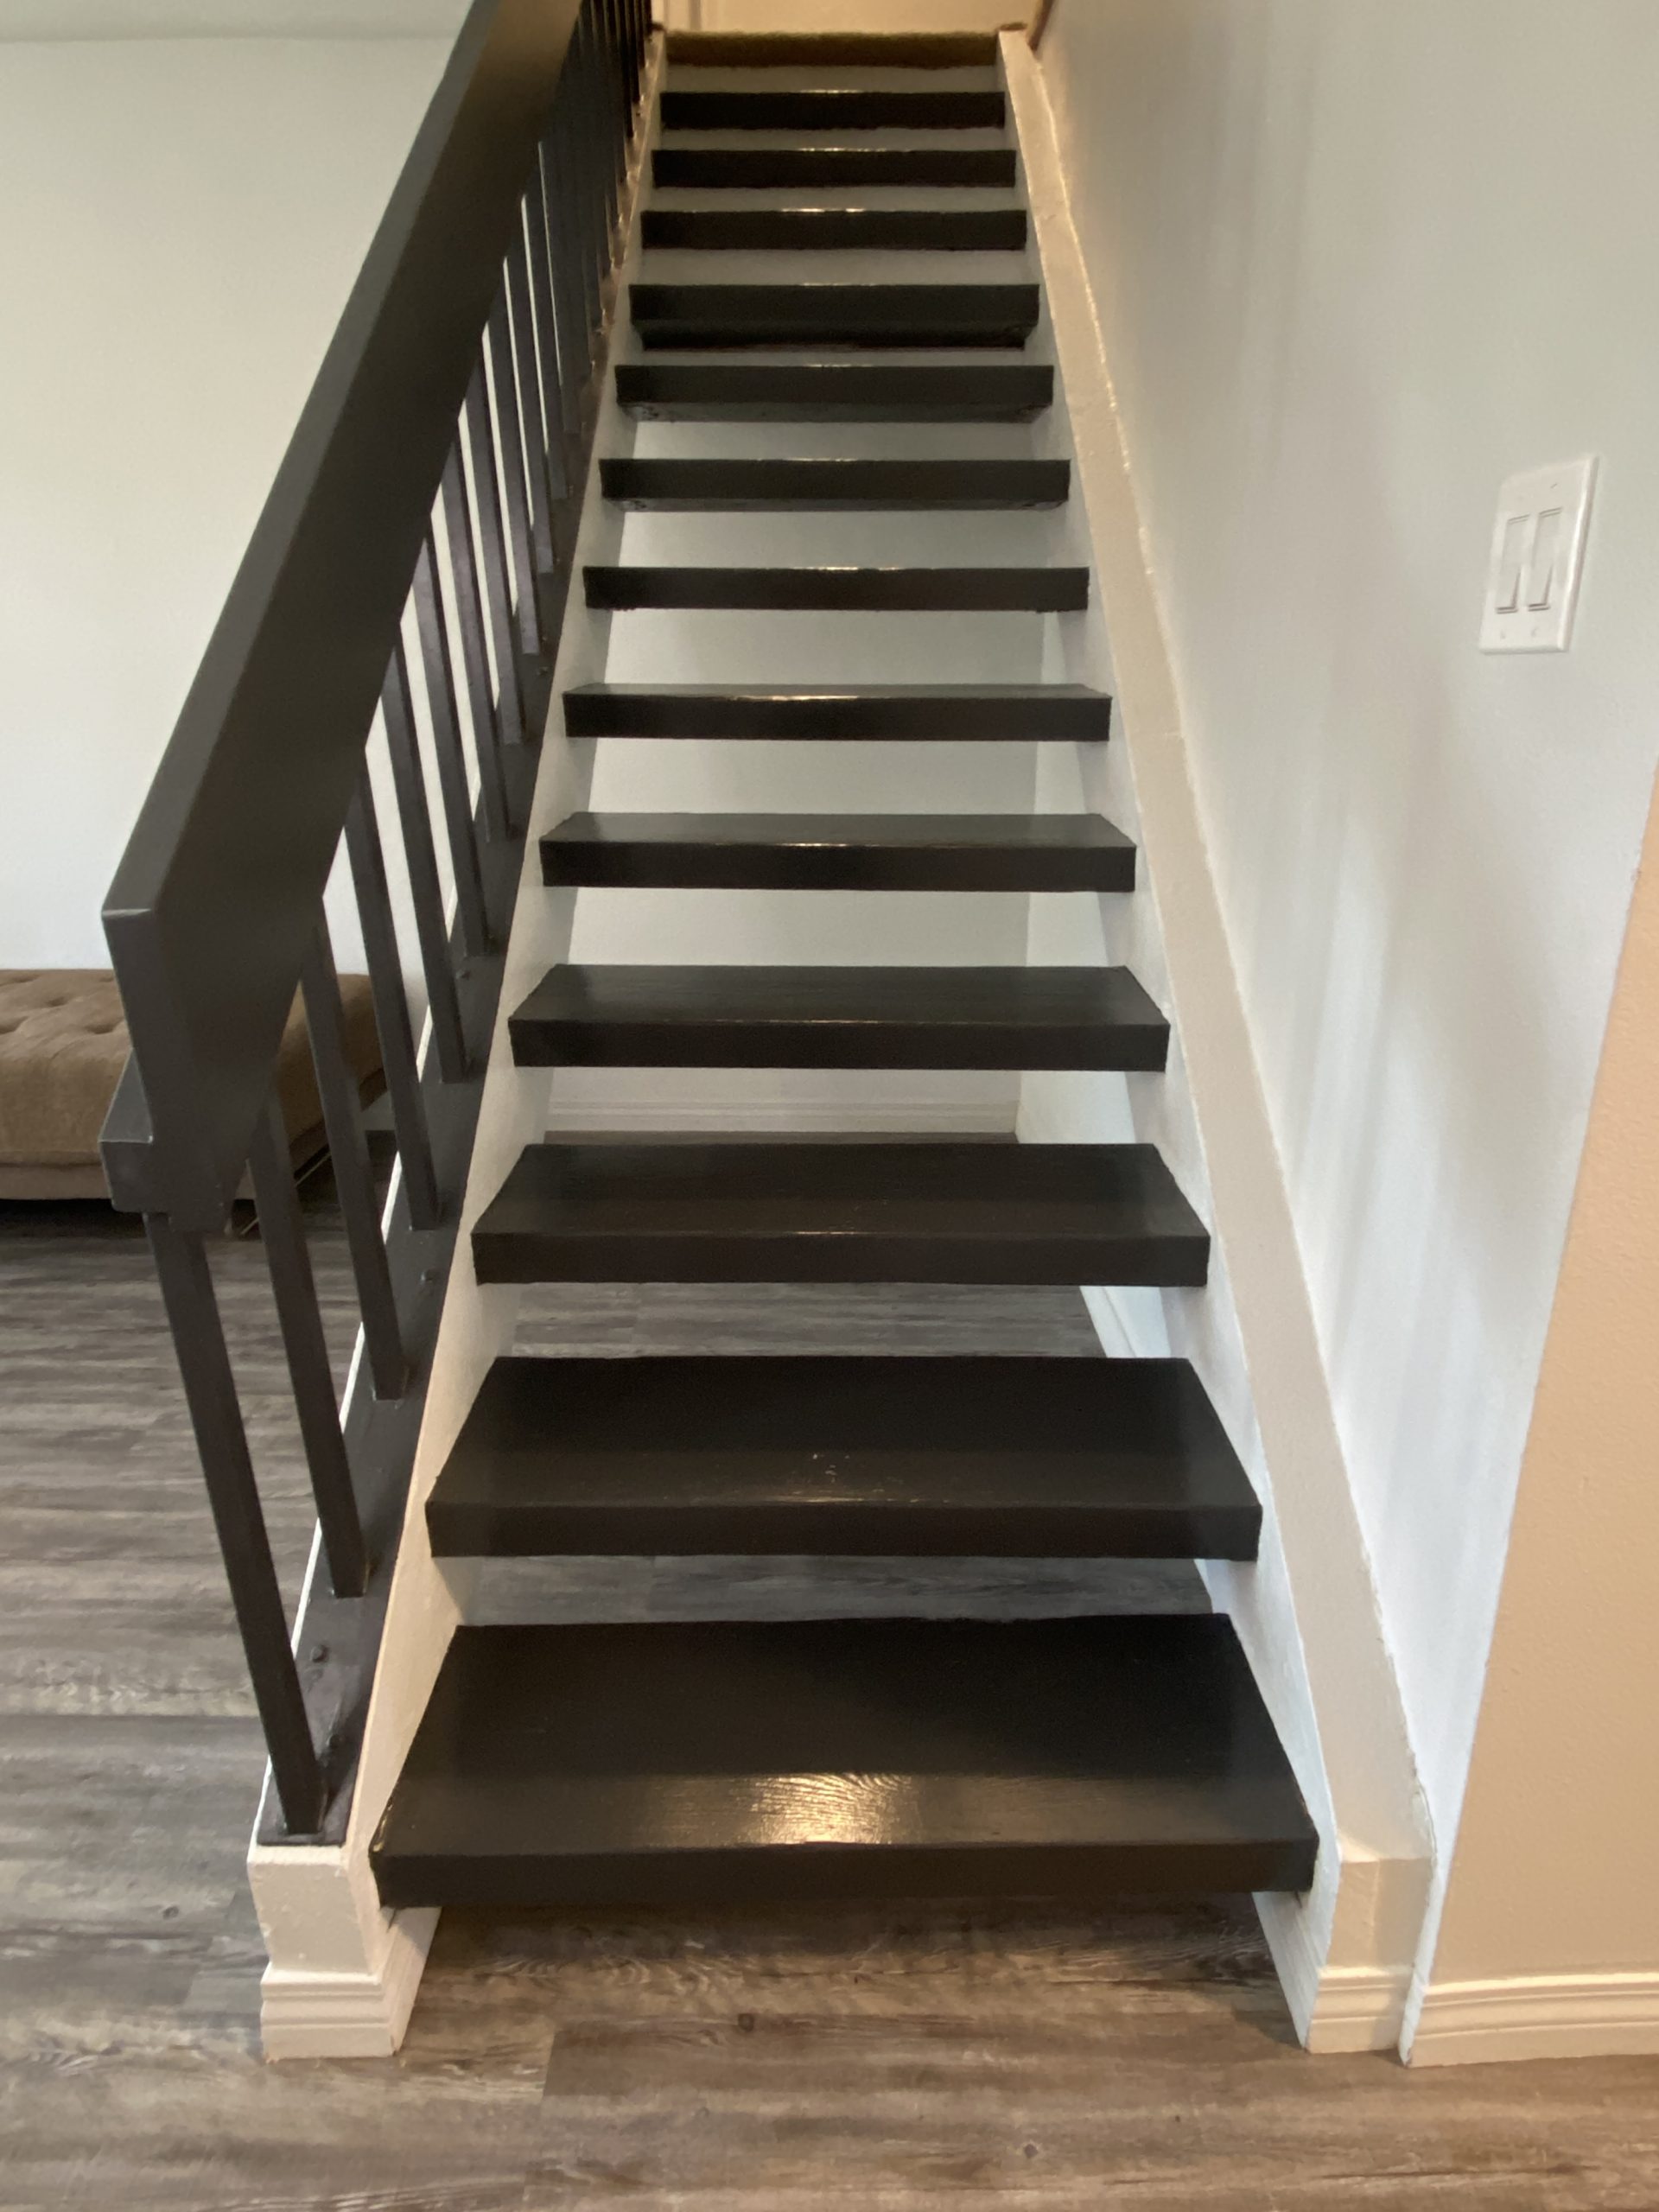
This is the post for you. I’ll show you step-by-step how we did our recent DIY staircase makeover. We transformed our 1970’s floating stairs from dated icky beige carpet to sleek and modern black wood steps – mainly using the magic of paint.
Save to Pinterest for later!
Just about anyone can do a DIY staircase makeover. All you need is a little willpower and be willing to put in some elbow grease.
This is a pretty big project if your stairs are like ours, and you use them 20 times a day. However, using this method to go from carpet to wood is far cheaper than the many thousands a new stair railing or professionally refaced stairs will cost. So, let’s get started on this DIY staircase makeover adventure.
Disclosure: This post contains affiliate links. As an Amazon Associate I earn from qualifying purchases, at NO extra cost to you.
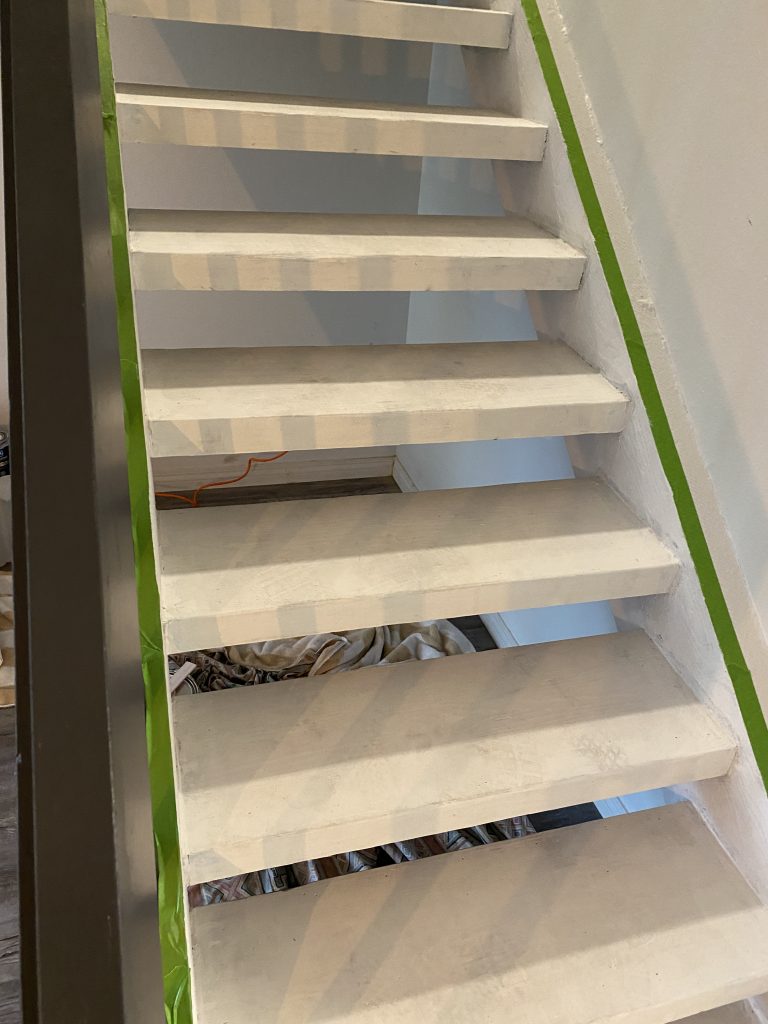
Step 1: Inspect your stairs
The first step in your staircase makeover, is you need to see what you are working with. We did this by peeling back the carpet from one of the stairs in a hidden spot. You want to see if you have cheap plywood or actual real wood under any carpet.
We were lucky and our floating stairs were one piece of solid wood. We decided to paint both the wood stairs and the railing the same color. For paint color, we chose Behr Cracked Pepper – a very dark grey/black color, to go with our grey luxury vinyl flooring.
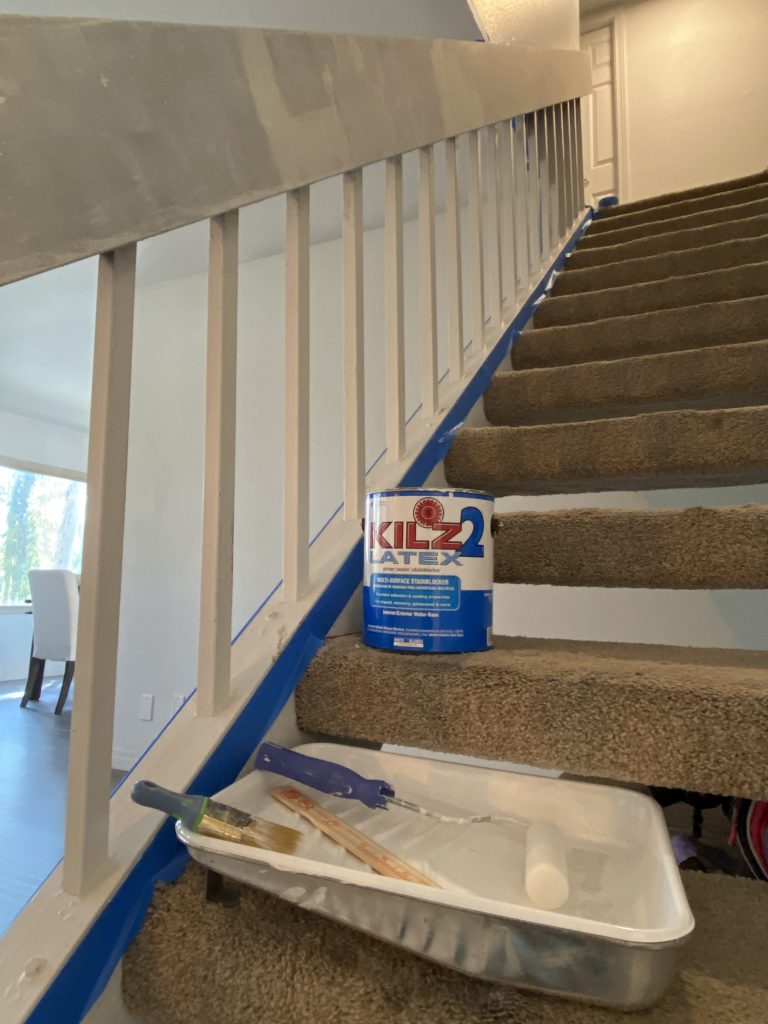
Step 2: Paint the railing first
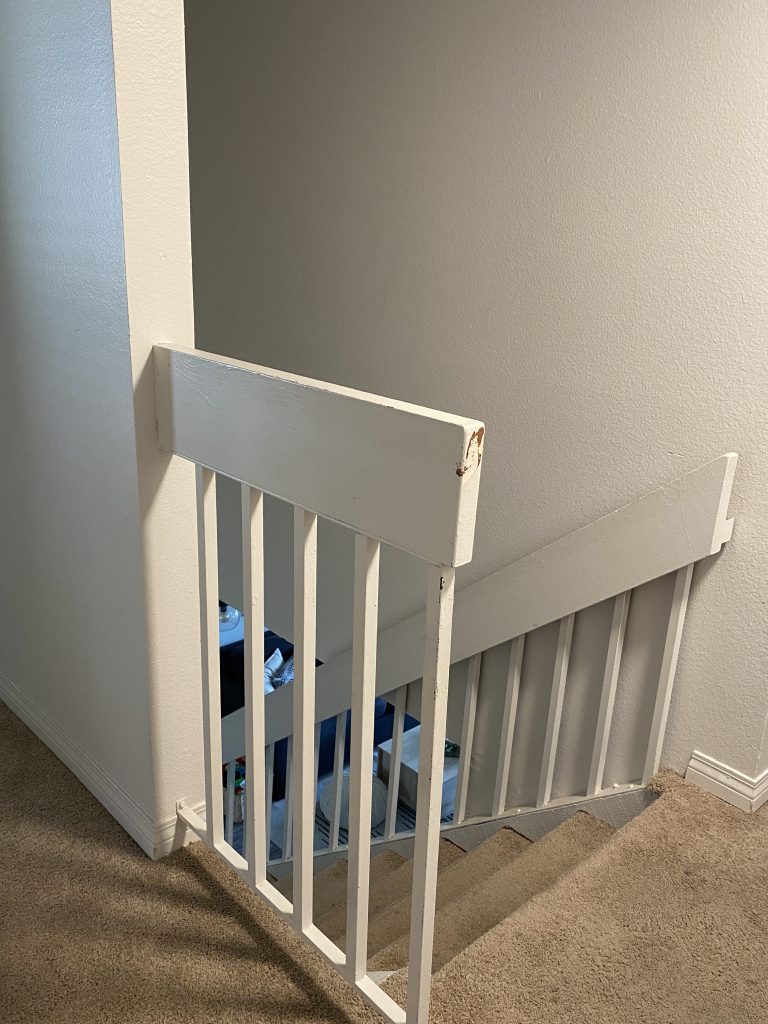
Stair Railing Before
Stair Railing After
We did our railings first. The thought was that if paint dripped onto the stairs I wouldn’t be upset since I had not worked on them yet.
Prep the railings
Remove old paint
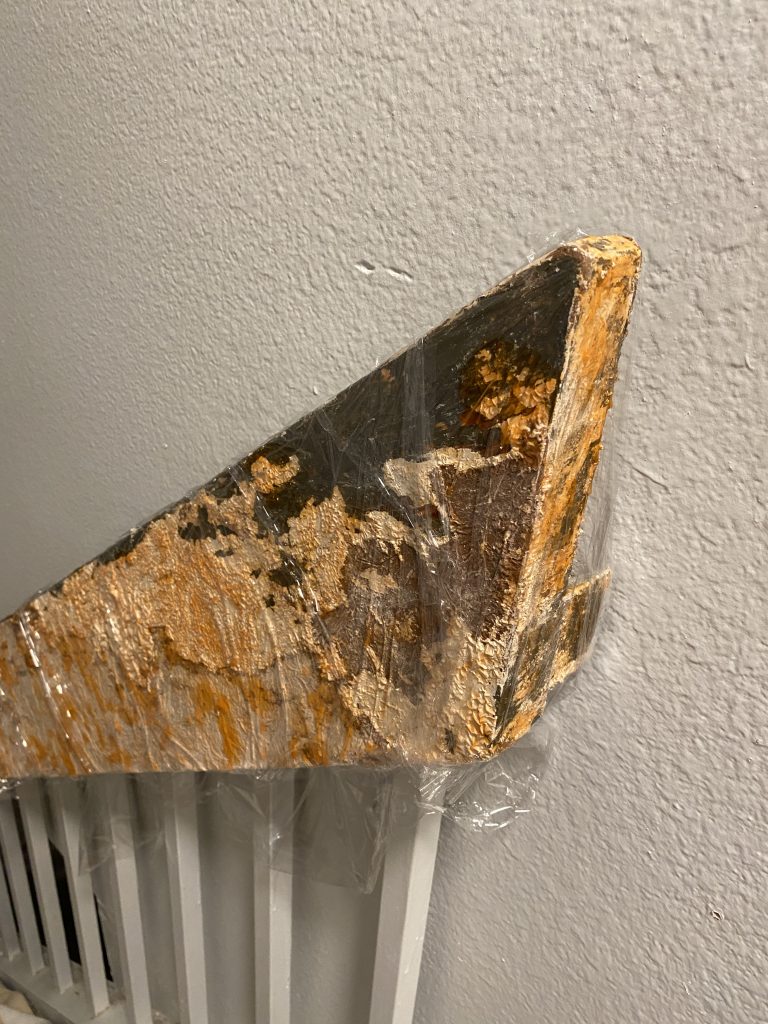
Painting the railings would have been 500% faster had I not decided to strip the old paint from the wood banister (the part you put your hand on). I used Citristrip to peel off all the old paint.
There were around 5 or 7 layers of paint, so I had to apply it (letting it sit overnight with Saran Wrap around it) THREE times. I had to scrape the paint off with a putty knife each time. After all that, I used mineral spirits to get off all the residue.
Citristrip working to peel off old paint from railing
Since I was painting and not staining the railing, there really was not much need to remove the old paint for my DIY staircase makeover. It did make the final product much smoother and will be more durable though.
Fill in damage and sand
After removing the old paint, I lightly sanded (by hand) and filled in some gouges in the wood with wood putty.
Apply Primer to Railing
After sanding and removing all dust with a microfiber cloth, I applied Killz 2 Latex All Purpose Primer so the paint would stick and be durable.
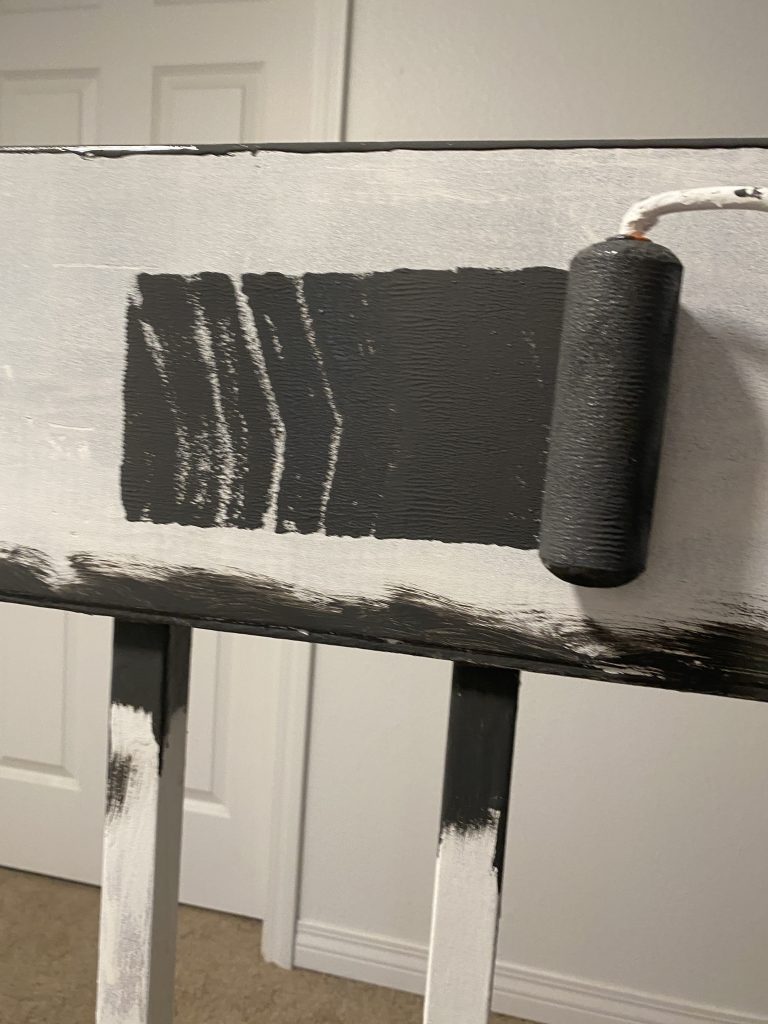
Paint the Railing
Used a roller and paint brush to paint the railing
For painting the railing I used a quart of basic Behr latex paint in satin finish, and had it tinted Behr Cracked Pepper.
For my technique, I would paint the top and bottom with a brush, then use a small foam roller to paint the sides and “smooth out” the paintbrush lines on the top and bottom.
I did the same for the spindles – used a brush to apply the paint, but then smoothed it out with a once over from the foam roller.
Step 3: Remove carpet and prep stairs
Remove carpet and staples
OK – I’m going to be honest – removing carpeting, and in particular carpet staples STINKS. I removed hundreds, if not over 1000 tiny staples from our stairs. It was tedious. BUT so worth it for the final product.
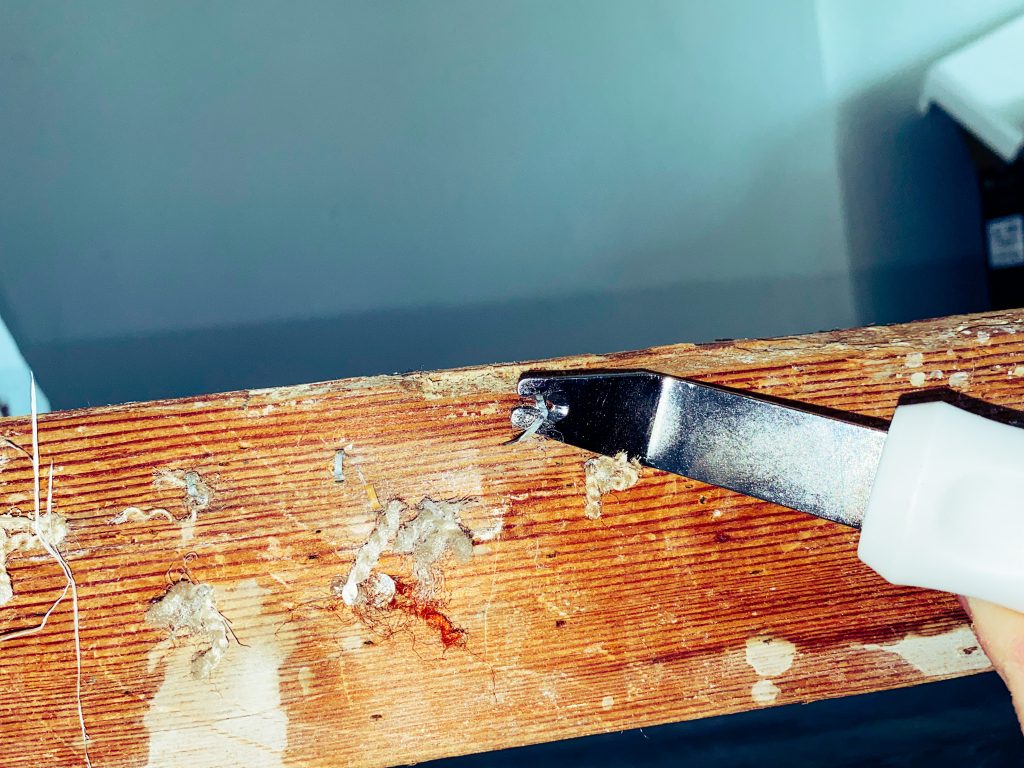
My hubby ripped off the carpeting, but removing the staples was left to me. The best tools for the job are a staple puller and a pliers, plus safety goggles (for your eyes).
The BEST tool for removing carpet staples is the Arrow Staple Puller from Home Depot. Trust me, I literally tried every tool you could think of.
Here is a full photo and clickable link for this amazing tool:
Repair any damage
It took over a week for me to pull all those dang staples. After that, it was time to make repairs. We fixed loose stairs, then filled in staple holes and gouges with putty.
To fix the loose stairs with gaps my hubby put in shims and countersink screws to secure our creaky stairs. Now they are silent when you walk on them, which is awesome.
I used wood putty to fill in some of the hundreds of staple holes and gouges.
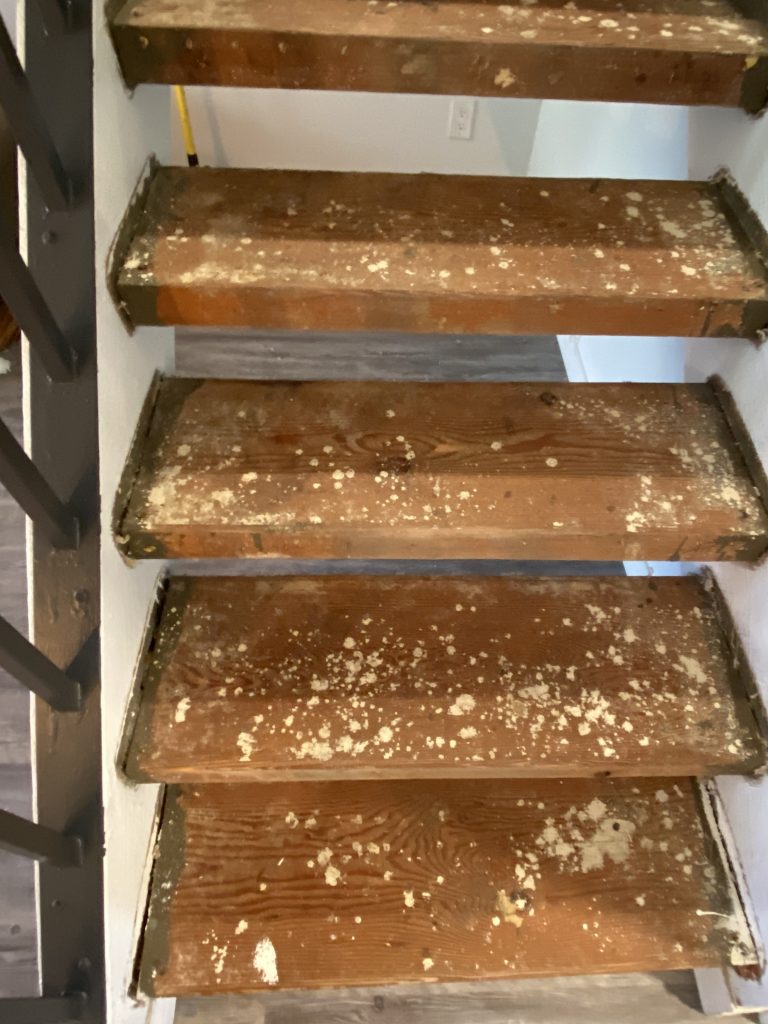
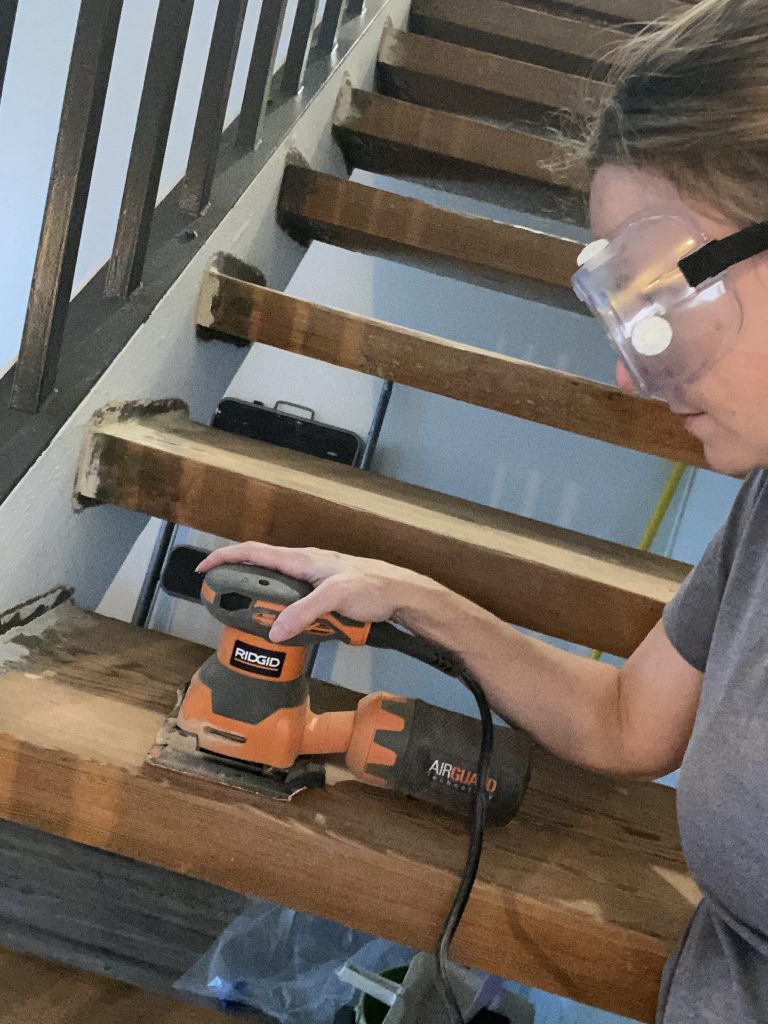
Sand the stairs
The stairs were raw wood from 1975 that had never been sanded – so it was extremely rough.
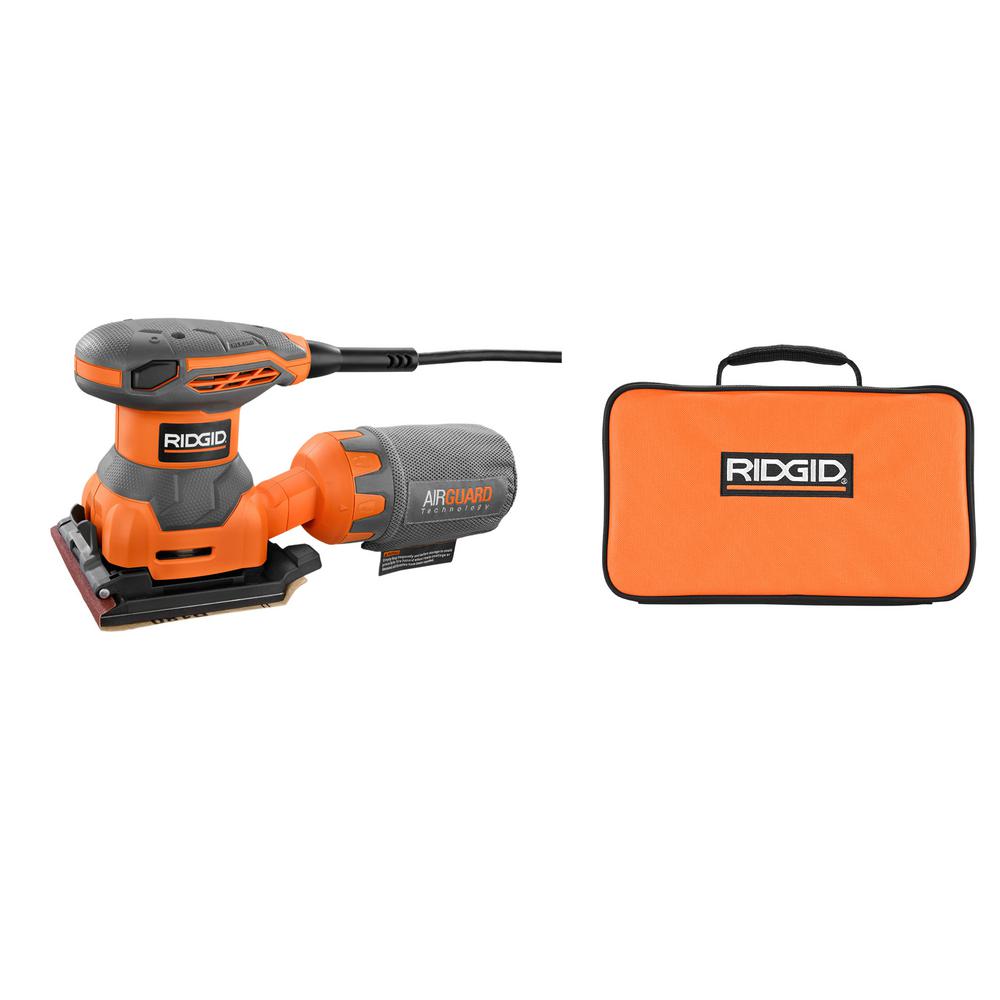
We used a 1/4 sheet sander from Ridgid for this job, which I got from Home Depot. I chose this because it has a nifty dust collection system that helps capture dust. You still need some dust mitigation like plastic sheeting, but I felt this sander really helped:
The stairs were sanded with three different grades of sandpaper to get a smooth finish. Start sanding with the roughest sandpaper (like 80), then gradually go to finer grit like a 120, then finish off with 220 grit.
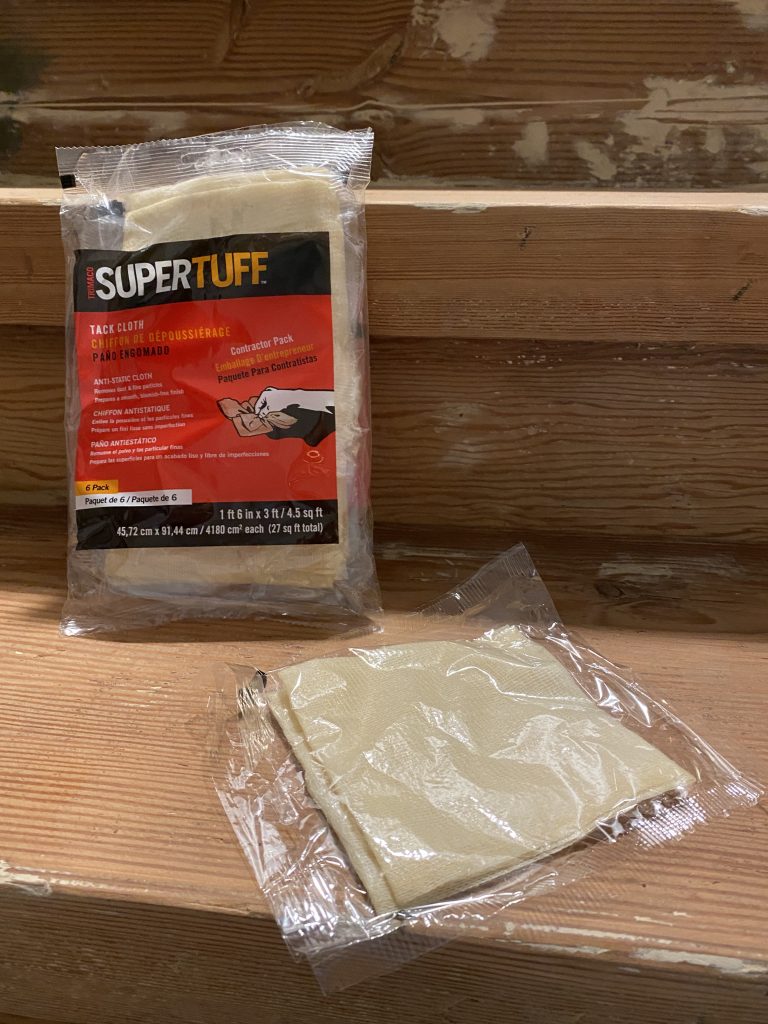
Remove all dust
After sanding, you need to remove ALL the dust to ensure paint looks perfect. I used a small broom, then microfiber cloth, then Supertuff tack cloth (from Amazon).
Step 4: Paint the stairs
First Apply Primer
Painting day was finally here so I taped off the parts I didn’t want paint on (using green Gorilla tape) and got my primer on. I’m a fan of Killz 2 Latex All Purpose Primer because it works well and it’s not expensive. I waited a day and then applied my paint next.
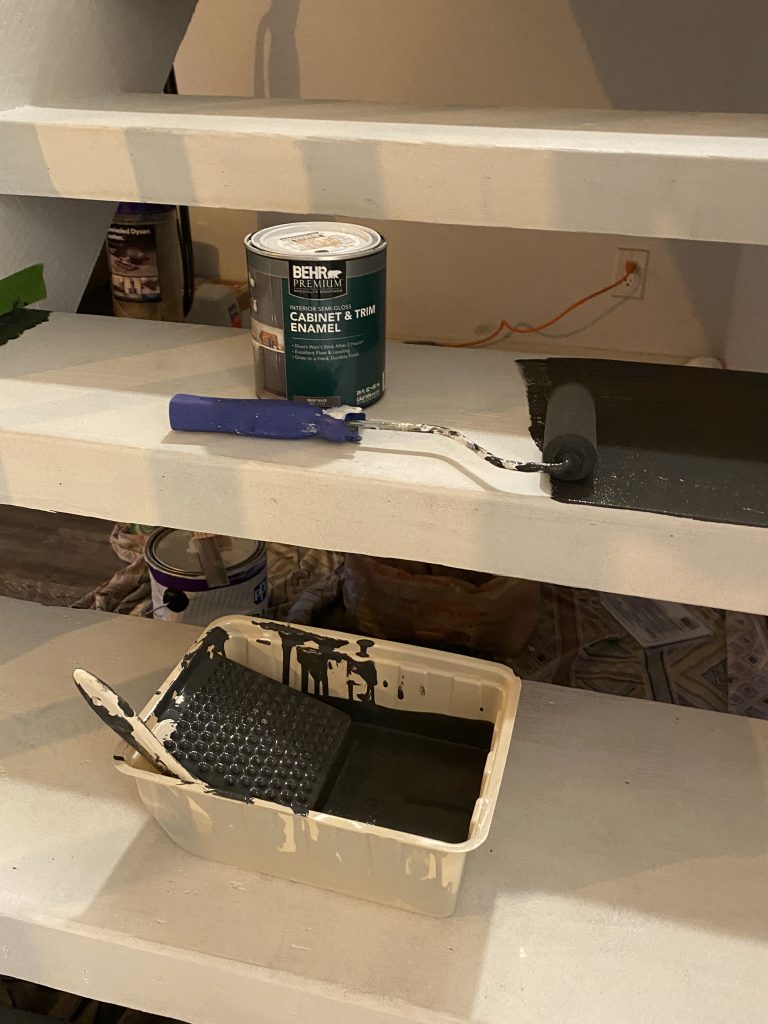
Then Apply Paint
I painted the stairs using ” target=”_blank” rel=”noreferrer noopener sponsored nofollow”>Behr cabinet and trim enamel (from Home Depot), tinted with the color Behr Cracked Pepper. The lady in the Home Depot paint department recommended this paint since it’s designed to be very durable.
This paint is kind of thin and “sinks in” to the wood. You can even still see the grain of the wood underneath a bit so I kind of liked it.
My painting tools of choice were a small foam roller and a 2″ paint brush, and a small disposable paint tray.
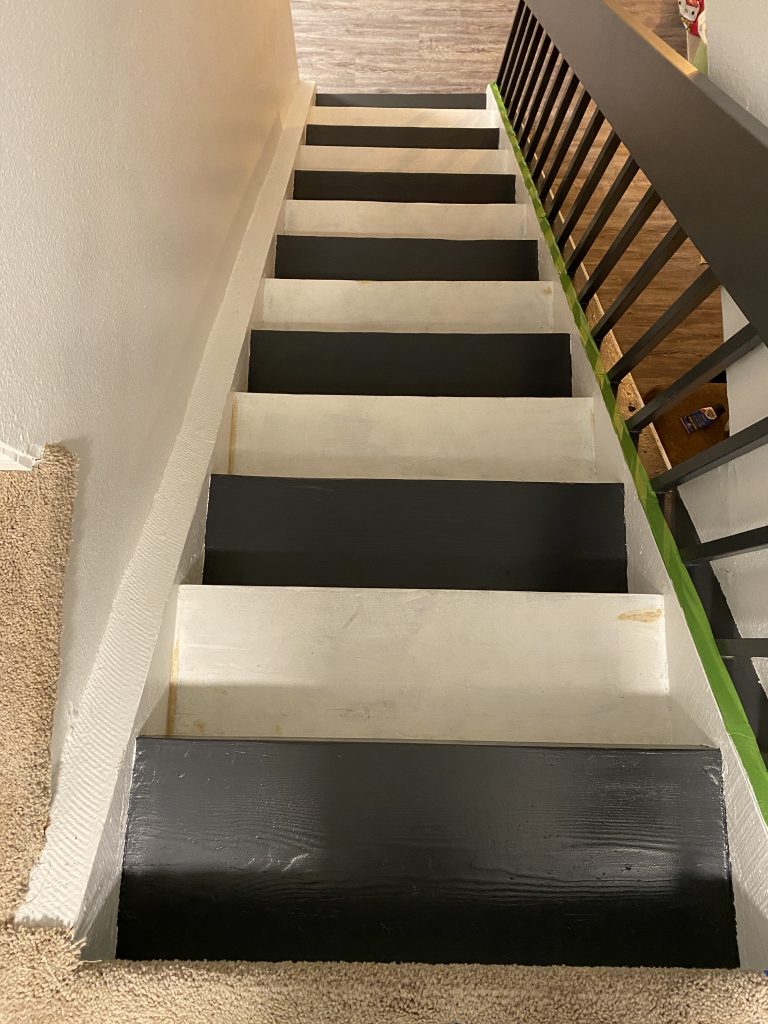
Two coats of paint did the trick, probably thanks to the Kilz primer. Here’s every other stair painted. We were able to walk on the white ones while the painted stairs dried.
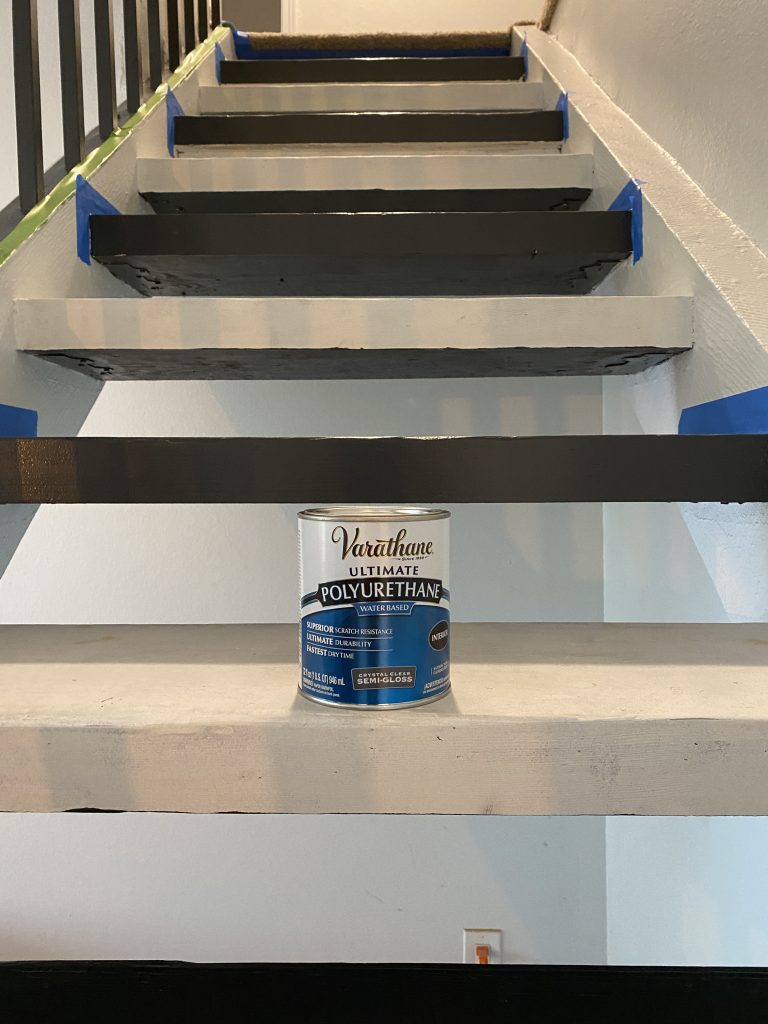
Lastly, Apply Topcoat
After 2 coats of paint, I applied THREE coats of topcoat to protect the paint and get maximum durability. We used Varathane Ultimate Polyurethane in Semi Gloss from Home Depot.
I did sand one of the steps in between coats (per the directions) but felt it messed up the final finish so didn’t do that on all of them. My recommendation is NOT to sand in between any topcoats to get a smooth finish.
For extra safety, I added in Seal Krete Clear-Grip non-slip paint additive that helps prevent slips from walking down the stairs in socks. You add it to your LAST coat of polyurethane and it’s invisible but helps your feet grip the stairs.
Once every other stair was done, I had to go back and do the whole process on the other stairs. In the end, it took about a week for all the painting (I do work full time, have a toddler, and write a blog so my spare time isn’t that plentiful).
Here is the final product:
If you like this post, please share on Pinterest – it helps spread the word.
Wrap Up & FAQ
Here’s a final before and after: from beige carpet to sleek black staircase. I was SO glad to be done, and so proud of my staircase makeover. My updated stairs now went with the rest of my home, matching the grey flooring throughout as well as having more modern, clean lines.
Before we go, I wanted to answer a few FAQ about this project:
How much does it cost to redo a staircase?
My DIY staircase makeover was well under $500. Some of the things I purchased: primer, paint, polyeurethane, 1/4 sheet sander, sandpaper, tack cloth, plastic tarps, painters tape, paintbrush, foam roller, staple remover.
I would say a professionally installed new custom metal stair railing is $5000 – $10,000. A completely new set of stairs and railing is likely $10,000 – $20,000 (or more) installed, and may need permits since there are all sorts of safety issues with stairs.
How do you modernize a staircase?
Making a staircase look more modern isn’t too difficult, and can be done mainly with paint. You can find a more modern color palette by searching on Pinterest and a little elbow grease.
Another way to modernize your stairs is to remove any carpeting or change out your rug runner.
If your stairs are stained wood, you can paint them or stain them a new color to change them up.
If you have a very dated stair railing, you may want to have a new metal or cable railing installed to give it a more modern flair. You can paint or reface the existing steps.
What to use to fill gaps in stairs?
Our stairs had huge gaps on either side, we used wood shims and a LOT of wood putty to fill in the gaps.
To make the stairs more secure, we drilled in countersink wood screws from the top through to the side of the stairs. The countersink helps you put the head of the screw below the surface of the wood, so it doesn’t create a trip hazard. This helped fix all our squeaky stairs too.
Hope this helps you do your own DIY staircase makeover with confidence. I would love to know if you have any questions about my project. Leave a comment below.
Want to remodel your bathroom and think you can DIY most of it, but don’t have the skills to take on a full-on shower remodel?
Have you seen a recent TV ad for a shower remodel in “One Day” and want to know what it’s actually like to go through the experience?
Well, this post providing a Dreamstyle Remodeling review for our shower remodel may be just for you. I’m sharing an unbiased review of Dreamstyle acrylic shower systems from start to finish. I had Dreamstyle custom fit and install two brand new remodeled showers for our condo, during the summer of 2020.
After reading this review, you should feel confident in making a decision about using Dreamstyle (or a similar shower remodeling company) to help you complete your bathroom and shower remodel.
Don’t have time to read now, save to Pinterest for later…
Dreamstyle Remodeling is a remodeling company specializing in full tub/shower remodels and tub to shower conversions.
They can install a new shower or tub, with a custom-fit acrylic enclosure, in about 2-3 days. These are not ceramic/stone tile shower walls, the enclosure is made from acrylic so you never have any grout to clean (yay!).
We decided to do a tub to shower conversion in the owner’s bathroom. We also had Dreamstyle renovate our guest bathroom’s tub/shower combo to a brand new one.
Full Disclosure: We purchased this shower system on our own and had NO discounts or compensation from Dreamstyle for this review. All opinions are my own and I am providing a fair and unbiased review of Dreamstyle Remodeling based on my own personal experience in the summer of 2020. I do not have any affiliation with Dreamstyle Remodeling.
Initial Contact
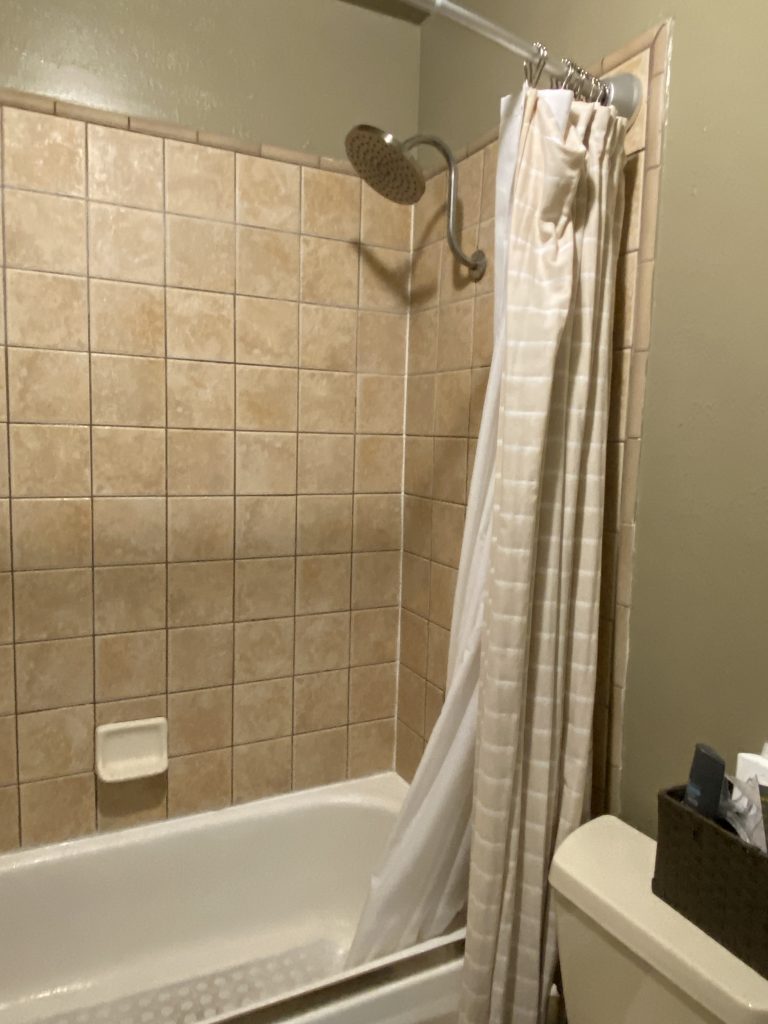
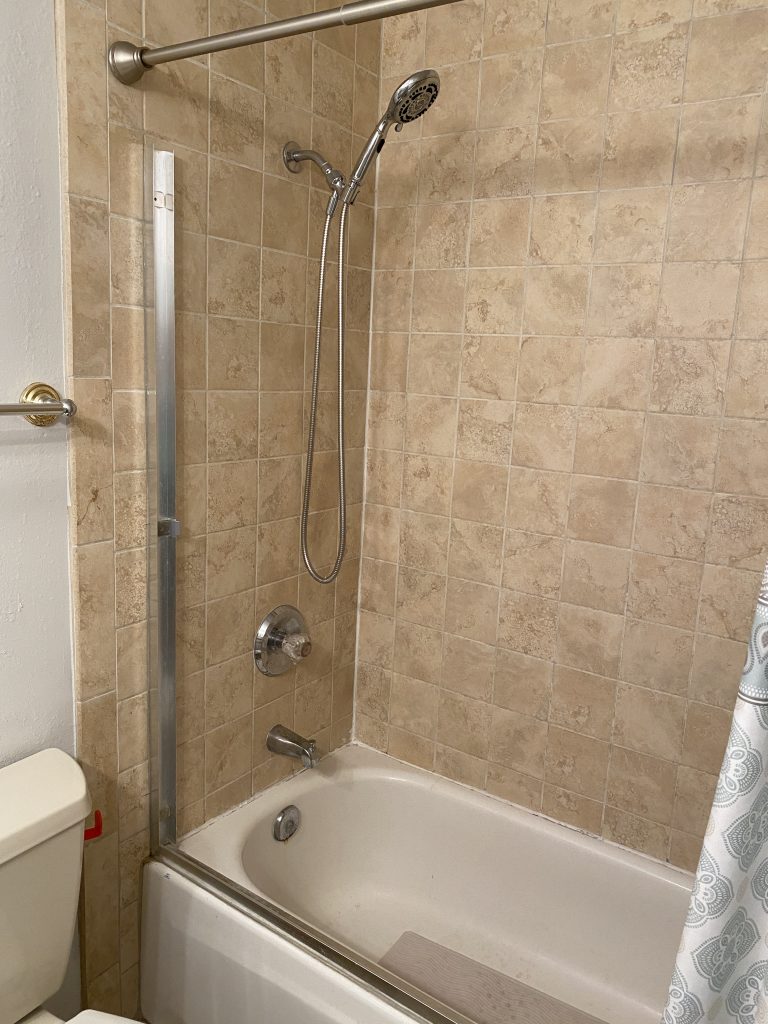
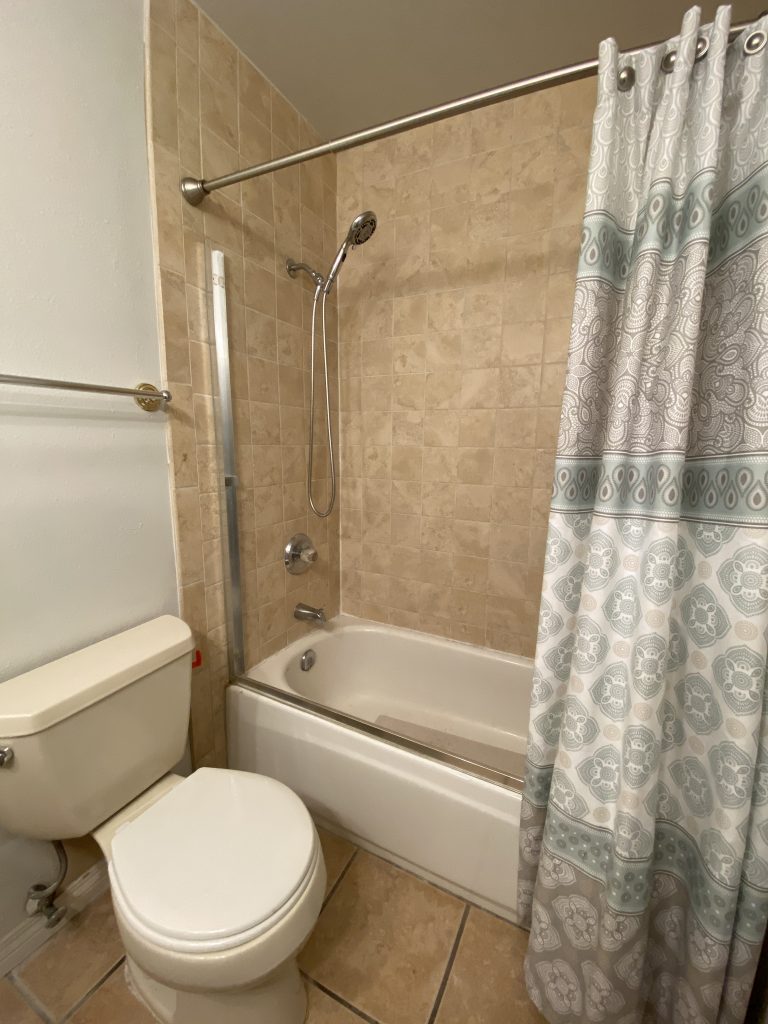
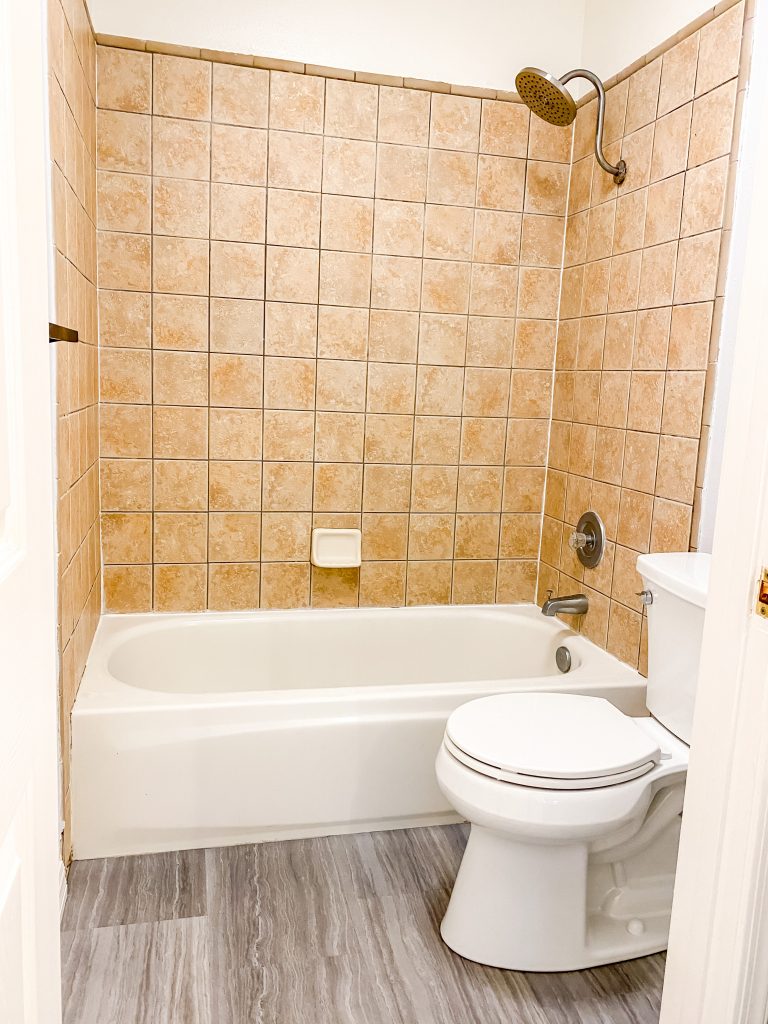
Here’s the “before” that we were working with:
These two beige baddies were itching to get made-over.
We had old, beige, builder grade tile shower/tub combos (above) that were unattractive and needed updating badly. We knew we wanted to hire a professional since we didn’t have the DIY skills to tackle this project with confidence.
Why choose Dreamstyle Remodeling for your shower remodel?
Dreamstyle Remodeling is a remodeling company, founded in 1989, based in the Southwestern USA. They specialize in bathroom remodeling, and also window and door replacement. Here’s why we chose Dreamstyle Remodeling for our shower remodel:
Using a general contractor for a traditional tile remodel takes a long time and the labor is very expensive in Southern California.
We wanted a company that offered financing, which most general contractors do not (you have to pay half in advance or pay in installments as the work gets done).
Some acrylic shower installers place the new shower/tub over your existing one. Ours was pretty old and smelled like mildew so we wanted the old one replaced.
We don’t live in a super high-end home, so acrylic would be perfectly acceptable to a lot of buyers in our price point (this wasn’t our forever home).
We received a couple of flyers from Dreamstyle offering a great financing special, which really is what drove me to pick up the phone.
So, I called Dreamstyle Remodeling to try to get a cost estimate, which they would not give me over the phone. Their person took my info and made an appointment for a sales visit. The sales person, Mike, was here within a couple of days.
Sales Appointment
The sales appointment took about 2.5 hours from start to finish, on Saturday May 29, 2020. He was right on time and came with lots of samples of the different acrylic wall types and fixture choices (they use Kohler fixtures).
Acrylic wall options
Dreamstyle Shower Systems has a variety of acrylic wall styles to choose from. They seem to offer wall styles from: Kohler, Jacuzzi, and Bathwraps. Kohler and Jacuzzi are more expensive than the Bathwraps walls.
They offer a lot of different colors and patterns for the walls: solid white, off white, beige, and a variety of “stone look” patterns.
Dreamstyle Remodeling also has any of their colors/patterns available with different “impressions” in them to simulate tiles – like subway tiles, squares, etc. The Bathwraps website shows a lot of the styles and textures they have available, and these were the most affordable options.
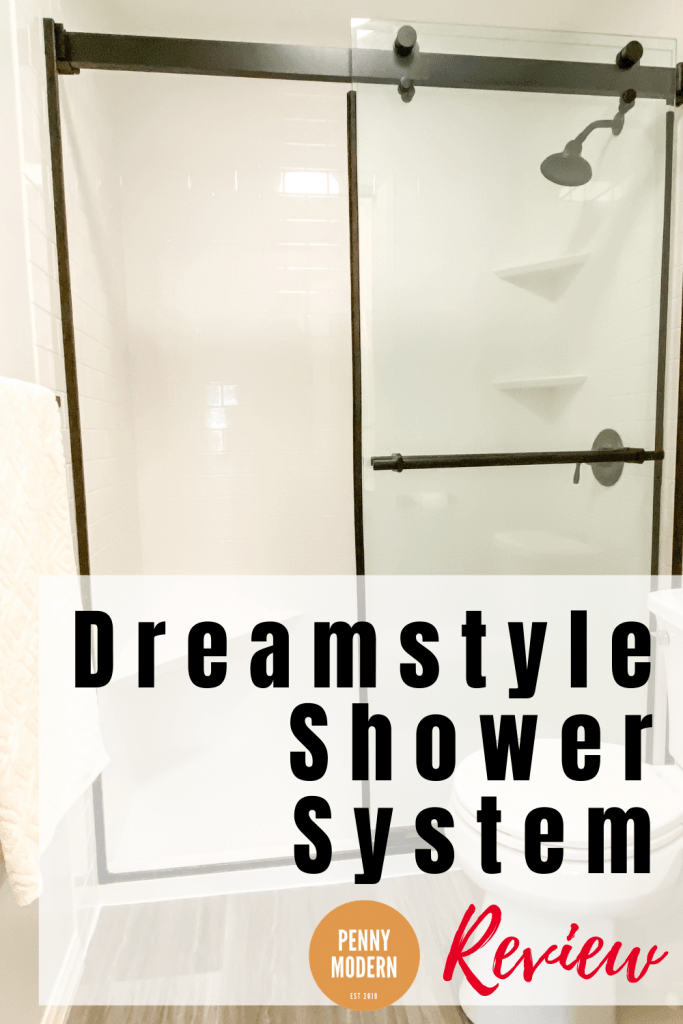
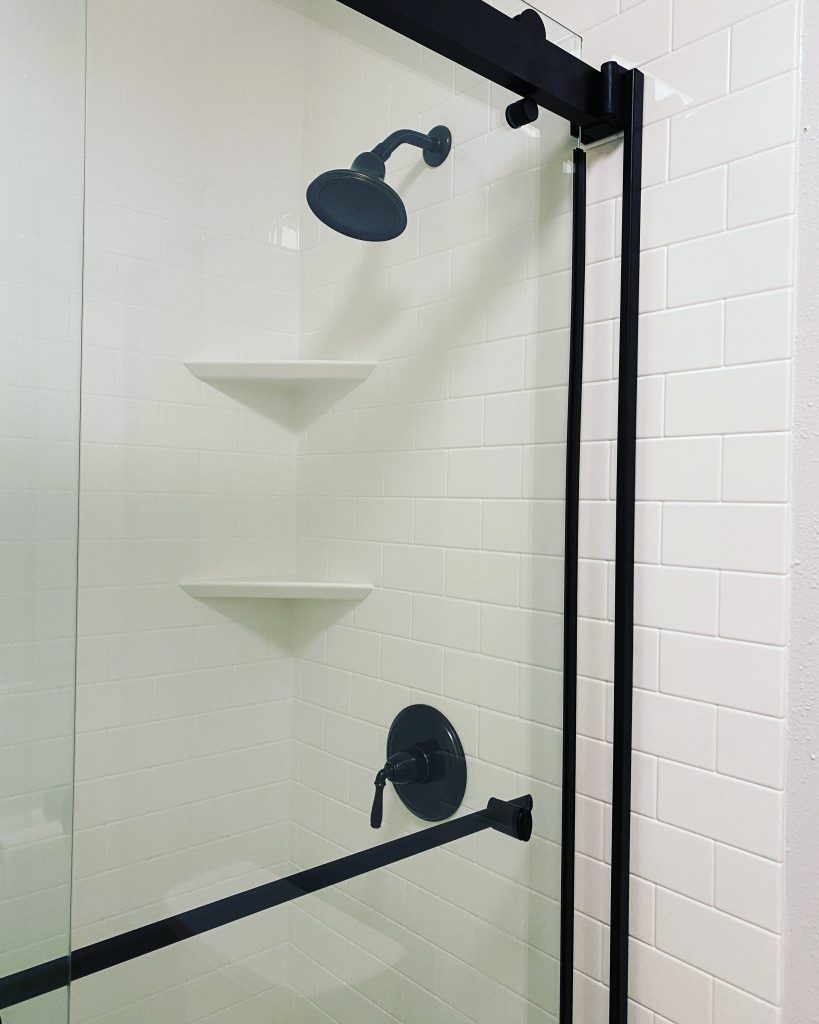
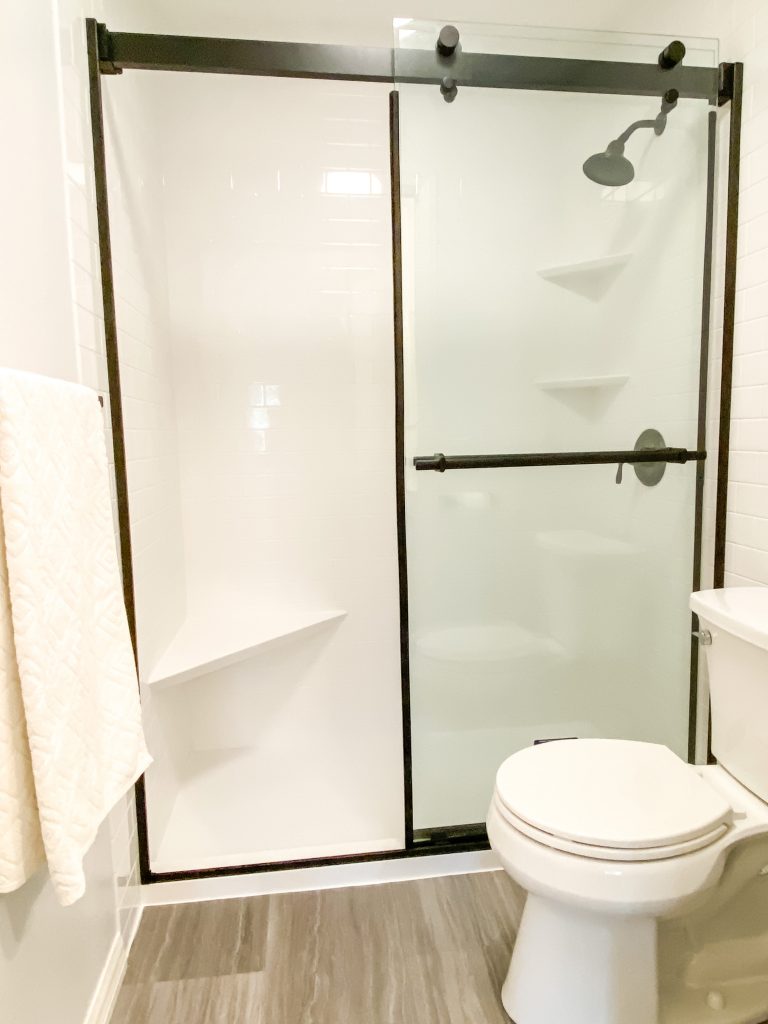
Close up of acrylic walls that look like white subway tile, along with antique bronze Kohler fixtures
The Kohler shower walls they carry are significantly more expensive (by a few thousand dollars) than what he was showing us, although the patterns and designs are quite beautiful. We decided to go with the Bathwraps shower walls, since we wanted a classic white subway tile-look design.
Tub or shower pan option
Some of the other options are choosing either an acrylic tub or a walk in shower. For the tub, I believe it comes in white or off white.
The shower has a couple of options. One option is an acrylic shower pan like you would buy at Home Depot. Or you can get the premium shower pan which is $600 more but more heavy, and less likely to crack or discolor. This shower pan is custom made for your exact space.
Fixture options:
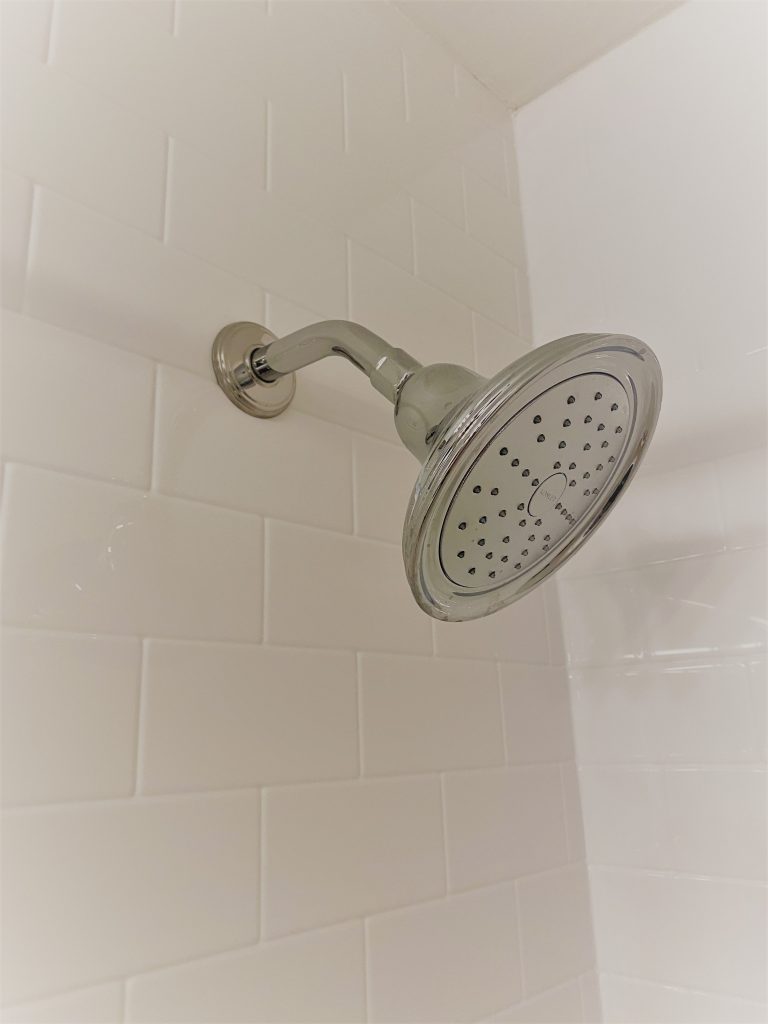
Kohler showerhead in chrome
The fixtures they carry are all Kohler fixtures. The finishes to choose from are: brushed nickel, chrome, or antique bronze.
Glass door options:
Dreamstyle Remodeling also offers glass doors for either the shower or the tub option. They offer them in brushed nickel, chrome, and black finishes.
Here is what we selected for each bathroom:
Owner’s bathroom selections (tub to shower conversion)
White subway tile-look acrylic shower wall (from Bathwraps)
Two shower shelves (included)
Shower seat (extra cost)
Heavy, premium white shower pan ($600 extra)
Antique bronze Kohler shower fixtures (included)
Black trim on shower door (extra cost)
Guest Bathroom selections (tub/shower combo)
White subway tile-look acrylic shower wall (tub/shower combo)
Acrylic tub – white
Two shelves (included)
Kohler chrome shower fixtures
Install info
Here were the main benefits we took away from the sales pitch:
Dreamstyle will do ALL the work themselves (no subcontractors) using 2 installers.
Each shower can be done in a couple of days
There is a LIFETIME Guarantee on all their work & materials.
They rip out all the old tile and tub, and haul the old stuff away.
Plus they totally re-do the plumbing, which if you’ve ever hired a plumber – that’s worth a LOT of money right there.
If they find anything really bad once they do the demo, they will give you a quote for the repair, but it will be in addition to the basic install price.
Dreamstyle Showers Cost
Dreamstyle was open to negotiations on our shower remodels, especially since we decided to do both bathrooms – so negotiate for sure! We ended up doing 2 shower systems for around $15,500, and got a great financing deal (which can depend on your credit score, etc). Keep in mind this is in San Diego, California – so labor prices are quite high in this area of the country.
The bathtub/shower combo was around $6500 – $8000. The tub to shower conversion was around $8,000 – $10,000.The shower is more expensive because of the premium shower pan and glass shower doors.
I know this is a LOT of money, but keep in mind these are licensed contractors and they were going to get each shower done in a couple of days – not the weeks you would normally spend doing tile showers. Plus the materials are custom made and fit to your exact space.
By the end, after we purchased, we had made an appointment for our measurements, on Tuesday 6/2/20 from 9-10am. They said our shower install would not be until 5 – 8 weeks from when we had our measurements done.
Measurements
The guy came for measurements on Tuesday 6/2/20 around 9 am. He was professional and quick – the whole thing took about 30 minutes.
He went over the whole process with me. At the end, he said the lead time is really more like 8-10 weeks, as they were having a holdup w/ the shower pans due to COVID-19, which are made in the Midwest.
Waiting for Dreamstyle Shower Remodel
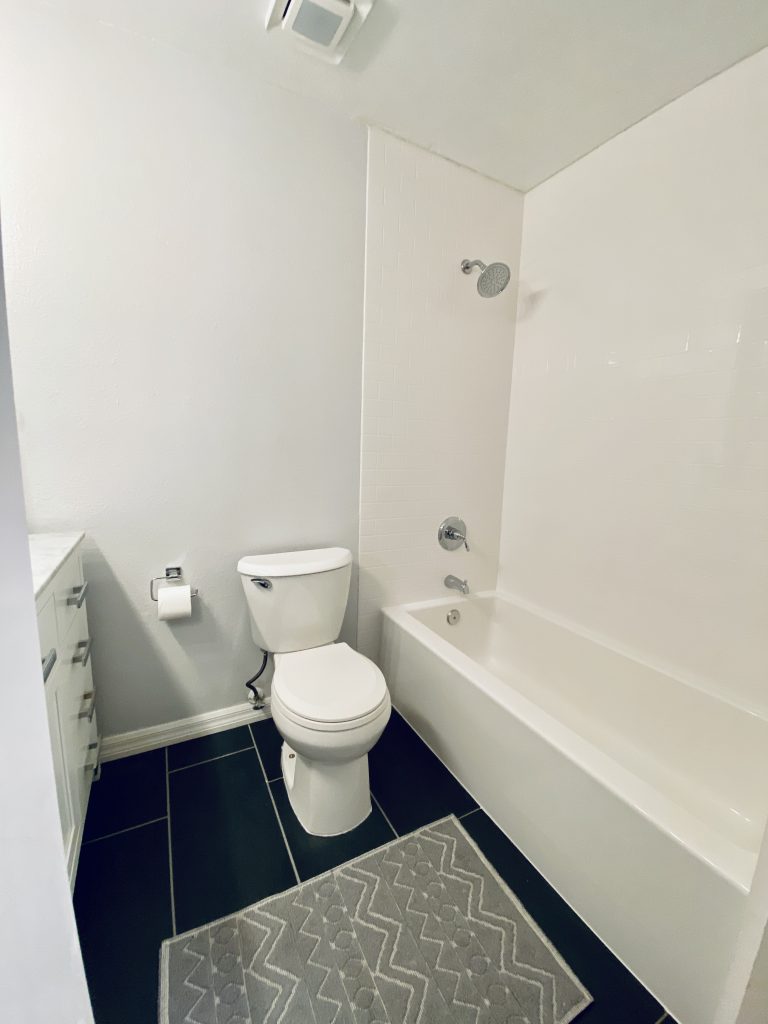
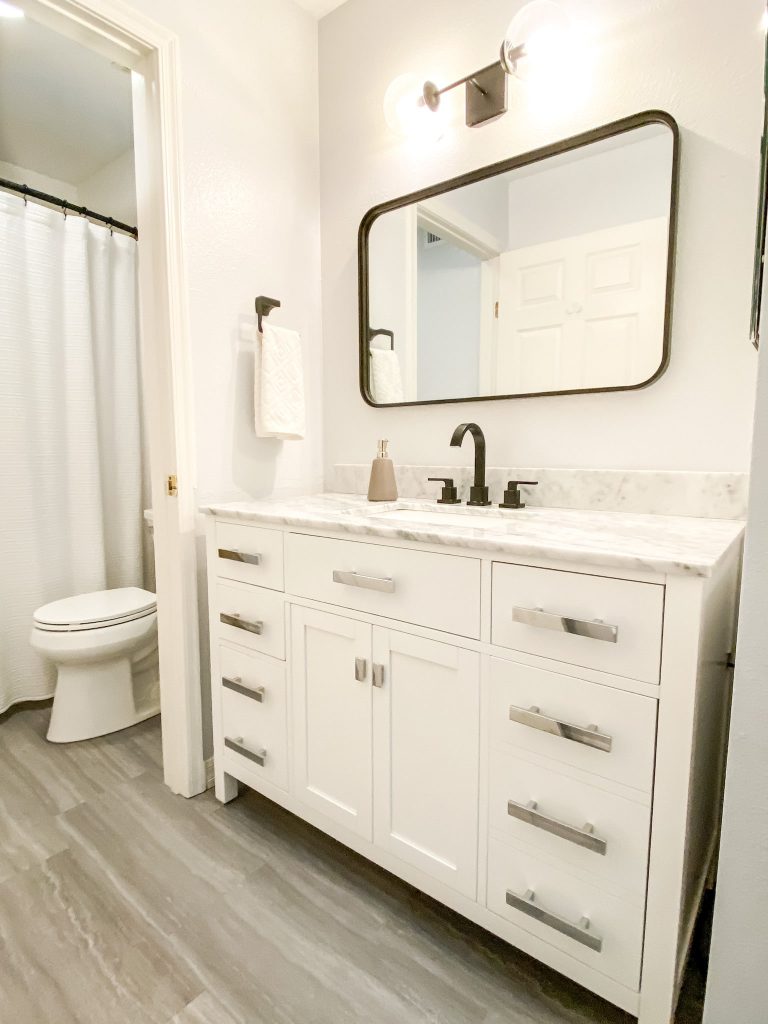
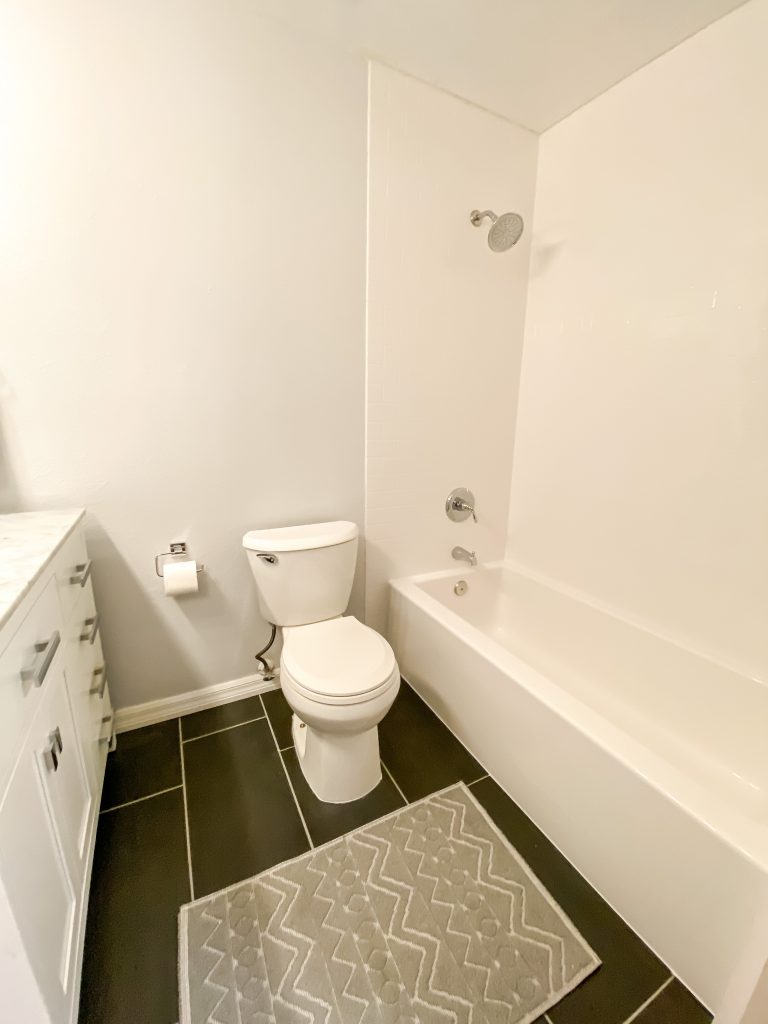
We waited quite a while for the actual installation, about 10 weeks from the measurements. During this time we actually updated the rest of the bathrooms, changing out the flooring, vanity, mirrors, and lighting. See my article DIY Bathroom Remodel: Beginner’s Guide for more details on the full remodel of both our bathrooms.
Some of the updates we made while we waited for our showers: New paint (Behr Pixel White), vanity, toilet, and luxury vinyl flooring.
I contacted Dreamstyle Remodeling a couple of times in July for an update. I didn’t not hear from Dreamstyle until Saturday, August 8, 2020, when Vinnie left me a voice mail to schedule our shower remodel.
Spoke to Vinnie and the install was scheduled for Monday, 8/17/20, at 8am. This was about 11 weeks we had to wait from when we signed the contract to when the install started. I will note this occured during the pandemic related to COVID-19, so I will cut them some slack.
Owner’s Bathroom: Tub to Shower Conversion
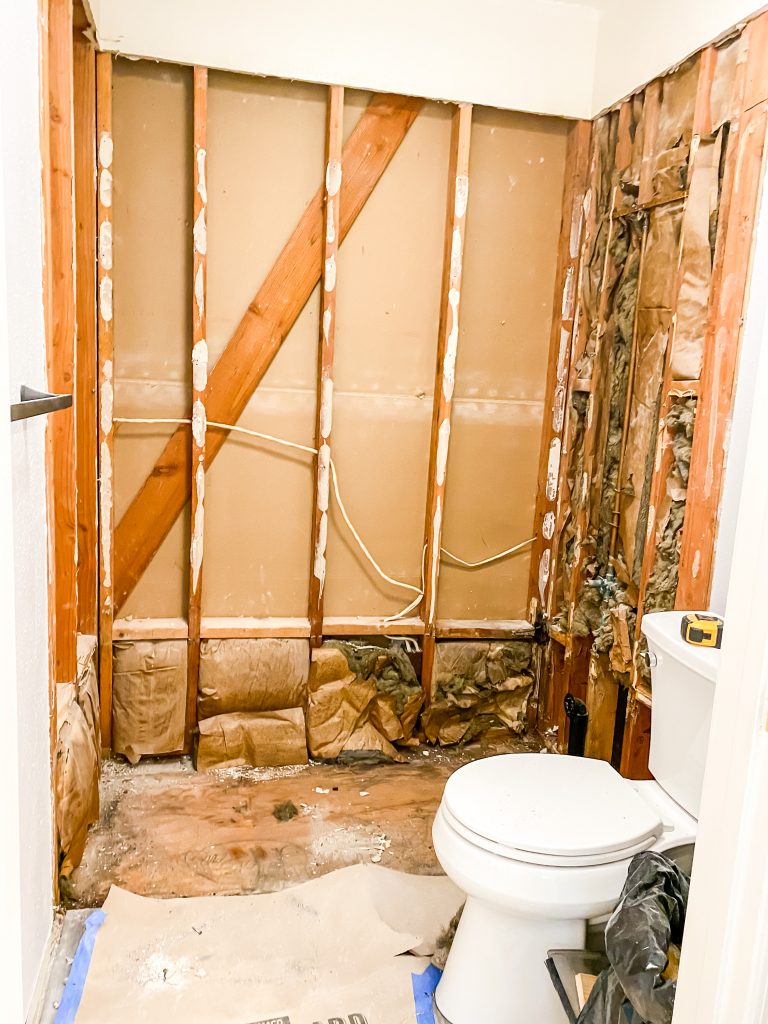
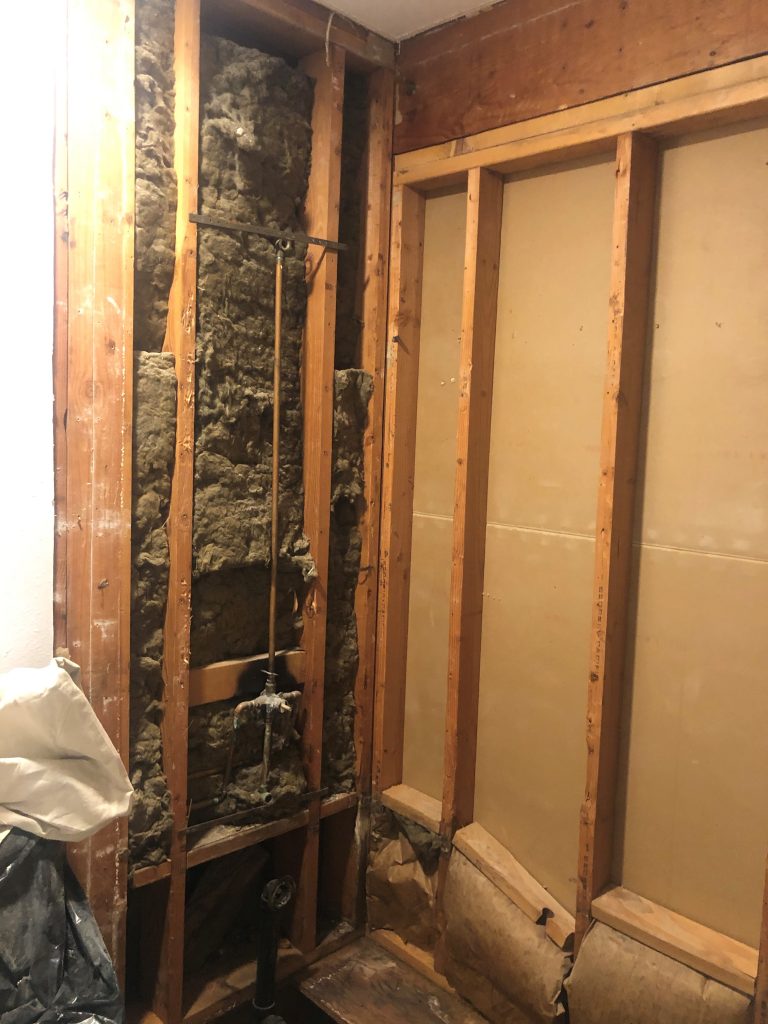
Demo day!
Monday: This was demo day and minor repair to some of the framing (very loud if you are home during the install). We got pretty lucky and they didn’t find too much damage to the studs (our house was build in the 70’s) . They put in one reinforced 2×4 to a damaged area.
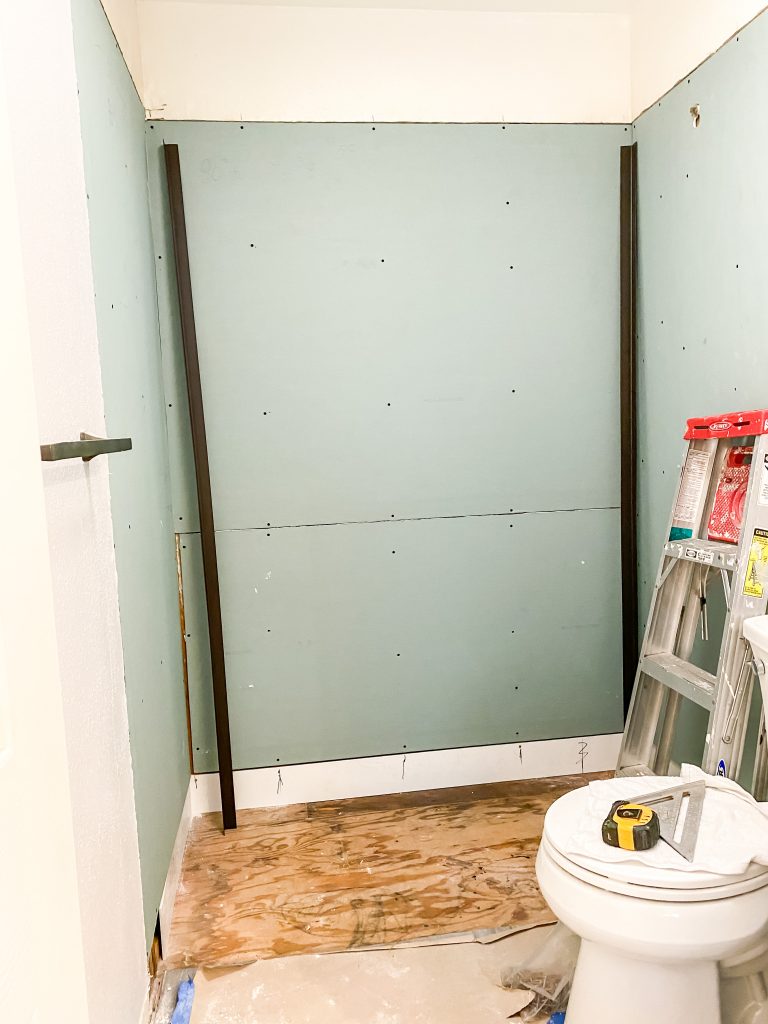
Tuesday: Plumbing and water resistant drywall went up.
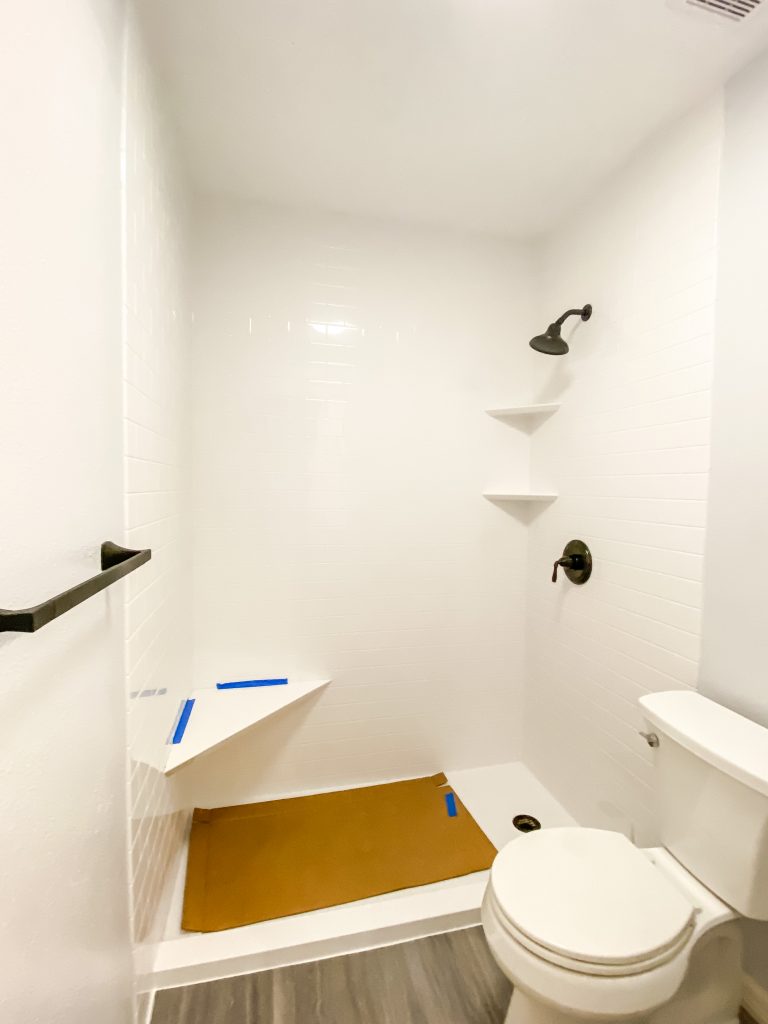
Wednesday: Install shower pan and put up walls, install fixtures. Add shelves and seat, then caulking. We got to pick out where we wanted the seat and the shelves.
Minor snafu:
We had antique bronze fixtures in one bathroom and chrome in the other. They accidentally installed the wrong finish in the owner’s bathroom, and had to re-install the correct ones (which they did quickly).
Finished product!
Thursday: Install shower door (different guys came in for shower doors), finalize caulking on seat.
Friday: Had to wait for caulk to dry. Full use of shower back by the afternoon.
Hallway Bathroom: Tub/Shower Combo
Before photo of our hallway tub/shower combo
Wednesday: Demo tub and shower (very loud if you happen to be working from home)
After demo of our hallway tub/shower combo
Thursday: Framing and plumbing, cut tub and walls to fit. A lot of issues getting the tub to fit as it seemed like the measurements were off. He had to cut the edges of the tub to make it fit.
Friday: Install water resistant drywall, tub, cut and install enclosure. Install fixtures, shelves, caulking. You get to pick where to put the shelves so make sure someone is around to do that.
Saturday: Wait for caulk to dry. Get to use bathtub in the afternoon.
Check out a full tour of our remodeled shower/tub combo right here:
Post-Install Inspection
Once the installers were done, there were 2 opportunities for an inspection. Before the installer left, then when a post-job inspector came. Here’s a little video showing the new shower system in the owner’s bathroom:
Short video showing the Dreamstyle Shower system in our Owner’s Bathroom
We scheduled the post-install inspection the following week. We showed the inspector some of the things we were not happy with, and they created a punch list of sorts to have someone come back and address. Here’s our punch list:
Shower doors leaking small amount of water on floor
Minor damage on ceiling from removing old tile
Need to caulk knob cover
We noticed the tub was “creaking” when you stepped into it, so they agreed to fill w/ foam underneath by cutting into wall behind it.
The punch list took weeks for them to address, by the way. The good thing is our financing payments did not start until the punch list was complete so we were not in any hurry, as the issues were very minor.
So, our first payment was not due until November 15, 2020. But they had installed it back in the week of August 17, 2020 so we were enjoying our new showers for a couple of months before we had to start making any payments.
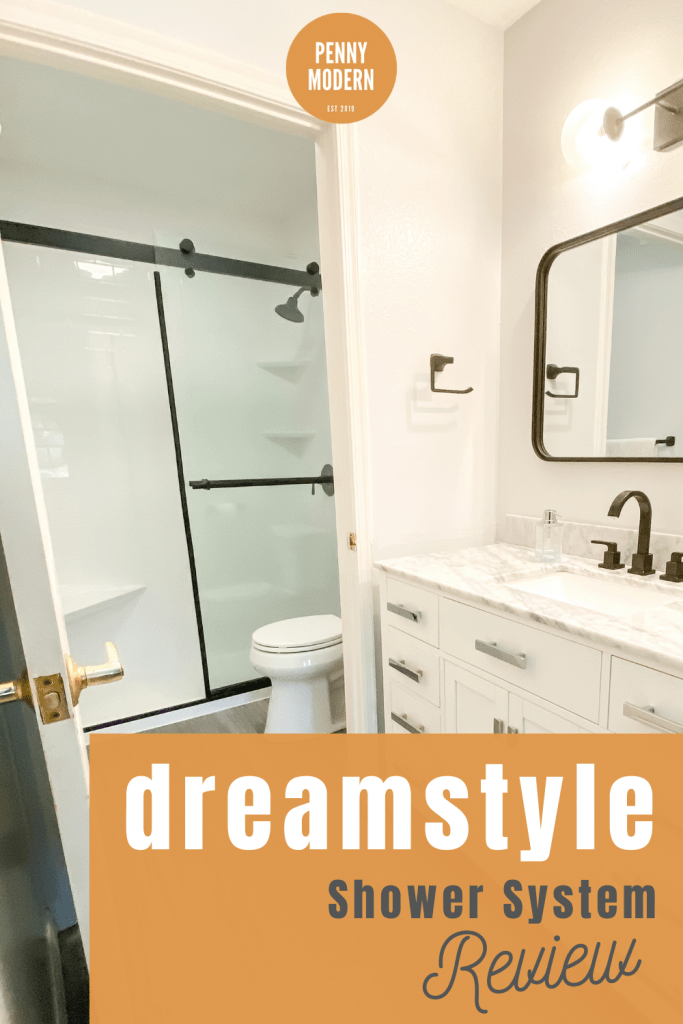
Final Product – Dreamstyle Shower Remodel
Let’s check out some of the before and after photos, one more time. Here’s our owner’s suite tub to shower conversion before and after:
Before
After
Here’s our Dreamstyle Remodeling Shower Tub Combo remodel:
Before
After
They got our Dreamstyle Shower Systems installed for BOTH bathrooms in ONE week, folks! This is amazing!
A normal replacement for two different tiled shower enclosures would definitely take at least twice as long for the install, since you have to wait for mortar and grout to dry before going to the next step.
Overall, the pros definitely outweighed the cons. Here’s a recap…
Pros and Cons of Dreamstyle Shower Remodel
Pros:
Quick install compared to tile with grout
No subcontractors to deal with – the installers did everything from demo to plumbing to framing and the final installation.
Dreamstyle, being a large company, offers great financing options to help make it more affordable through a payment plan.
No grout to clean – ever!
A lifetime warranty puts my mind at ease if there is ever any staining or leaks. If you got tile installed by some tile contractor – there would not be any warranty, trust me.
The quality is really nice – you can get a variety of options of colors and styles.
You can get a smooth surface or different brick patterns imprinted into the acrylic.
They provide and install the shower or tub doors for you. If you do tile, you typically have to hire a separate shower door guy for that kind of work.
Post-install inspection and Dreamstyle willing to fix issues to make you happy.
Cons:
Long wait time – a little less than 3 months from when we signed the deal until both showers were fully installed.
A day without a shower – we chose to do both our showers in the same week, and ended up having one day where we had no shower. Not ideal, but we rolled we had somewhere else to go shower.
They have stone-look printed options for their acrylic enclosures, but they weren’t very appealing to me – the solid colors were more our style.
If you are in a very expensive high-end home and are concerned about resale value – many high-end buyers are more impressed by ceramic or stone tile, than acrylic, in general.
Recommendation
Sharing is caring, if you like this article, please share to Pinterest…
I would definitely recommend a Dreamstyle Shower System to anyone looking to update their bathroom.
The installation process was quick, easy, high quality, and they have great financing deals to make it more affordable.
The main “con” is the long wait (11 weeks) before installation began, which may or may not have been related to COVID. Probably not the best option for a “house flipper,” but if you can wait, it’s worth it.
I hope this review helps you make an informed decision to make your bathroom more beautiful and modern. Our install was in August 2020, so feel free to contact me if you want to see how it’s held up over time. If you have any questions, please leave a comment below – I’d be happy to answer.
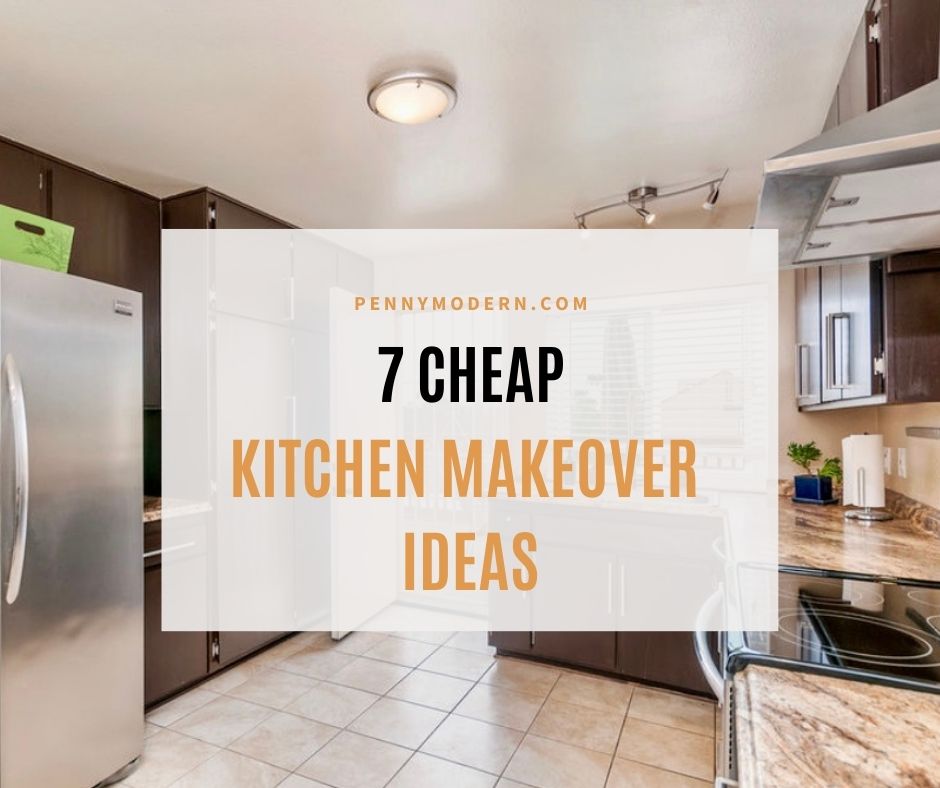
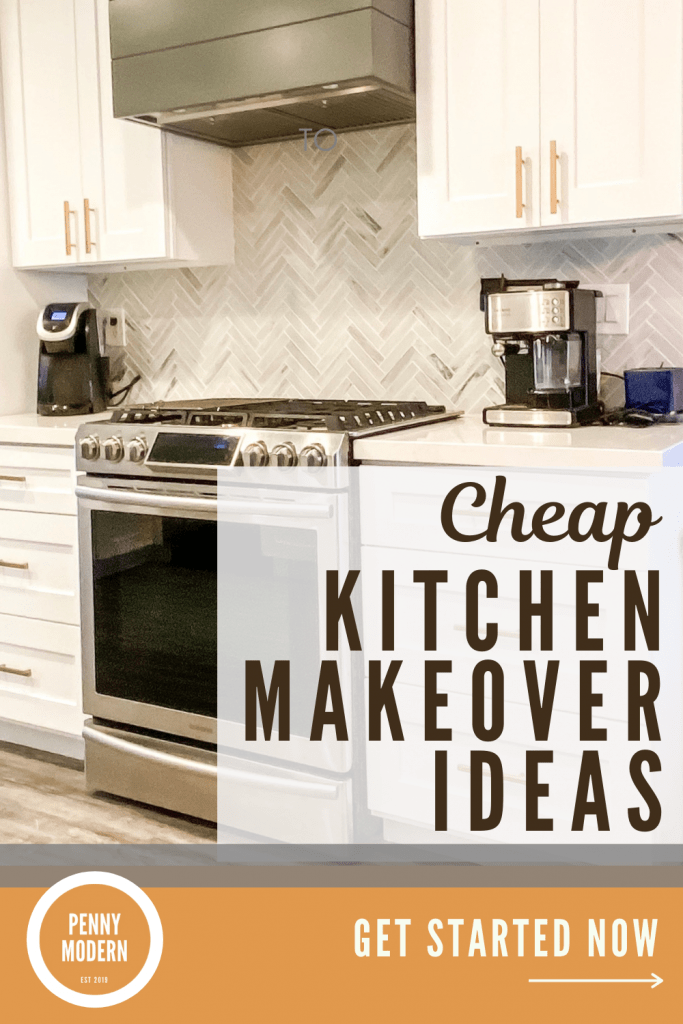
Have you lived in your home for a while, and are just fed up with how your kitchen looks, and need a kitchen makeover ASAP?
Did you just buy a new (to you) house, but it’s got a kitchen from the previous decade (or century)?
This post is for you, my friend. We will give you seven of the best cheap kitchen makeover ideas to help you create a modern and contemporary space to cook, eat, and entertain.
By the end of this post, you will have 7 amazing design ideas to reface or replace most of your kitchen, while staying on a shoestring budget. Let’s get cookin’!
Don’t have time right now? Save to Pinterest for later.
Paint the walls for a fast kitchen makeover
Disclosure: This post contains affiliate links. As an Amazon Associate I earn from qualifying purchases, at NO extra cost to you.
This one seems like a no brainer, right? Well a lot of times you buy a home and the kitchen is just awful, and you just want to gut it. Before you pick up the sledgehammer – try picking up a paintbrush instead.
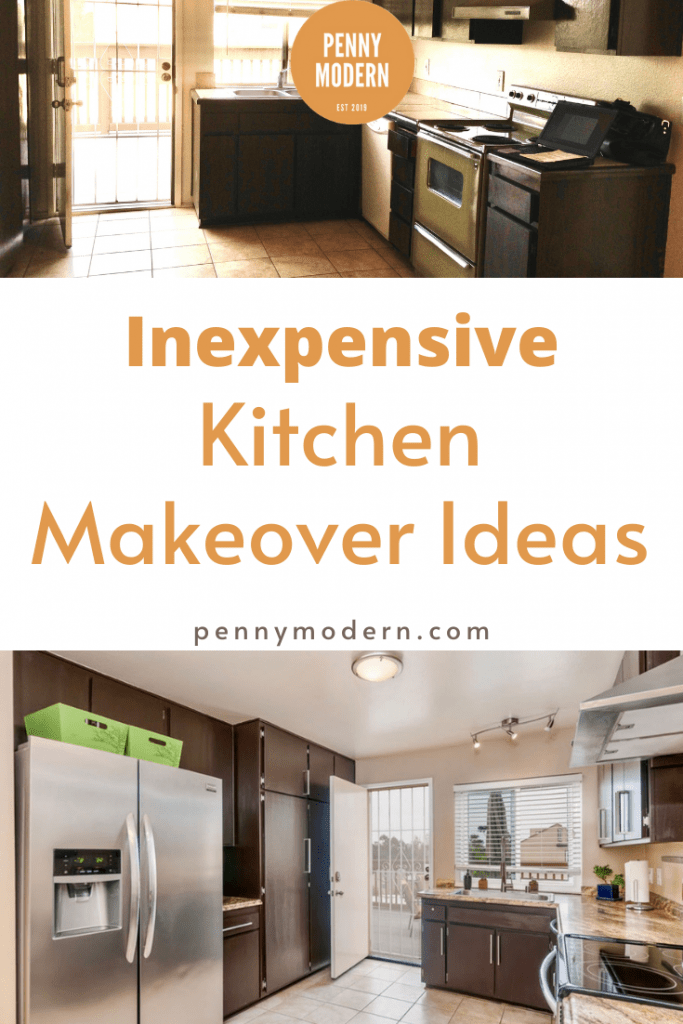
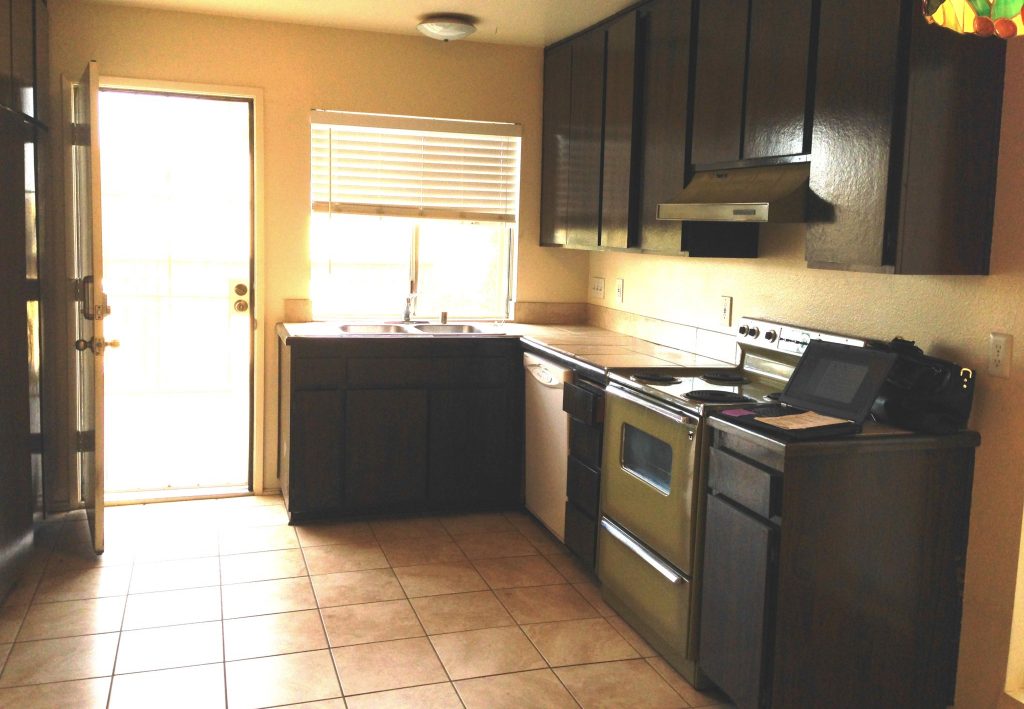
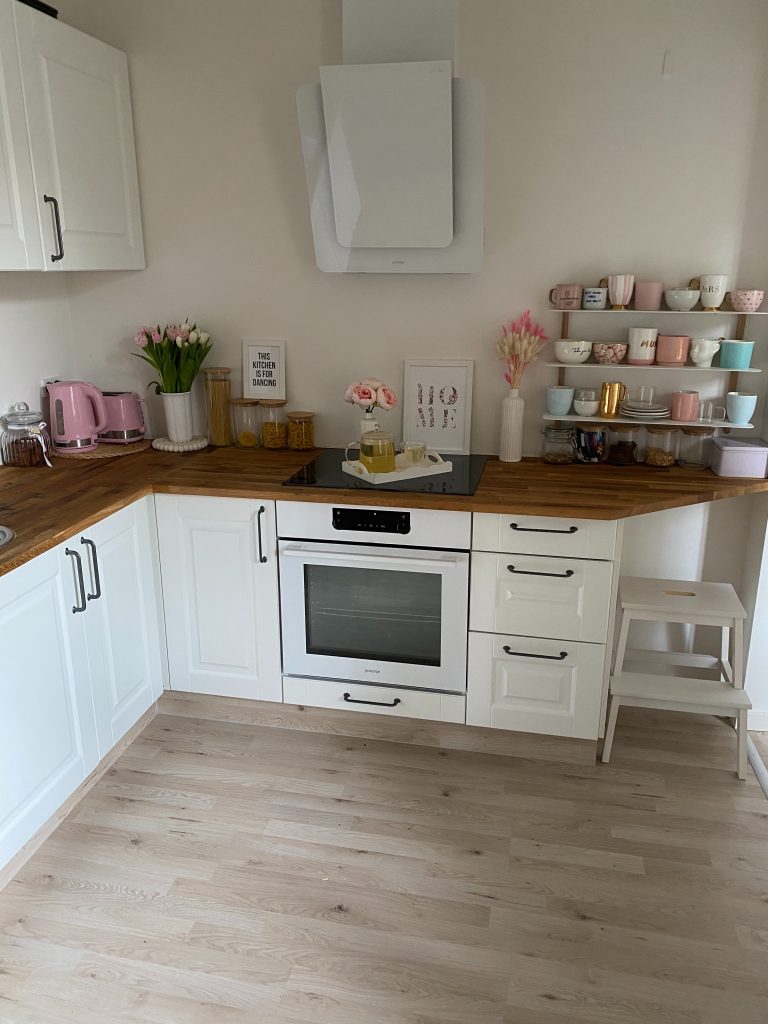
Paint can completely transform a space, taking it from dark and dingy to bright and light. Check out the paint transformation on our first kitchen makeover:
Before
After
I had dark, goldish brown wall paint before, and swapped it our for a nice light beige.
Smaller kitchens especially can use light paint to make them seem larger – think white, grey, beige, or even a light green or aqua. Make sure you pick your whole house color scheme first so you don’t have every room a different color.
Paint the cabinets
Photo: Jelena Mirkovic via Unsplash
This is one of the biggest “bang for your buck” cheap kitchen makeover ideas, especially if you do it yourself. New cabinets can run from $5k to $20k, but painting your kitchen cabinets yourself can cost as little as $200!
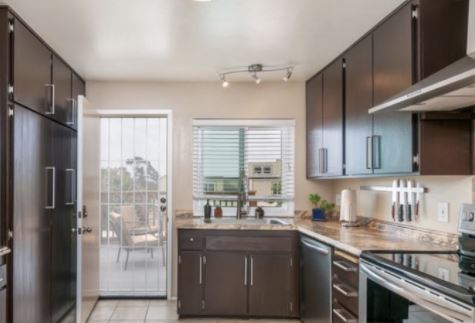
This one isn’t super quick if you DIY, but it’s certainly faster than a full down-to-the-studs remodel. I painted all my cabinets myself in less than a month in my “spare time.” End result below.
I used Rustoleum Cabinet Transformations kit in Espresso. The only thing I would change is the top coat (it was too sticky when I applied so was hard to get perfectly smooth), just use a different polyeurethane top coat and you should be set.
Rustoleum Cabinet paint held up great – we lived there 2 years after I painted the cabinets. It comes in several colors, from Espresso to White, click on the image below to take you to HomeDepot.com to check it out.
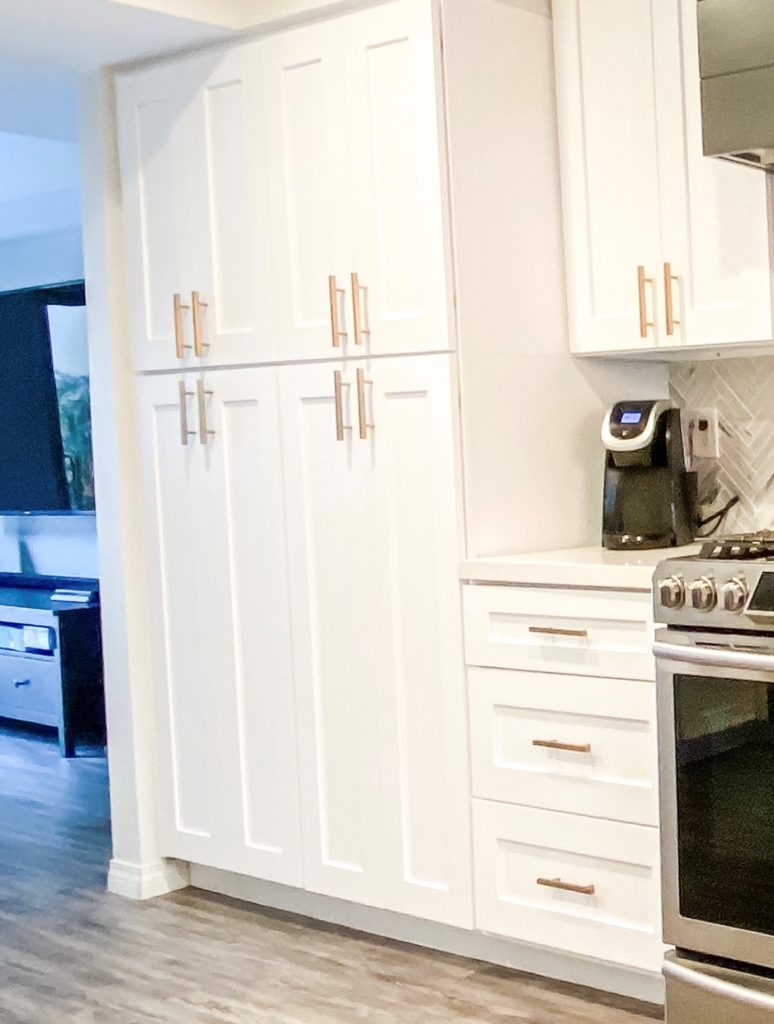
In terms of picking out a color, white is always timeless, and an off white would go with beige or warm wood floors.
Hardware can make your kitchen feel WAY more modern, and it’s quick and easy to change. The easiest way is to find something that “fits” in the existing holes in your cabinets. So pulls and handles the same approximate shape as the existing ones.
Amazon has a HUGE selection of modern and affordable knobs, pulls, and handles. Here are a couple of my faves (the first is nearly identical to my own kitchen cabinet hardware, above):
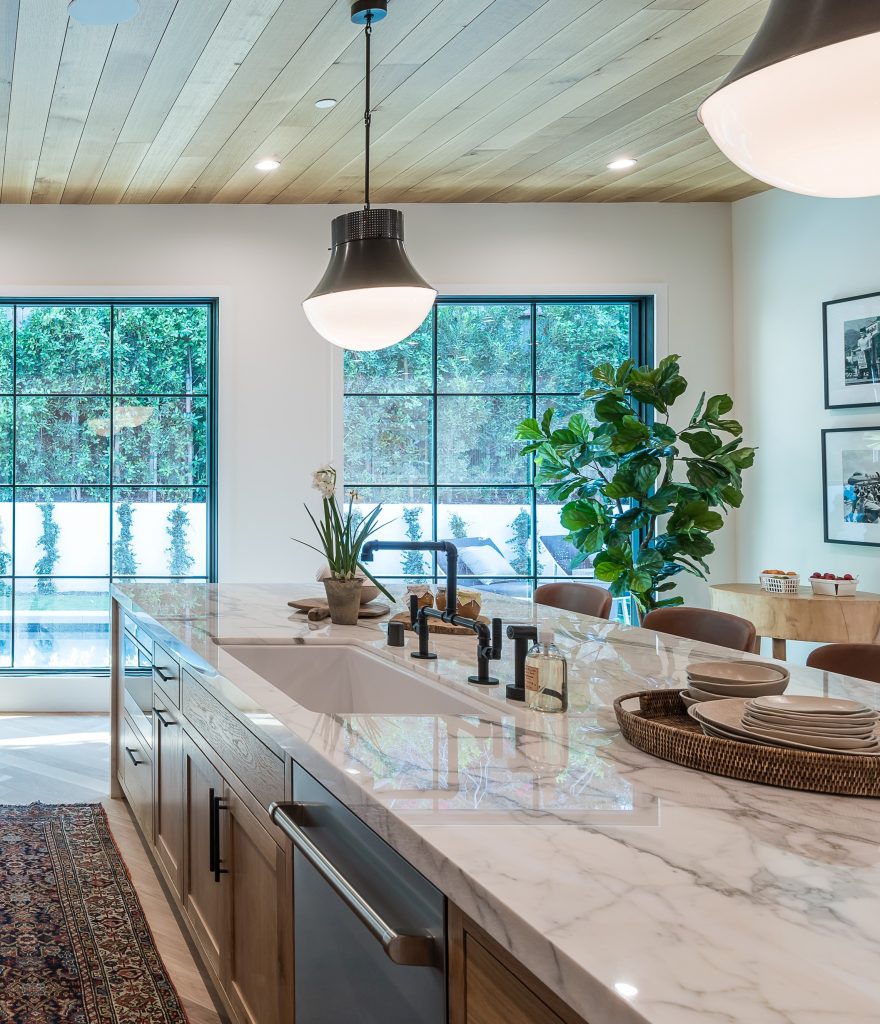
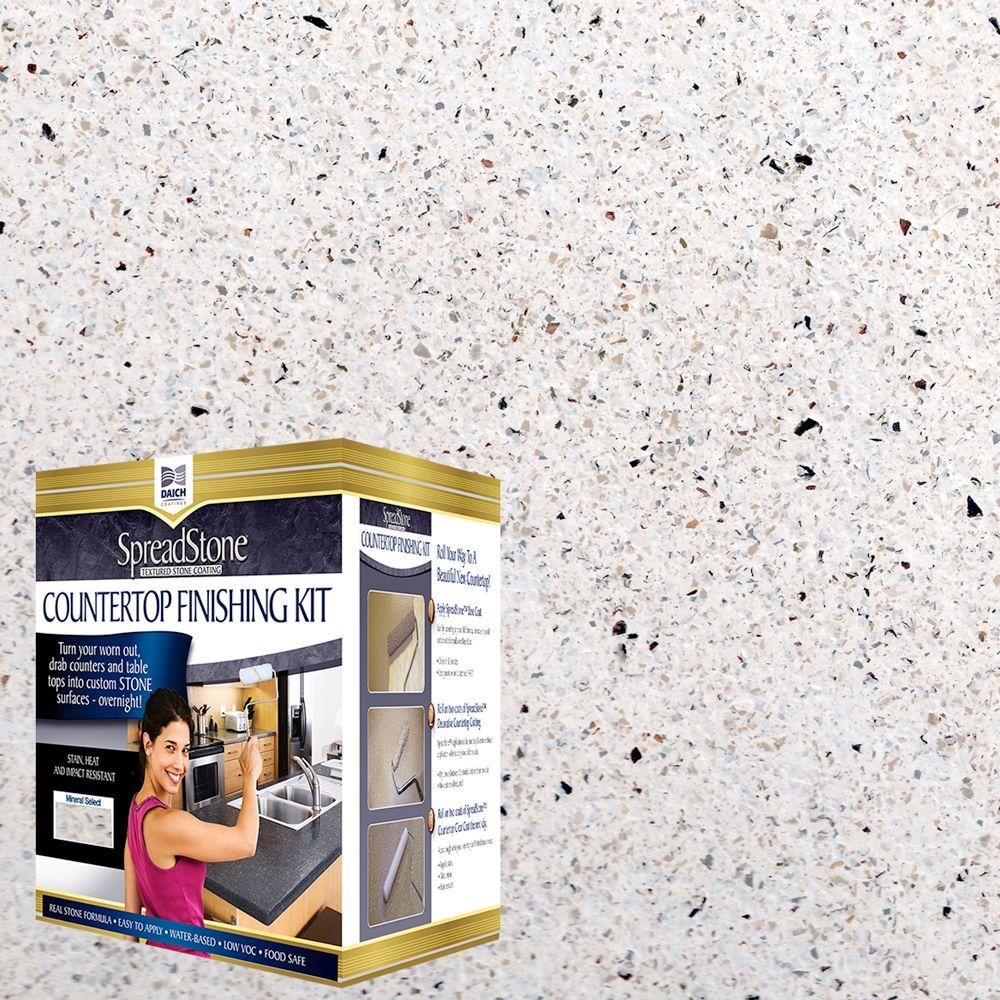
Replace or reface the countertops
Photo: Watermark Designs via Unsplash
Old countertops can be ugly, let’s face it. There are a bunch of options to improve countertops for your kitchen makeover.
Option 1: Replace countertops and sink. You could DIY, but we decided to hire a local contractor for this job in our old place. We replaced old tile countertops with really affordable (but nice) laminate ones from Lowes: VT Dimensions Formica Lapidus Brown Laminate Kitchen Countertop. They replicated a granite countertop and looked great, this project was less than $1000.
Our new countertops were laminate but looked like real granite
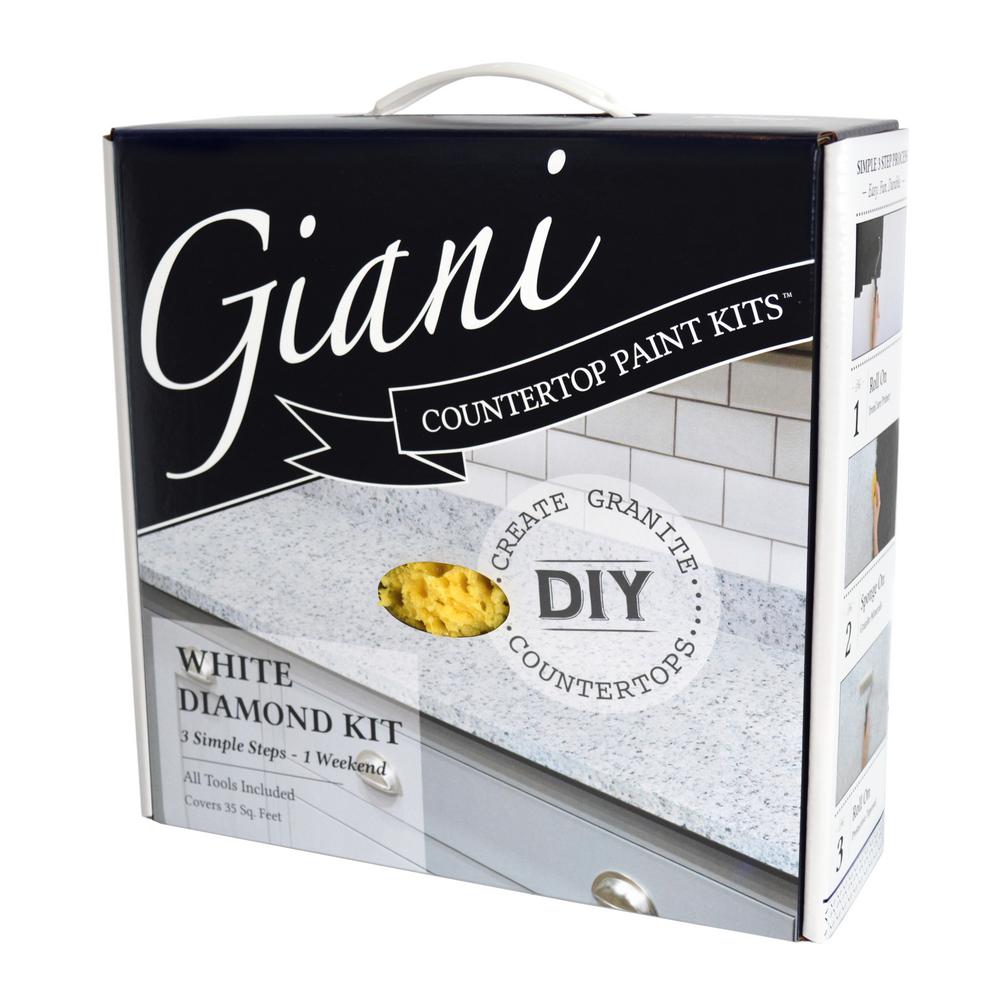
Option 2: Reface your countertops. You can do this by painting or applying a contact paper cover up. This will likely be more of a short term fix, so don’t expect it to last more than a couple of years. Don’t place anything hot on the countertops if you do this (get yourself a nice trivet).
Some modern light colored countertop painting kits from Home Depot (both highly rated):
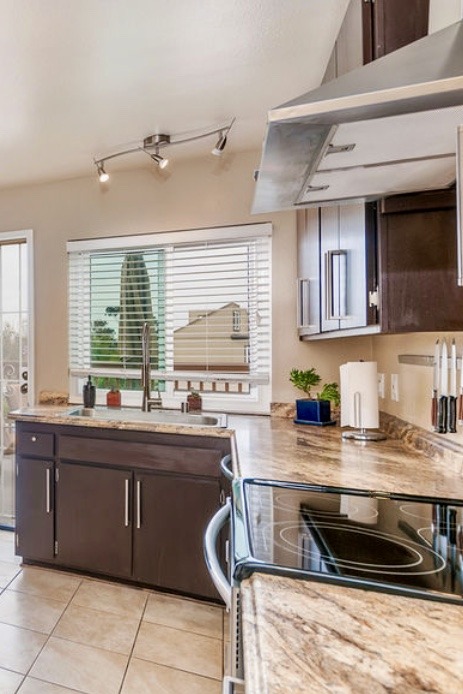
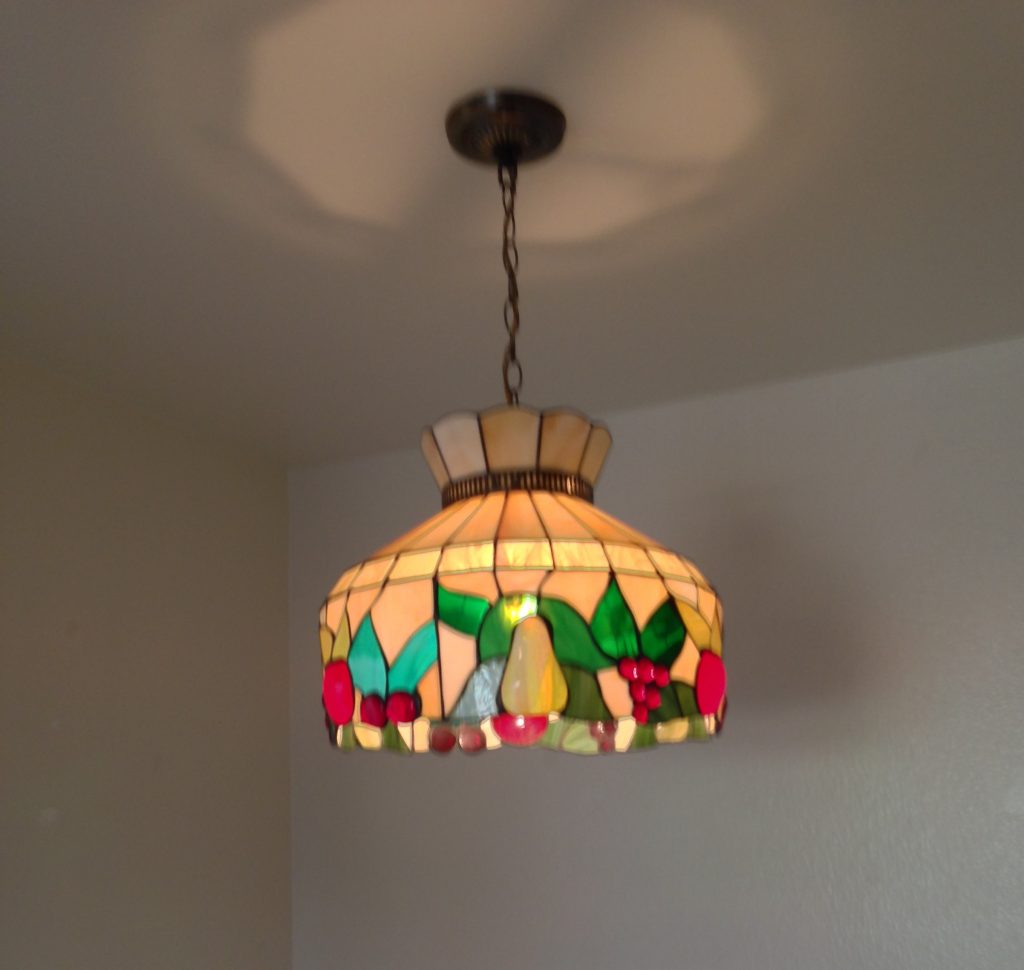
A lot of kitchens have lighting that makes them look dated. Luckily, this is an easy fix, especially if you just replace versus reconfigure. Lighting is an easy and cheap kitchen makeover idea, especially if you buy an inexpensive option.
Our old kitchen had one of these babies in the dining area:
We actually replaced this vintage beauty with an LED track lighting fixture for less than $50, similar to this one from Amazon: Modern LED Track Lighting Kit. What a dramatic change right?
The key to updating lighting is to find something with a similar base to the existing fixture. That tends to be easy to swap out yourself. Anything else, like installing recessed lights, may require hiring an electrician.
Pendant lights can be swapped out too, if you have them. Here are a few of my favorite affordable and modern pendant lights from Amazon. Each is around $50 or less:
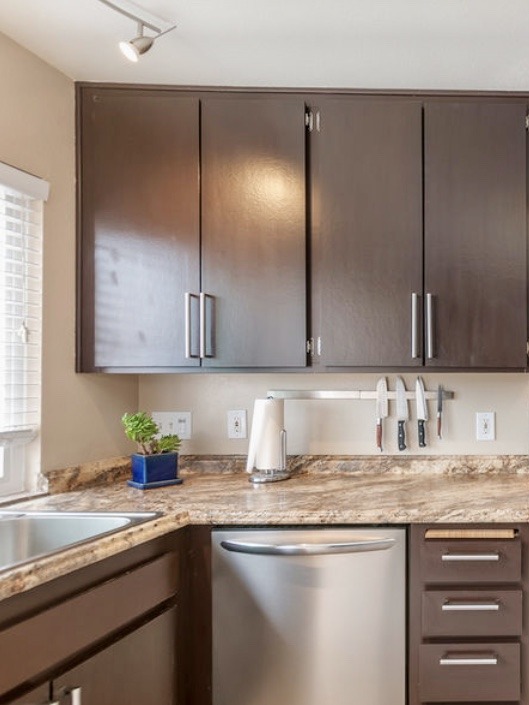
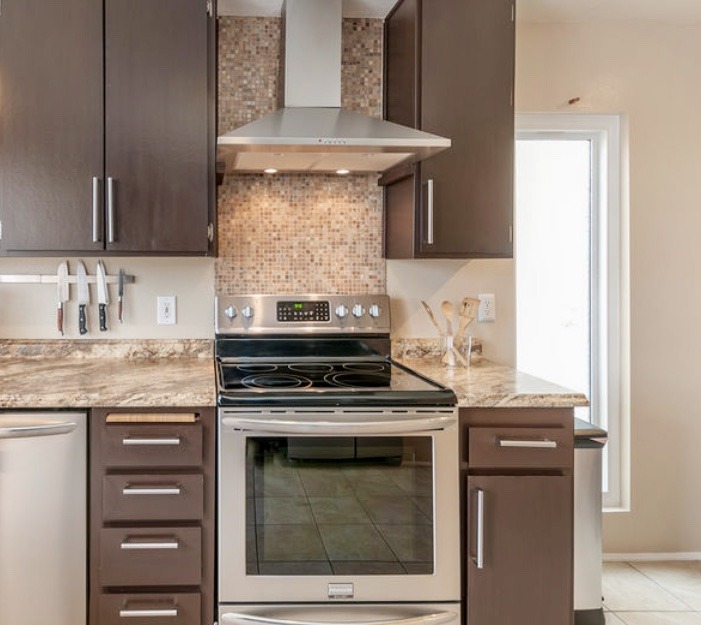
Update backsplash
Add or replace tile backsplash
Oh backsplash, how do I love thee? A lot of older homes don’t have any backsplash at all, so adding one is pretty easy, and you can DIY if you keep it to a simple tile pattern or mosaic.
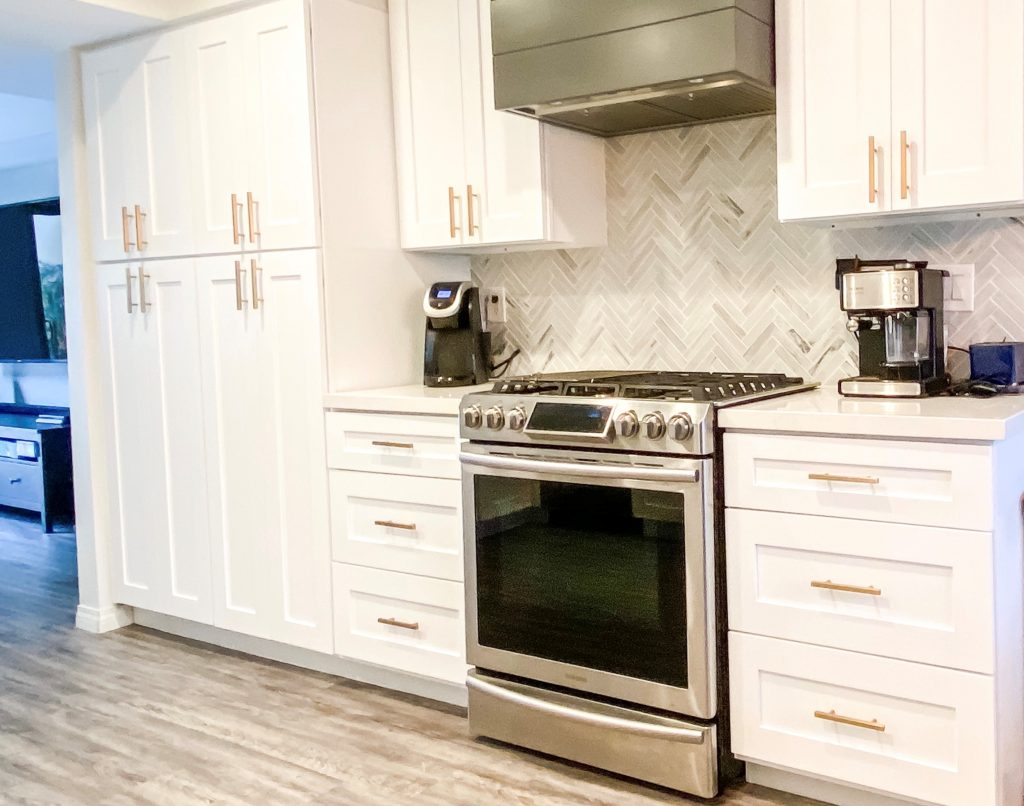
For our kitchen makeover below, we ripped out the cabinet and small hood above the stove, and replaced it with a modern vent hood. Then, we put up a mosaic tile backsplash ourselves, all the way to the ceiling.
This DIY backsplash project was really easy, we didn’t even use a tile saw since the tiles were very small. I suggest sticking with a mosaic or an easy pattern if it’s your first time, something like a herringbone pattern can be tricky to do yourself. Our new backsplash created a nice focal point for our cheap kitchen makeover and was less than $200.
DIY backsplash taken all the way to the ceiling
Reface backsplash
Another even easier way to add a backsplash is to use peel and stick backsplash. This is basically like a sticker that you can put up over existing tile or your wall. No grout or mortar needed!
Here are a few modern and contemporary peel and stick backsplash options to inspire you. These may seem expensive, but if you do it yourself, vs hiring a tile installer, it ends up being less expensive (and much faster).
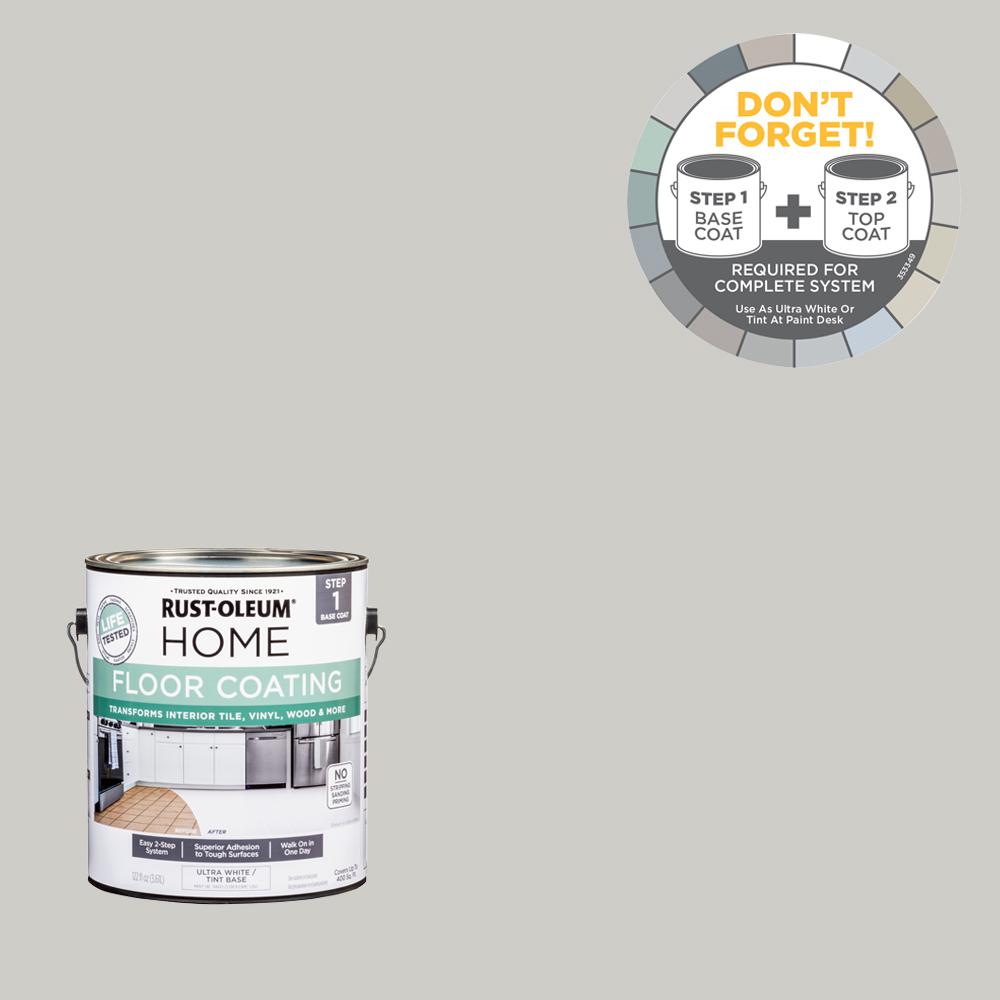
A final option is to use tile paint to actually paint the existing tile backsplash. This takes a little more skill but can pay off big time in terms of savings.
Update appliances for your kitchen makeover
OK, so this one’s not “cheap” if you want to replace all your appliances with top of the line, super fancy appliances. But, updated appliances can completely transform a kitchen without doing anything else.
New appliances can completely change a kitchen
Replace appliances
A decent set of a refrigerator, dishwasher and range can run you around $2500-$4000 if you buy on sale (most big box stores put appliances on sale at almost every major holiday). This is way less than a full remodel of your kitchen (which could be $15k – $45k).
A lot of places like Lowes and Home Depot have financing deals at 0% interest (if you have good credit) for a year or more. Financing is a good option so you don’t have to take a bunch of cash out of your pocket all up front, you can pay it off over time.
Reface appliances
OK, so this one is super thrifty, but there is actually stainless steel appliances stickers. $10 on Amazon, and with over 1300 reviews with 4 stars, it can’t hurt to try?
Wrap up of cheap kitchen makeover ideas
Sharing is caring! If you like this post, please share…
Ok, that was fast and furious but now you have the best cheap kitchen makeover ideas to reface and replace your kitchen while taking it easy on your bank account. We covered everything from walls, to cabinets, and countertops. Then we gave ideas to refresh lighting, backsplash, and appliances.
These ideas will give you the most bang for your buck if you are trying to go from dated, neglected, kitchen, to a contemporary heart of your home. If you need help on the design side, for picking out finishes and colors, check out my post: How to Design a Room (for Beginners).
Which idea do you think would make the biggest difference in your home? Leave a comment below, I’d love to know.
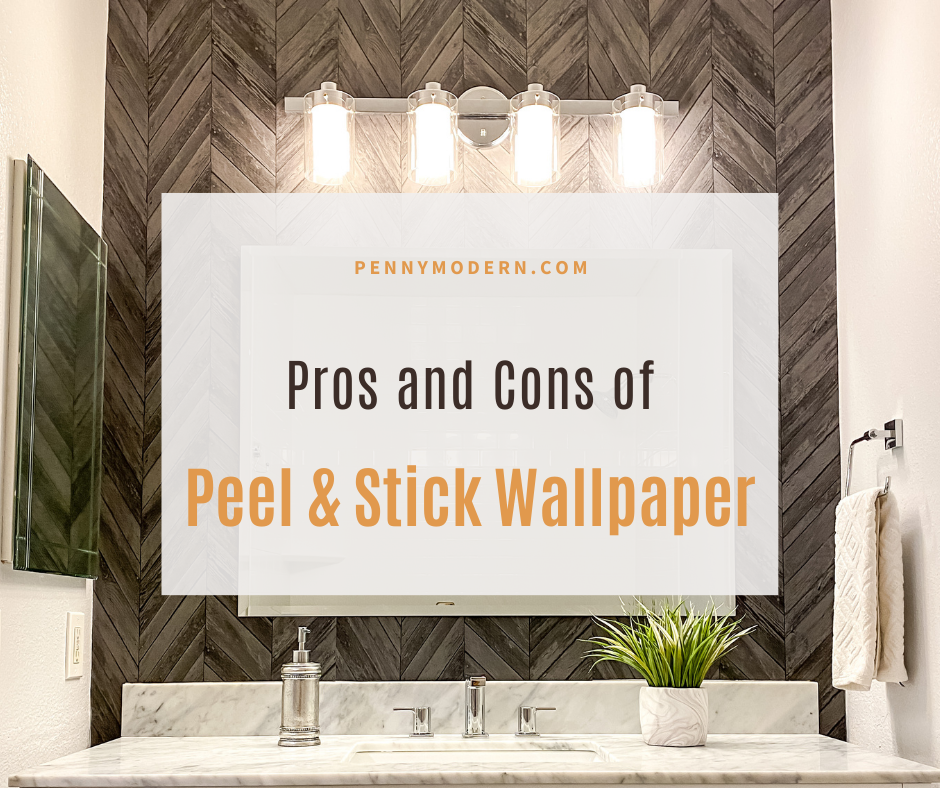
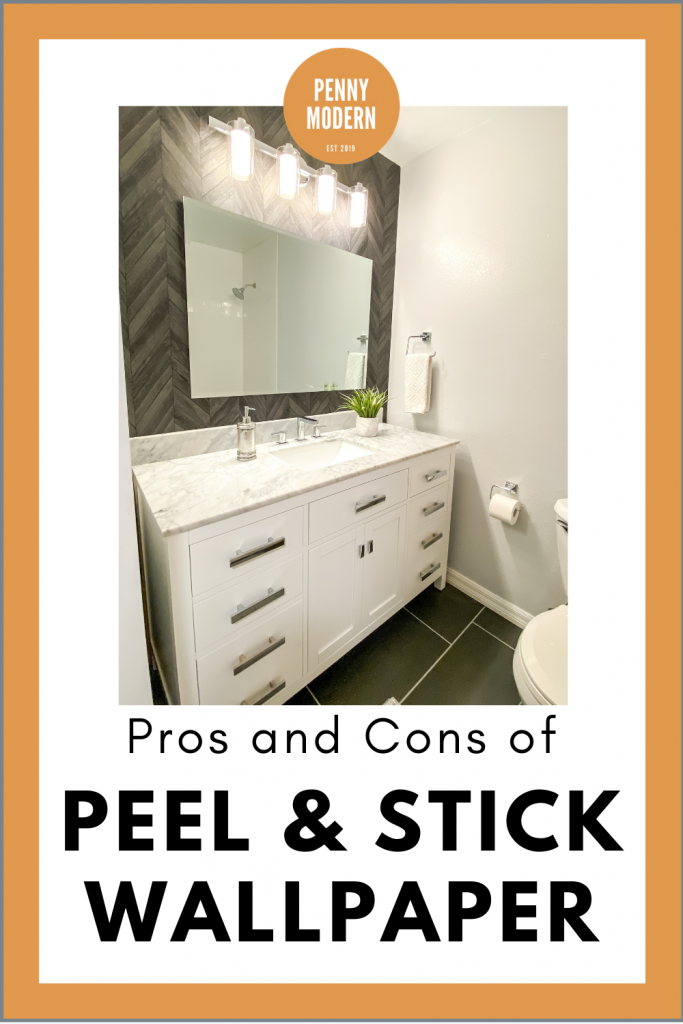
Want to make your room look on-trend and impress your friends and family when they come over for your next dinner party?
Want to try some of those cute, modern wallpapers but don’t want the commitment if the design goes out of style in a few years?
Well there is a simple answer for you:
Peel and Stick Wallpaper.
This week I’m going to give you all the pros and cons of peel and stick wallpaper from a regular person (i.e., me) who has actually used it numerous times. Plus you’ll get tips, sources, and a FAQ to answer all your questions.
You will get all the details you need right now, so you don’t have to go hunting and pecking around the internet, and you can spruce up your space and feel proud of your DIY abilities.
Save to Pinterest if you don’t have time to read now…
By the end of this post, you will know:
All the good, and the bad about peel and stick wallpaper when it comes to purchasing, prepping, application, durability, and removal.
All my pro tips for doing it yourself plus the BEST Youtube Tutorial I have found to date.
A BUNCH of sources and curated picks to easily buy the perfect wallpaper for your project.
FAQ to clear up any burning questions you may have
After reading this, I know you will be able to get started making your home even more beautiful and reflective of your awesome personality.
Let’s get started peeling back the layers here…
Disclosure: This post contains affiliate links. As an Amazon Associate I earn from qualifying purchases, at NO extra cost to you.
Huge selectionof designs – some really trendy, but also super traditional patterns out there, especially online. You should have no problem finding something to go with your modern decor, no matter what color scheme you have.
Online Sources that can deliver straight to your door include Amazon, Home Depot, Lowes, Wayfair, Wal Mart, RoomMates, and Etsy. Here are a few of my favorite modern designs from Amazon and Home Depot:
Transform Trellis Silver/White Vinyl Peelable Roll (from Home Depot, around $40). I’m a huge fan of all things trellis and think this will give your room a more stately feel. I personally have used this brand so can attest it’s great quality.
RoomMates Gold and White Striped Hexagon (from Amazon). This one is just so sophisticated in glam gold. I could see it in a foyer or as an accent wall for an entryway. Again, I’ve personally used the RoomMates brand and can tell you it’s super easy to apply and very good quality.
Unique patterns can be pricey, especially if you are doing a large area or an entire room. I have seen really, really cute patterns on Etsy for over $100 for 1 roll. It would be expensive for a whole room, but not terrible just for a small accent wall.
Hard to find cute patterns in stores. Brick-and-mortar stores don’t carry that big of a selection yet so your best bet is to shop online.
Pro Tip: Read the fine print & make sure whatever you buy online is returnable, if you don’t like it once it arrives. It can look different than the pic.
I bought a roll of a really cool hexagon pattern from Home Depot. It looked great online, but when I received it, there was a shininess to it that I didn’t expect. Thanks to Home Depot’s awesome return policy, I returned it to my local store.
Home Depot is a great source of wallpaper since you can return it if you don’t like it.
Prepping for Application
Pros
Really isn’t much prep needed if your wall is already painted. Maybe just wipe off any dust or hair from the walls.
Cons
Most manufacturers recommend to paint the wall at least 2 weeks before applying peel and stick wallpaper to it. This is to avoid damaging your walls when you remove it. I applied mine in our entryway closet (below), just 1 day after painting, so will update this post if that was a terrible idea – so far so good.
Applying Peel and Stick Wallpaper
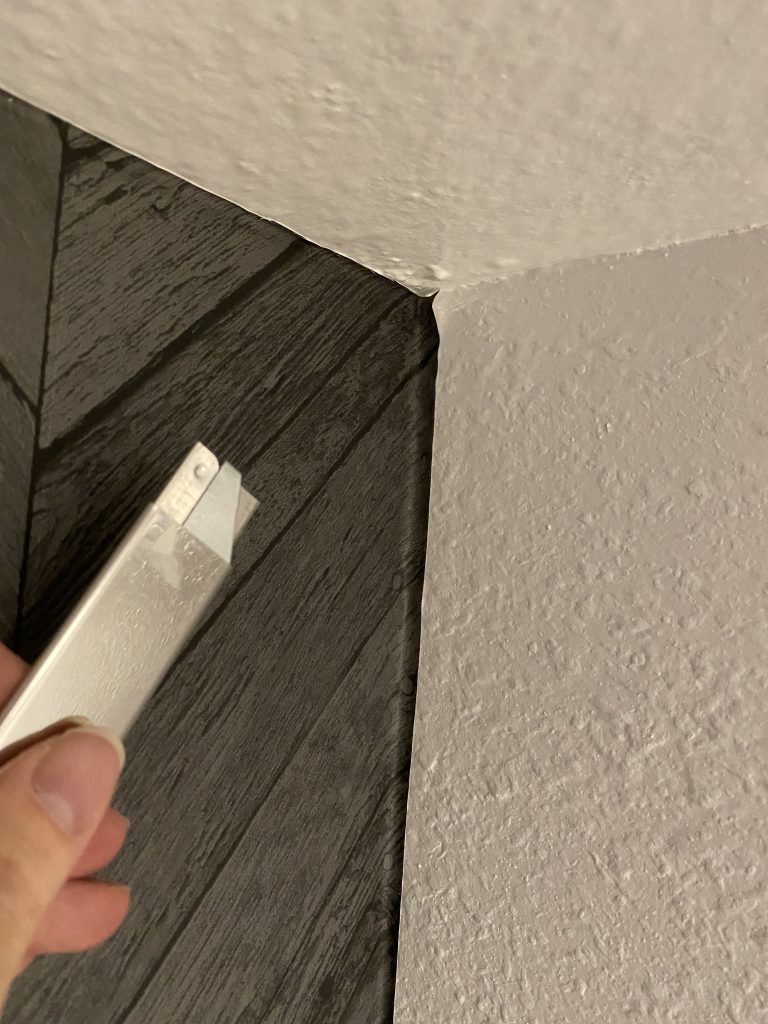
Pro Tip: apply a little extra in the corners/or top edge and cut off excess to make your edges perfect.
Pros
Super easy to apply. You simply peel off the backing, stick it on the wall, then smooth out the air bubbles. See my pro tip above for corners and top edges.
The best peel and stick wallpaper tutorial I found online, which I actually used myself, was from Young House Love, they made a great Youtube video tutorial too:
No wet mess or paste like traditional wallpaper where you have to mix up paste and let it dry, etc.
Can remove and reposition it when applying. This is a huge benefit if you mess up the pattern, you can just peel it off and try again.
You can apply peel and stick wallpaper to lots of things – walls, on furniture, or closets. It’s just like contact paper so you can even use it inside drawers.
Doesn’t require many tools to install removable wallpaper. You probably already have most of the tools…
Only a few tools needed for applying peel and stick wallpaper
Tools needed for applying peel and stick wallpaper:
Boxcutter or utility knife
Plastic putty knife for smoothing
Level or yardstick
Tape measure
Scissors
It’s super easy to cut wallpaper around lights or other wall features. Remove your vanity light or sconce first and just cut a hole with a boxcutter.
Cons
Most manufacturers don’t recommend applying to really bumpy walls with a lot of texture (like that orange peel texture). I went ahead and applied it in our bathroom (below) that has orange peel texture, and it seems to be just fine. I’ll update this post later if it falls off the wall.
Will maintain it’s color and texture, since it’s made of high quality PVC, for many years.
Easy to maintain – you basically can just wipe it clean with a damp cloth or maybe a Magic Eraser.
Won’t ruin walls – this is a great feature, even if you leave it stuck for a long time. It’s just like contact paper, and if you peel it off slowly, won’t damage the drywall underneath.
Manufacturers claim you can re-use it again and again. Peel it off the wall, and find somewhere else to apply it (bookshelf, drawer, or another wall even).
Cons:
Most peel and stick wallpaper is made of high quality vinyl. This is PVC, or plastic, and since it’s a man made materials, some people believe PVC may be environmentally unfriendly. I would argue some people believe paints and stains are environmentally unfriendly as well since they are also made from chemicals.
Probably best to keep away from heat since it is made of plastic. So don’t put near or on your fireplace or behind the stove (check the specifications).
Just peels right off – This is one of the biggest pros. If you get sick of it, or you are renting and need to move, you’re all set. If you have ever removed traditional wallpaper you know how tedious this is, and will want to avoid having to do that at all costs.
Cons
It’s recommended to remove it slowly, and avoid ripping it off so you don’t damage the paint or walls.
Probably will rip some of the panels during removal, so might be difficult to re-use.
FAQ on Peel and Stick Wallpaper
Does peel and stick wallpaper ruin walls?
I have removed some of the panels and can tell you that this wallpaper will not damage your walls. I do recommend peeling it off slowly.
Does peel and stick wallpaper work?
Peel and stick wallpaper is definitely sticky, and works well on walls. It’s made of PVC so will maintain it’s color over time, and is extremely durable. Mine has not fallen off and it’s been over 6 months.
Can you use peel and stick wallpaper in an apartment?
Yes, it’s perfect for any type of rental or apartment since it’s super easy to remove when you move out!
Can you use peel and stick wallpaper in a bathroom?
Yes, since peel and stick wallpaper is made of plastic or synthetic materials, it’s not going to get moldy, but check the manufacturer’s specifications. Just make sure it is adhered properly to the walls.
Is peel and stick wallpaper waterproof?
It is not waterproof, but is somewhat water resistant. It should not be applied inside a shower or bathtub. But it could be applied on bathroom walls that might get steamy.
Conclusion
If you liked this post, please share to Pinterest.
Overall, my view is the pros definitely outweigh the cons. The fact it’s easily removable is the biggest pro, and that it’s so easy to apply. The biggest con is that some of the super trendy patterns can be expensive if you have to apply to a whole room (just applying to an accent wall would fix that).
Why not give peel and stick wallpaper a try to create a focal wall for your room? It will help elevate your design and add sophistication, texture, or visual interest to your room, for not a lot of money.
For more ideas on how to use peel and stick wallpaper in your home, check out my posts where I show how I used it around our home:
Do you want to embrace the fall season, but don’t want to shell out major bucks to make your home look like an Instagram post?
Well, you came to the right place. I’m of the firm belief you can decorate your home for major holidays, without spending your entire paycheck to do so. I’ve had years of experience on how to find the best ways to decorate for every season on a teeny tiny budget.
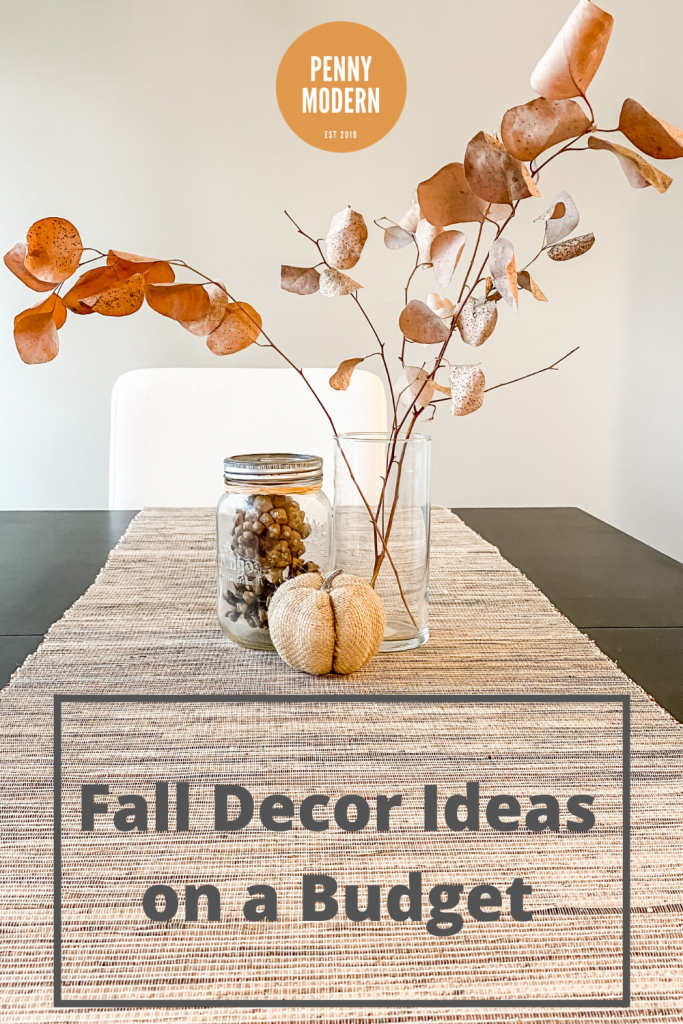
This post will give you 5 easy fall decor ideas on a shoestring budget. I’ll show you how to make your home look “fall” without looking cheap.
We’ll cover everything from using “found” materials to raiding Dollar Tree, to using things you already have around the house. Also, I’ll give you fall decor ideas for everything from centerpieces, to doors, and finally window decor.
Let’s get crackin’…
Sharing is caring. Save to Pinterest for later…
Disclosure: This post contains affiliate links. As an Amazon Associate I earn from qualifying purchases, at NO extra cost to you.
Use found materials for fall decor
So what are “found” materials?
Found materials are natural materials that you find outside and use in your home decor. It may be in your yard, or a family member’s property, or a local natural area. I’m just talking about snapping a branch or two from a tree, gathering up some nice smooth stones, or finding pine cones on the ground, NOT stealing someone’s prize-winning roses!
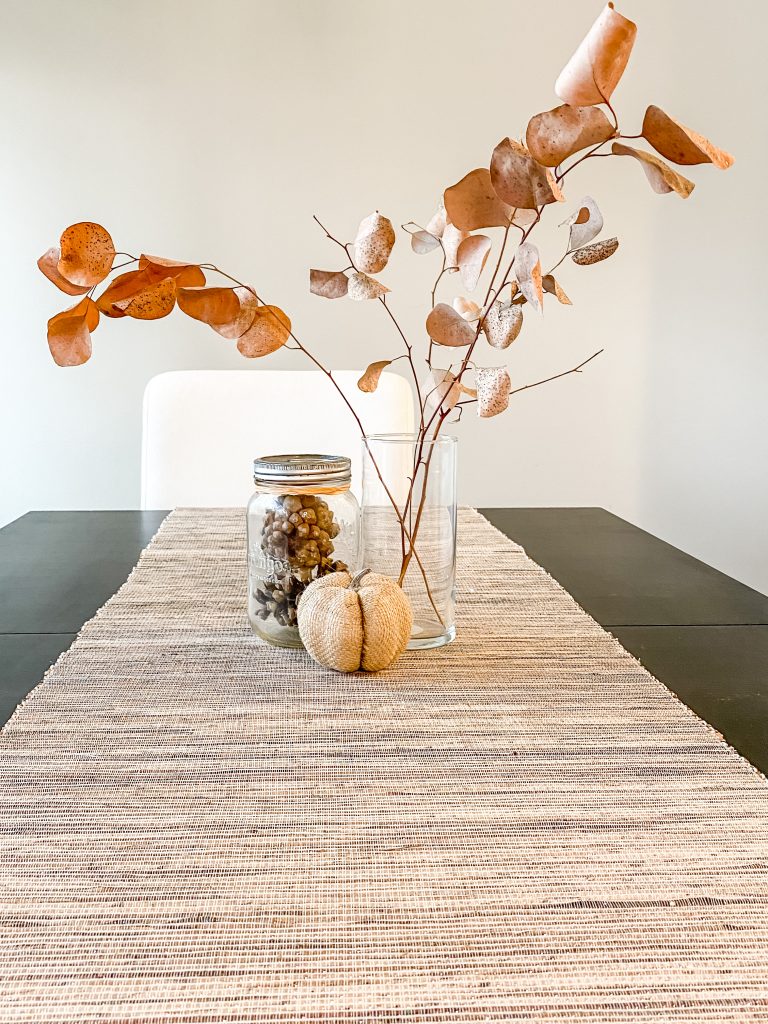
OK now that that’s out of the way, this fall centerpiece cost me $2. Seriously.
This is more of a minimalist look but I think it does the job for fall and it looks elegant and cheerful.
I went outside on a walk with my toddler, and found a few dried eucalyptus stems, and some pine cones in the neighborhood I live. You could use some small tree branches with red or orange leaves instead.
Then, we went to Dollar Tree for the little pumpkin and clear glass vase.
Raid Dollar Tree for fall decor
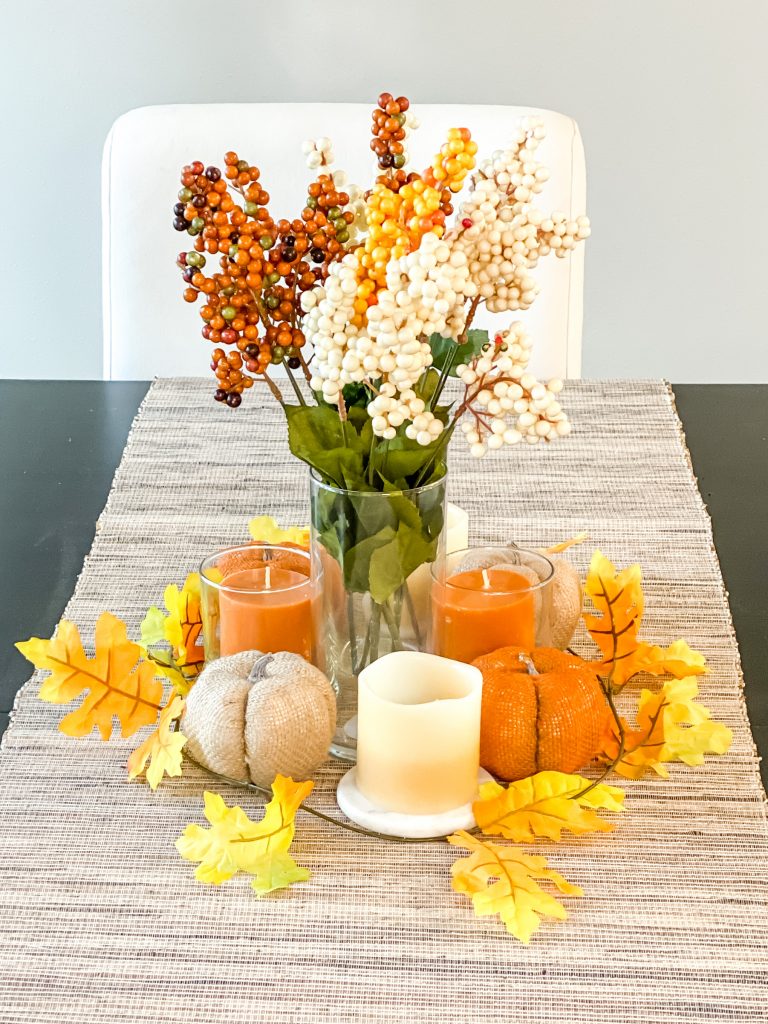
Ok, so I thought this was a little more cheerful, and it’s pretty much 100% from Dollar Tree.
I got the berries, clear glass stems, candles, candle holders, vase, and pumpkins, along with the leaf garland from my local Dollar Tree. This cost me about $15.
Mix it up when it comes to fall decor
I like this because I used a couple of things I had around the house – the tall vase and mason jar.
Then I mixed it with some of my Dollar Tree finds: the berries, pumpkin, and candles.
To add some natural elements, I mixed in the pine cones and some stems from some bushes outside my house.
Don’t be afraid to mix it up – use stuff you have, with things you bought or find around the house.
Dress your front door
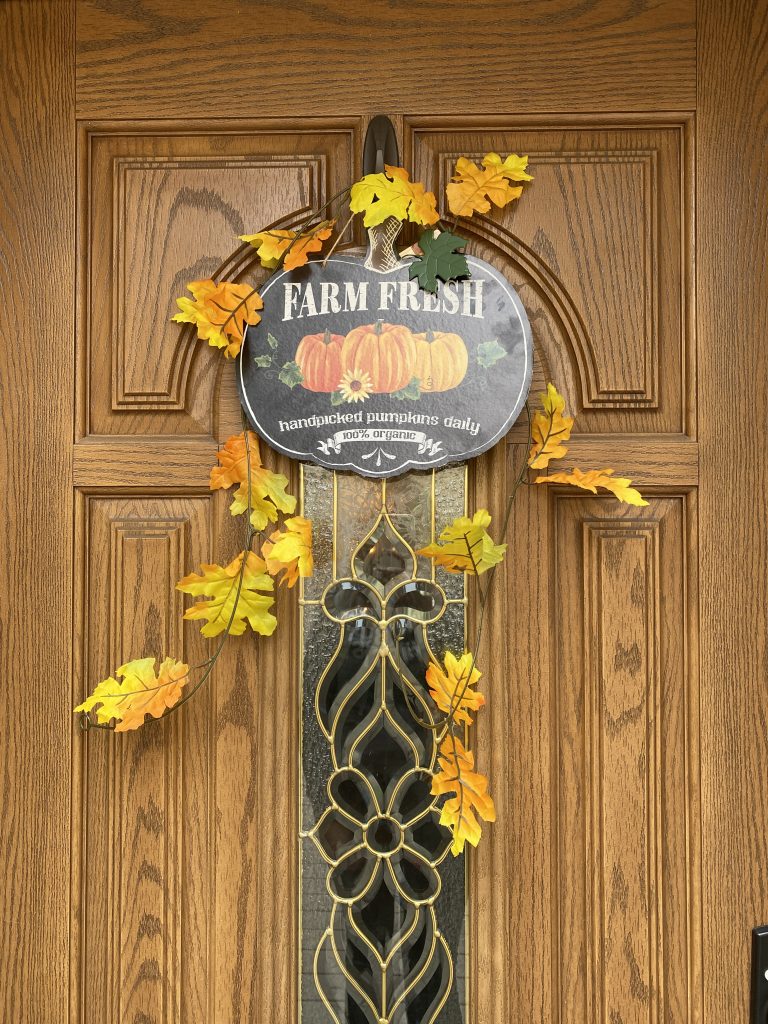
This one was pretty easy.
I already had a Command Hook (Amazon) on the front door, which I leave up year round.
Then added my leaf garland from Dollar Tree. Finally I added a cute “Farm Fresh Pumpkins” sign, also from Dollar Tree. Total cost: $2.
Make your windows wonderful
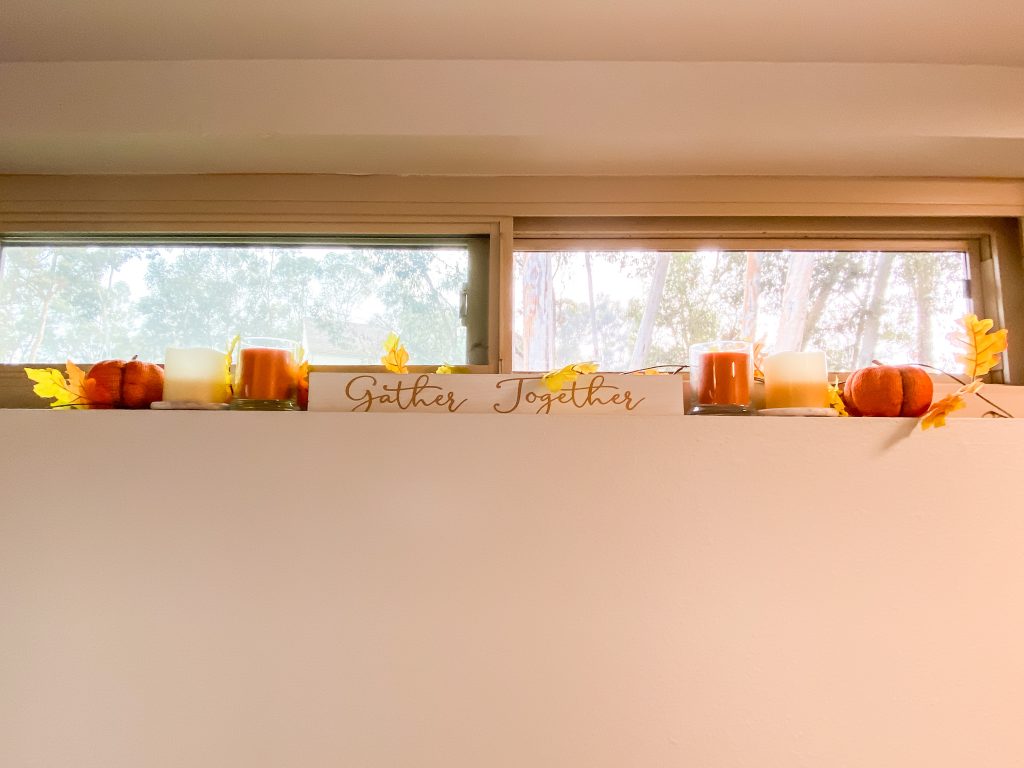
So I have this little window right at my front entrance (which is basically a hallway). It’s the first thing you see when you walk in, so I wanted it to look cheerful and welcoming, while still being understated.
The “Gather Together” sign was $6 from Big Lots. Total cost: $13.
Wrap up
If you like this post, I’d love it if you share it on Pinterest!
Well that about wraps up today. We covered sources for fall decorations: Dollar Tree, Big Lots, Amazon, along with natural areas around your home. Then I showed you how you can mix what you already have with some inexpensive seasonal stuff. Finally we covered centerpieces, doors, and windows, so you can decorate nearly every area of you house.
Ok, so it’s almost fall ya’ll! Who else is ready for this year to be over?
Do you need some fall decor ideas for your home to celebrate the changing of the season, but don’t want scarecrows and haybales clashing with your chic modern decor?
I was in the same boat, so did an extensive search for affordable yet elegant fall decor ideas to get my transitional/contemporary home ready for the season of pumpkin spice lattes! I wanted to share what I found, so YOU don’t have to spend your precious time sifting through product listings to find something that will go with your modern decor.
This post will give you 10 awesome ideas for fall decor, along with online shopping links, to make things super easy for you to decorate your modern home for fall. Everything is under $50, with a lot under $20, so they are all easy on your pocketbook too.
Feel free to Pin this to your Pinterest board for later!
Let’s get the ideas flowing for everything you need to celebrate fall in your neck of the woods.
Disclosure: This post contains affiliate links. As an Amazon Associate I earn from qualifying purchases, at NO extra cost to you.
Fall Decor Ideas Under $50:
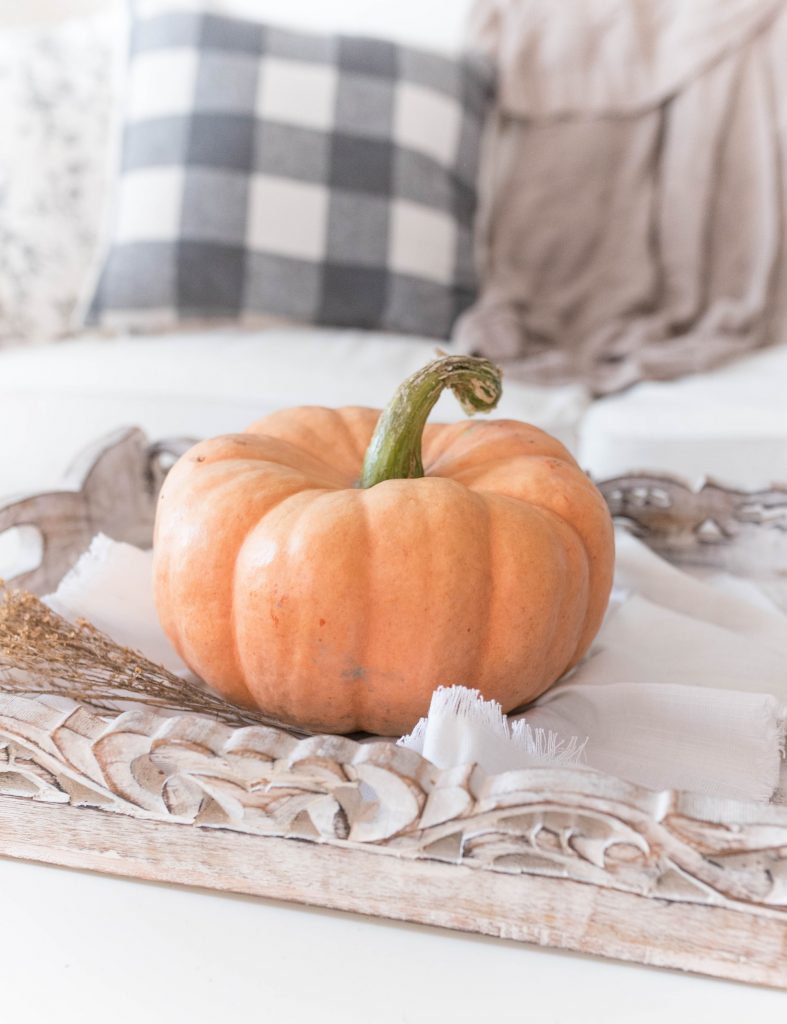
Me and my little guy picking out our pumpkin last year…
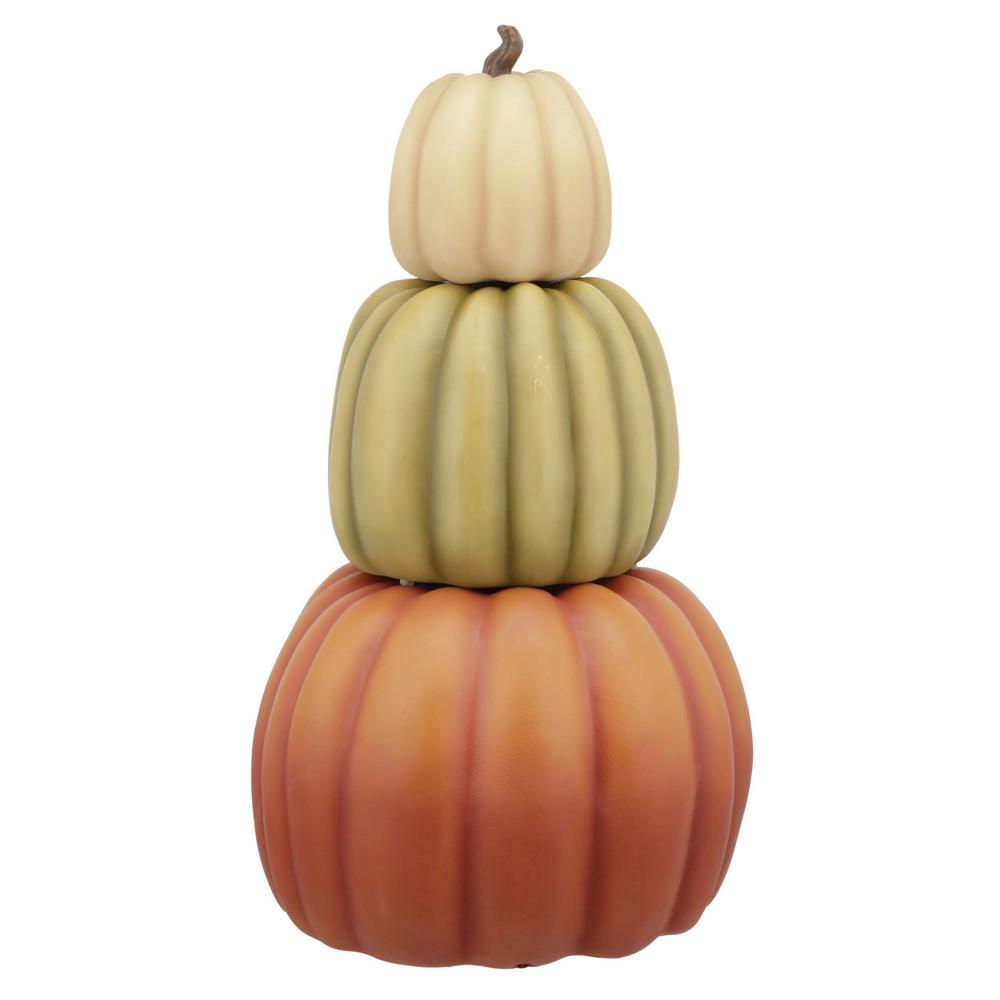
Ok, so nothing says fall more than pumpkins, so I had to include some here. I love the below stacked pumpkins from Home Depot. I think they are simple, but stand out, and shout “fall is here” without being TOO in your face. They come in two color options: a cream, green, and orange set (pictured), along with an all white set (dreamy).
The below two wreaths are amazing, simple, and elegant. I love the use of just the natural materials, without a lot of embellishment or fuss. Either one would look great on almost any color front door!
I love the orange berries/bittersweet for a bright pop of color for your fall home decor. Again, not a lot of embellishment, and you let the wreath or garland shine through.
This doormat gets you Thanksgiving ready, while being chic and understated. Would look so great if you picked a black and white fall decor scheme with some white pumpkins and something in buffalo check plaid.
Ok, so a solar lantern is something you could have out year-round, but this style of lantern is kind of old timey and could be a little bit Halloween, along with a little bit fall. I think this would be a great add to your “porch-scape” with some pumpkins next to it.
Ok, so I know they are pumpkins, but they are white pumpkins so will basically go with ANY color scheme you have going on. They’re cute and you can literally use them in 20 different ways – outside on the porch, on your dining table, at your entryway area.
So candles are not necessarily just for fall, but these beautiful, thick candles would complement your fall decor, especially when paired with a pretty garland or pumpkins to create a fall vignette.
I don’t know when buffalo check plaid started to equate to fall, but I love it. Buffalo check items are great options that will go with modern home decor, especially if you have grey and white or black and white interior colors anyways. There is buffalo check pillows, but there are table runners, blankets, curtains, rugs, almost anything.
Who doesn’t want their house to smell like fall? What better way to do that than some cute potpurri that is shaped like little pumpkins? These would be so cute in a glass jar or vase, plus they smell amazing!
Sharing is caring – Please pin or share on your social if you like this post!
Well, there you go, 10 super easy and chic fall decor ideas that should go with almost any modern home decor. Not a single haybale or scarecrow in the bunch! I hope you love them and that they help you get ready for the season of color changing leaves, pumpkins, and spice.
Which idea do you want to try to get your home ready for fall? Leave a comment below, I’d love to know.